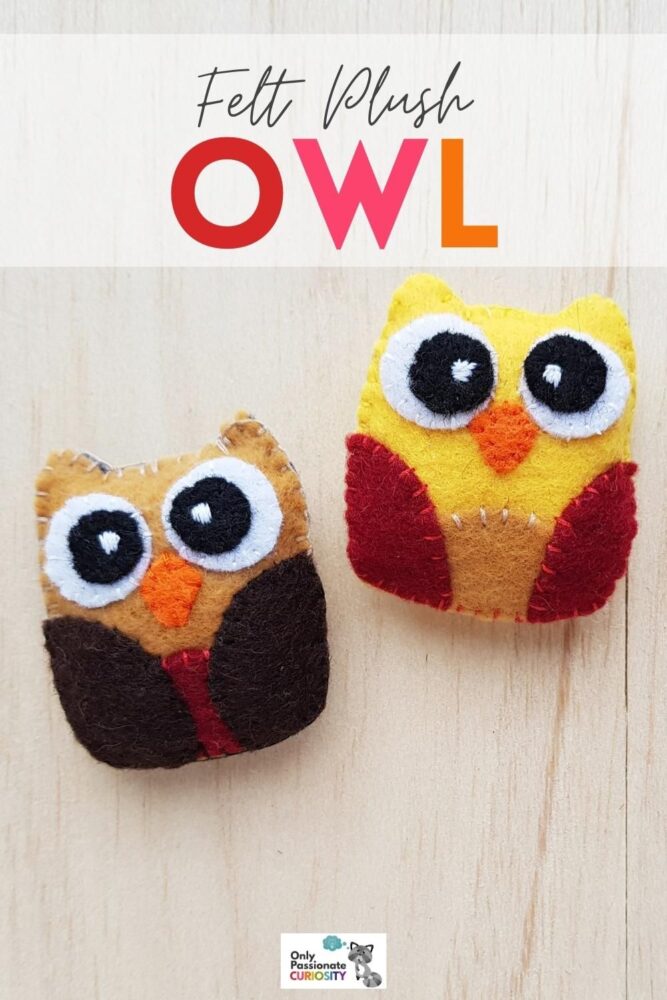
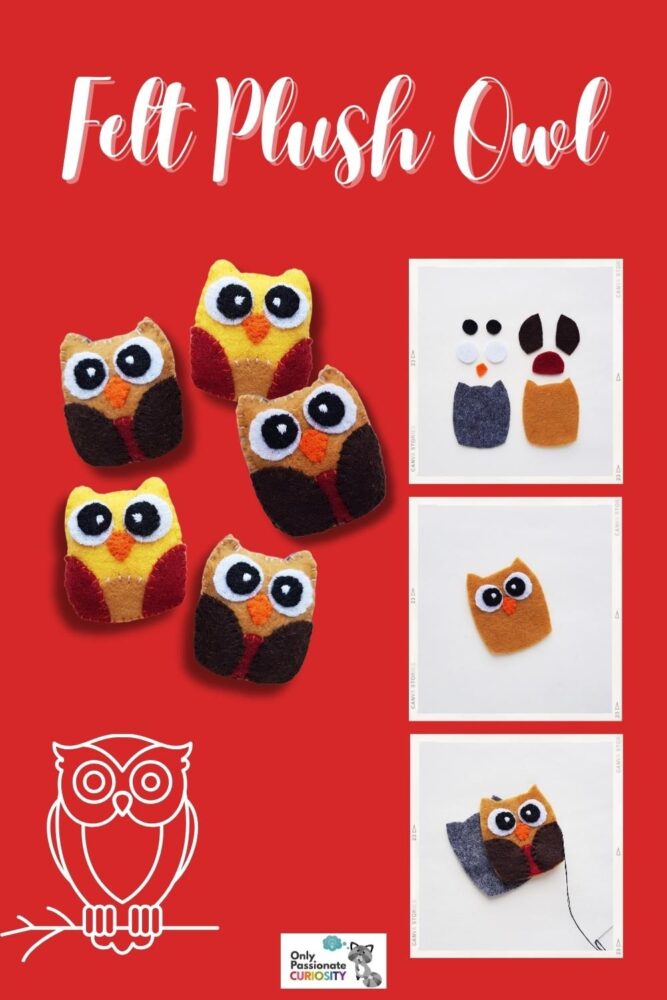
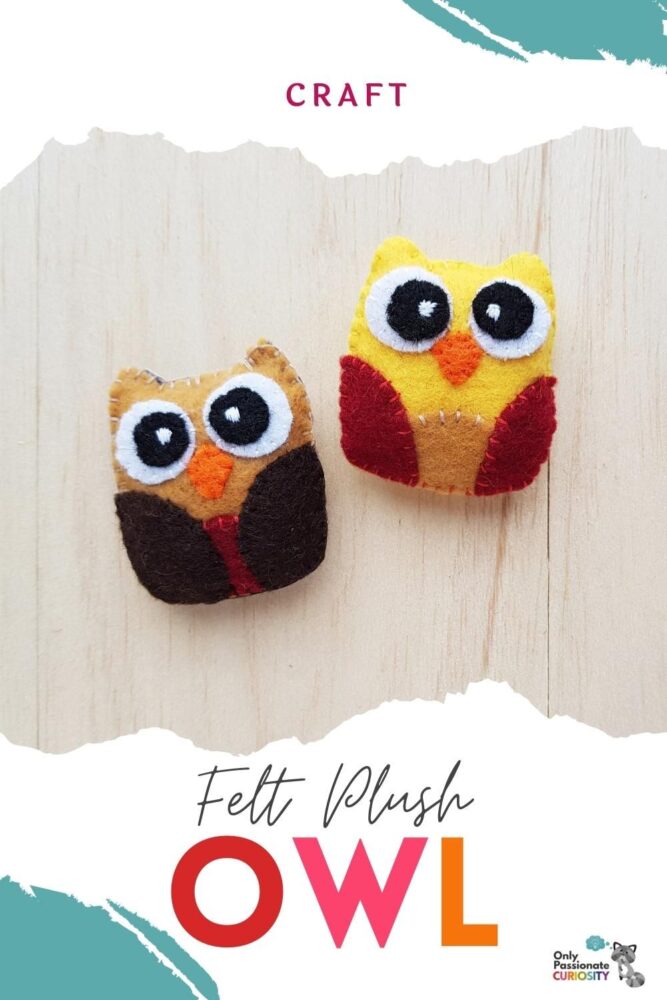
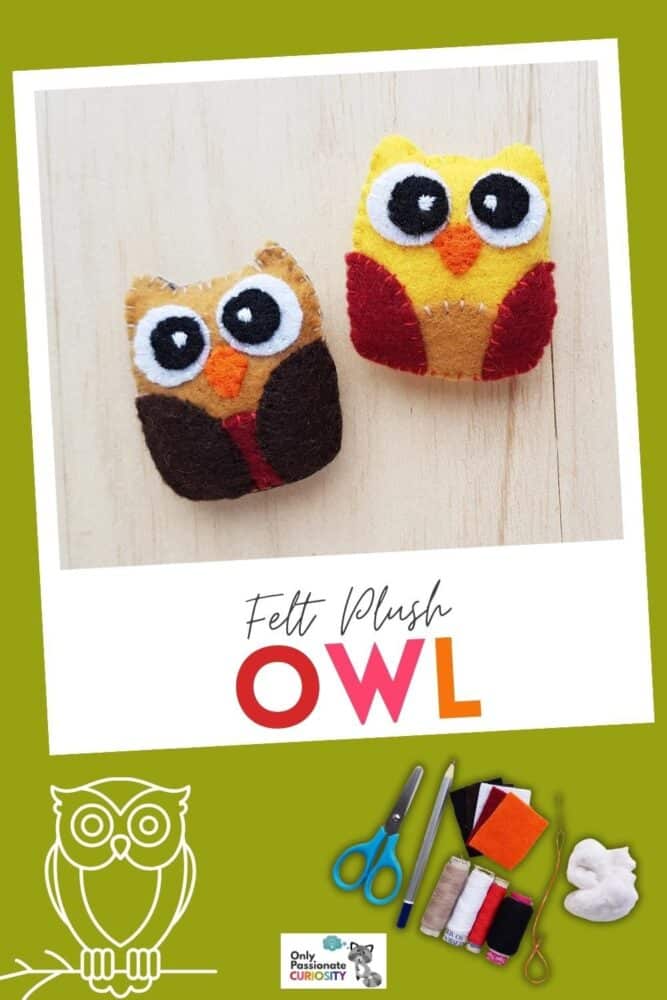
Felt Owl Plush

My dad and I went on a nature walk recently, hiking through a redwood grove. In one of the giant redwood trees, we caught a glimpse of an owl, then realized there were two of them! They were perched in the tree and watching us silently. It was the neatest thing to see, as spotting owls in the wild where we live is a rare treat.
Whether or not you live in a place where seeing owls in nature is a common sight, owls are a neat subject for projects and crafts with kids. This felt owl plush craft is a cute project that will also give your children the opportunity to practice their sewing skills.
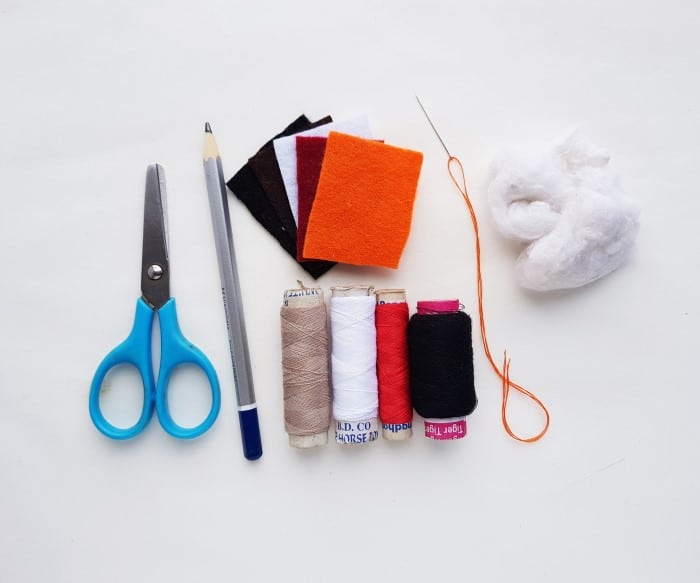
List of Supplies for Felt Owl Plush:
These are a few of the things you’ll need for the project. Some are items you likely have in your home. If not, the links here are for your convenience. They are affiliate links, and your purchase of any of these products helps us continue to produce great content for you.
- Several colors of felt fabric
- Cotton
- Needle and thread, preferably in several colors
- Pencil
- Scissors
- Owl Template
Instructions for the Owl Plush:
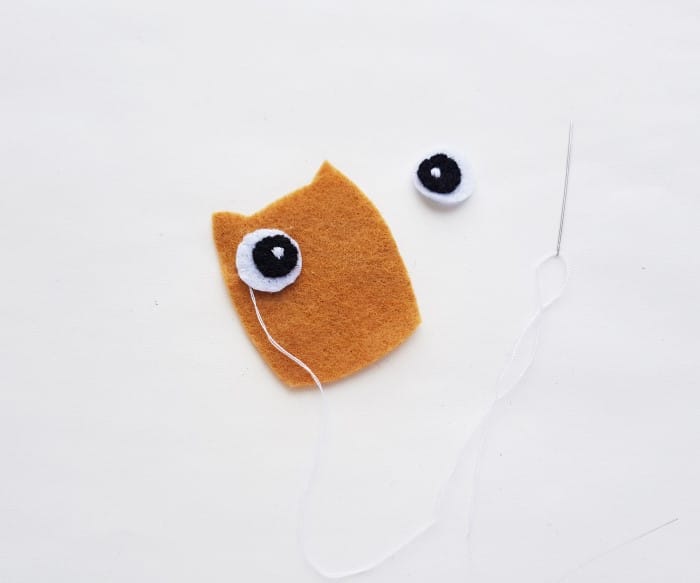
Step 1:
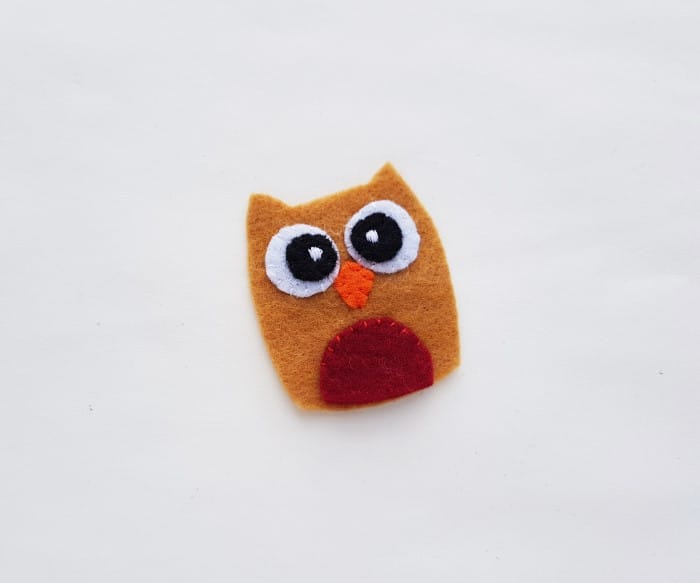
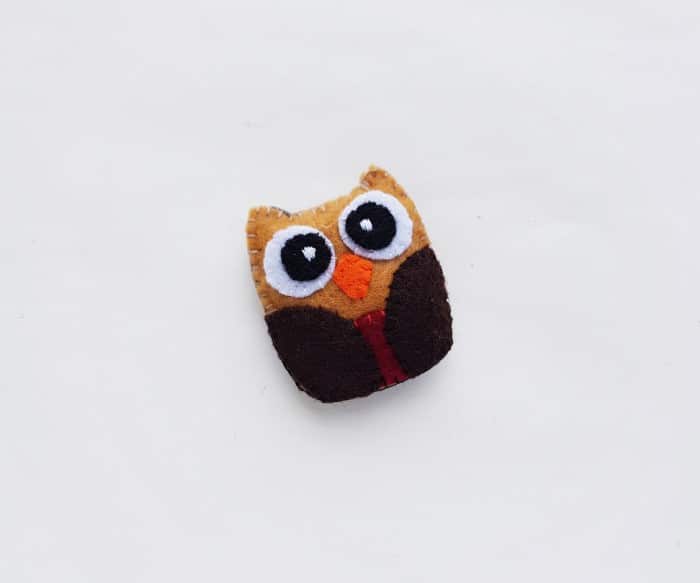
Select 3 different colors of felt fabric for the owl pattern. You will also need black and white felt for the eyes and orange felt for the beak. Trace the patterns on the felt pieces you have selected and then cut them out nicely.

Step 2:
Take the eye cutouts (1 small, round, black piece of felt and 1 relatively big, round, white piece of felt) Stitch the black piece on top of the white piece by stitching a small white dot pattern. Stitch the other eye in the same manner. Place the eyes on the top of the owl body base and stitch the white piece to the base piece.
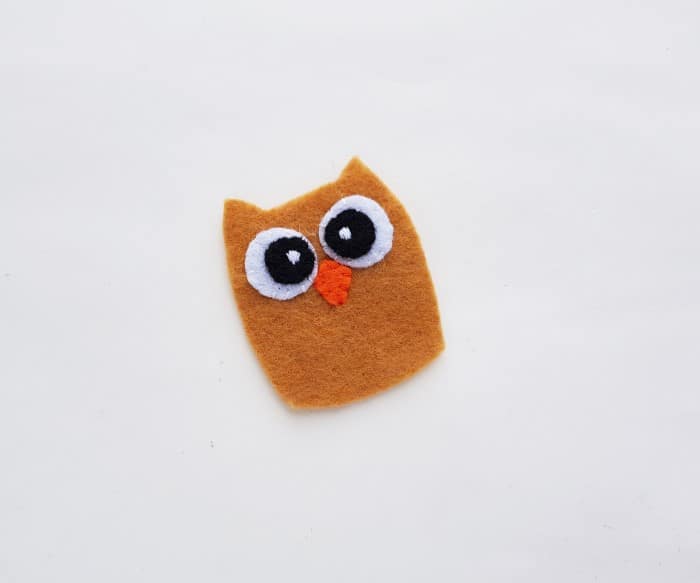
Step 3:
Stitch around the side of the white felt of the eyes to join them with the owl base piece. Stitch the orange triangle (beak) between and below the two eyes.
Step 4:
Now you’ll want to take the half-circle piece and stitch it with the straight base along the bottom side of the owl. Make sure you align the straight ends of both pieces nicely before stitching.
Step 5:
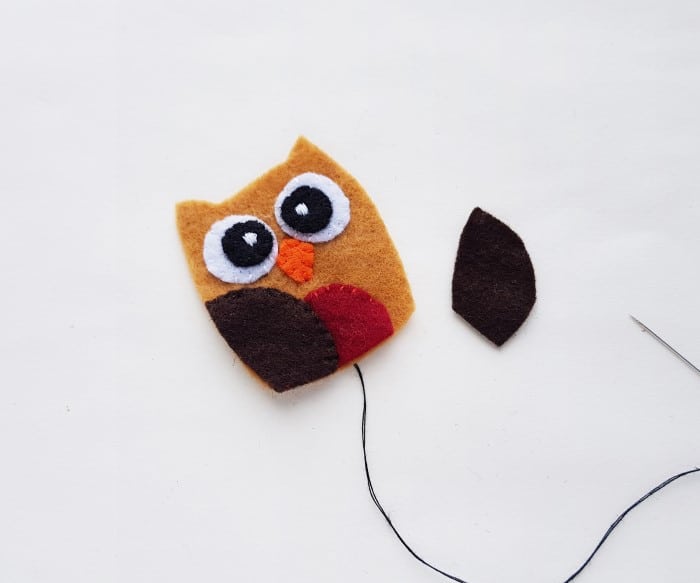
Now take either one of the semi-circular pieces. These are the wings for your owl plush. You’ll want to stitch it with the base on both sides.
Step 6:
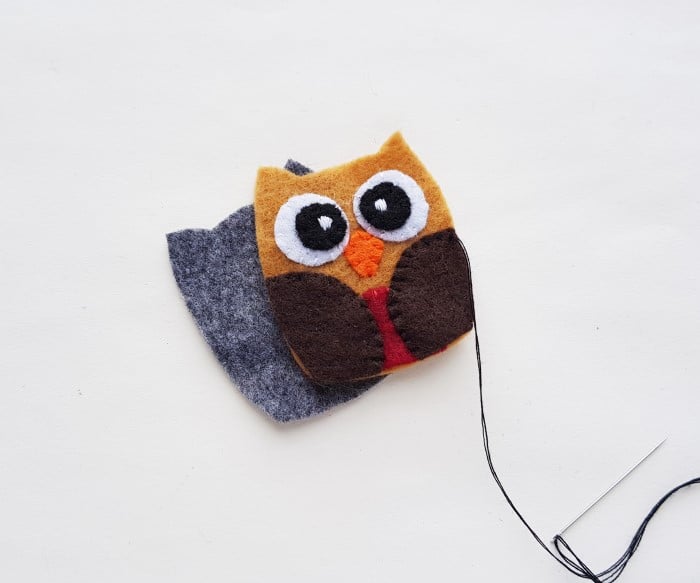
Make sure to keep the curved edge of the wing patterns towards the inner side of the base. Place the plain body base on the back side of the stitched body base. Prepare your needle and thread to stitch both bases together.
Step 7:
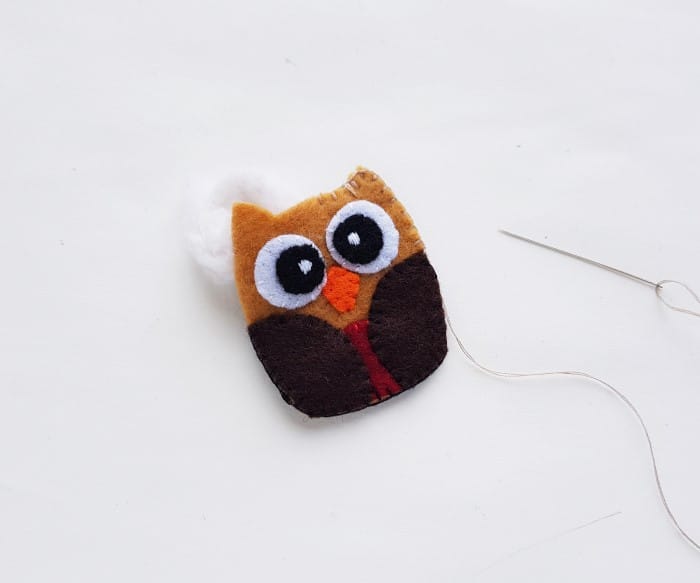
Keep a small opening for stuffing the felt owl. Use cotton or scrap felt to stuff the owl plush.
Step 8:
Once you are done stuffing the owl plush, you can close the small opening to secure the stuffing. Then tie a knot and cut off the extra thread when done.
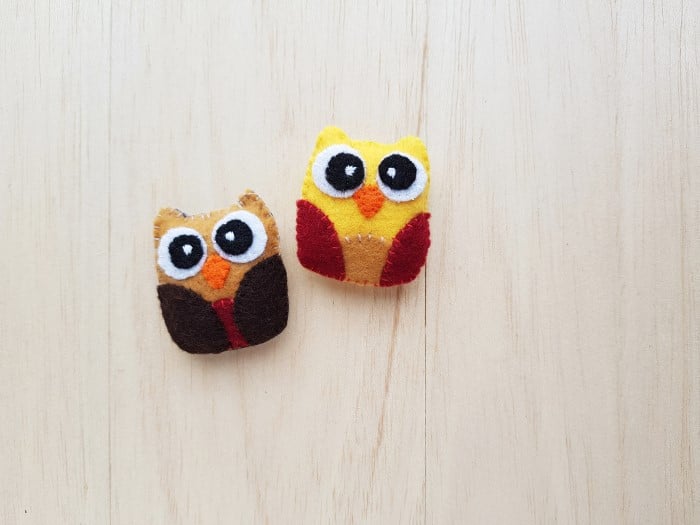
There you have it! Your cute felt owl plush is perfect for a splash of fall décor. You can make several as a project with your kids, to hang around your homeschool classroom.
Suggested Projects and Activities
Also if you’re teaching your kids about owls or doing an owl mini-unit study, we have several other cute owl craft projects you can check out!
- This owl papercraft puppet is the perfect craft for kids looking for something to do that involves creativity and fun! The post also includes eight interesting facts about owls, to expand your craft time into a teachable moment.
- For your “wise little owls” who love to read, here are easy-to-make paper owl bookmarks.
- These adorable pinecone owls are perfect to make just for fun or to use as fall decorations!
- The Caldecott Award winning book, Owl Moon, by Jane Yolen and illustrated by John Schoenherr, is a terrific book to read with your child. These Owl Moon-inspired printables go along with the book!
- And although we don’t have a specific owl recipe, these angry bird-themed Oreo cookies are a cute edible project to do with your kids.