Clay Forest Layer Craft


This clay forest layer craft provides a terrific way for kids to learn more about nature and the forest with a hands-on project that doesn’t require you to go outdoors.
I know, I know … outdoor homeschooling can be a lot of fun, and your kids can learn so much through an actual walk in the woods, with a nature journal or scavenger hunt. But sometimes the weather doesn’t allow you to be out and about, and that’s when an in-house project like this clay forest layer craft comes in handy.

Why Make a Clay Forest?
Learning about the layers of the forest becomes so much more real when kids can build them with their own hands. A clay craft turns what could be a flat page in a textbook into a colorful, three-dimensional world full of texture and imagination. Instead of just memorizing “emergent layer, canopy, understory, forest floor,” your child gets to sculpt each one—rolling vines, shaping tiny trees, maybe even hiding a clay critter. It’s hands-on science meets art class, which means the lesson sticks (and it’s a lot more fun than flashcards).
There’s also something wonderful about the quiet focus that comes with clay projects. As your kids pinch and smooth the layers into place, they’re building fine motor skills, observing patterns in nature, and connecting with the bigger story of how ecosystems work together. By the time their forest scene is finished, they’ve not only learned about the structure of a rainforest—they’ve created one right at your kitchen table.
Don’t forget to download our free homeschool field guide, Wanderings, for the month of October! You can find it on our home page. Inside the 200+ page edition of Wanderings, you’ll find free unit studies, hands-on science, crafts, recipes, and joyful learning rooted in the beautiful gifts autumn nature provides.

You’ll also find hands-on STEM activities designed to spark curiosity, light up young imaginations, and turn everyday moments into discoveries worth marveling at. Page 107 connects nicely with this clay forest craft.
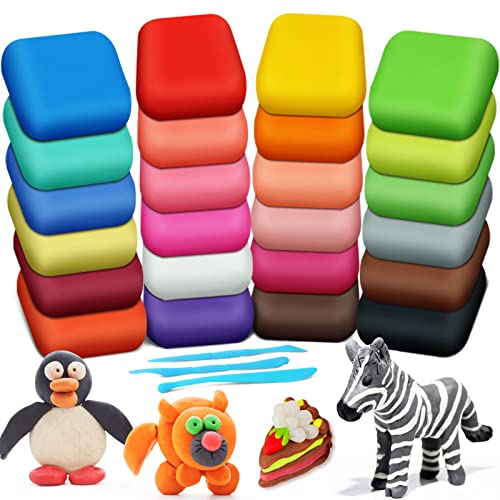
List of Supplies for Clay Forest Craft:
- Air dry clay or foam clay
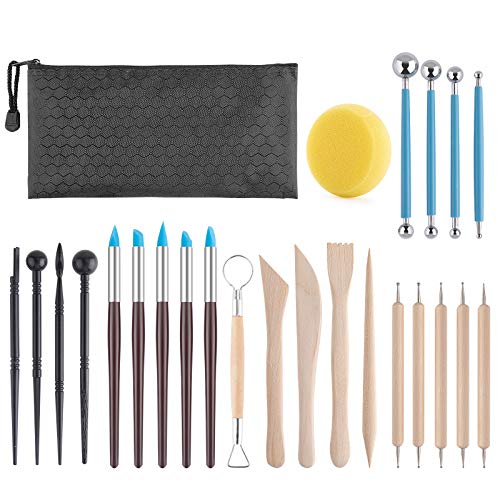
- Clay sculpting tools
- Cardstock paper (for the craft base)

Instructions for The Clay Forest Layer Craft
Accesories

Step 1
First, we are going to make the shrubs. Make some tiny balls using green clay.

Step 2
Now pinch them each on one end to make an oval shape then flatten them by pressing against a smooth hard surface

Step 3
Make a line in the middle of the leaves using a clay knife tool then attach all the leaves together on one end as shown in the image.

Step 4
For the next one, take some clay and make very tiny balls.

Step 5
Roll them out so they look thin and long.

Step 6
Stick them together on one end and keep the other end spread as shown in the image of this step.

Step 7
For the trees, let’s start with a palm tree. The leaves are the same as the first shrub. Make tiny green balls but pinch out both sides, then flatten them. Make small cuts along one side of each leaf and attach together on one end.

Step 8
Take a small amount of brown clay for the trunk of the tree. Roll the clay and make a rope-like shape for the trunk. Attach the clay leaves with the brown rope-like clay to complete the palm tree.

Step 9
Now, take some dark green clay.

Step 10
Now pinch on one end of the ball of clay to give it a teardrop or oval shape; then start flattening it. You can give it some waves on the sides, as shown in the pictures, using your fingertips.

Step 11
Now make some branches with brown clay. Make thick strands or rolls of clay of varying sizes and place it on the green clay you prepared.

Step 12
Again, make some dark green leaves and cut lines on two sides using a clay knife tool.

Step 13
Attach the leaves together, forming a plant shape.

Step 14
Take some green clay and then flatten it to make it look like a cloud or bush.

Step 15
Make the trunk and branches using brown clay and place them on top.

Step 16
Make some more trees and plants using these.

Step 17
Now start placing your plants and trees according to the layer they belong to.
Instructions for The Clay Forest Layer Craft
Forest Layers

Step 1
Now take a piece of rectangular paper which we will use as our base and mark different layers using different colored clay. Start by spreading brown clay on the bottom part of the paper. Fill ¼ of the paper using the brown clay.

Step 2
Next, select a light brown clay and fill 1/3 of the remaining paper, keeping it adjacent to the first brown layer.

Step 3
Use peach or light orange clay for the 3rd layer and blue for the last and 4th layer.

Step 4
Grab your clay items and attach them to the base while the base is still fresh. If the base is dry, you can use craft glue to attach the clay items to the base.

Step 5
Place the emergent layer’s tree to the base first. If required, make brown rope-like shapes to make the trunk reach the brown bottom layer.

Step 6
Attach the canopy layer’s trees next. Add the rest of the trees and bushes one by one on each layer.

Step 7
Write down the names of the each layer on small pieces of paper cutouts.

Step 8
Attach the layer name cutouts on each layer to complete the craft.
Related Crafts and Projects
If you’re in search of other projects that go well with this one, we’ve got you covered! While you have your clay out, here are a few more great crafts you can make with clay.