Pretty Pumpkin Crochet Craft
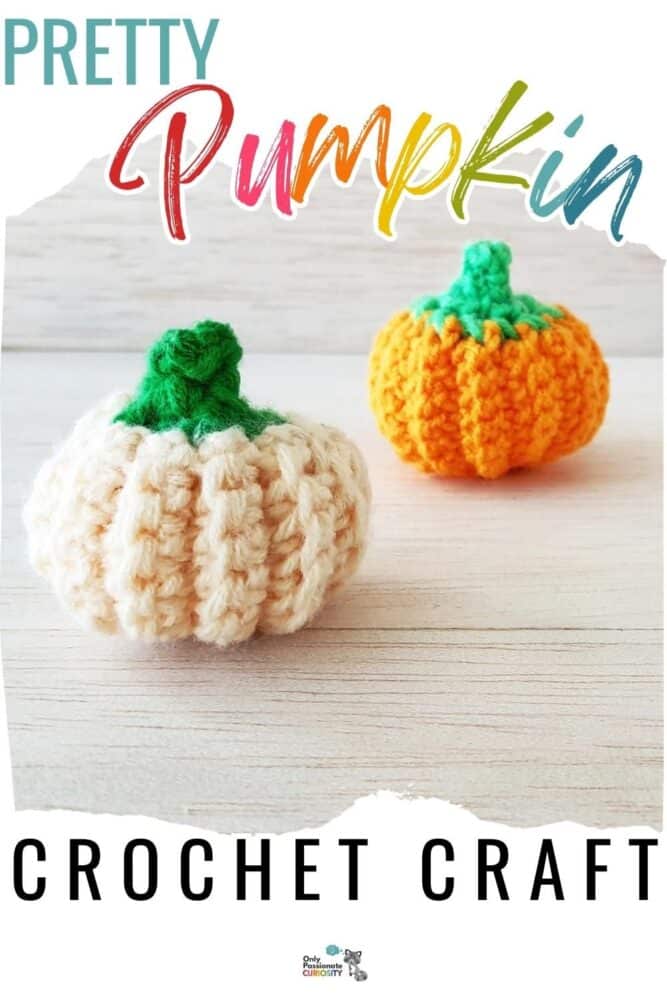
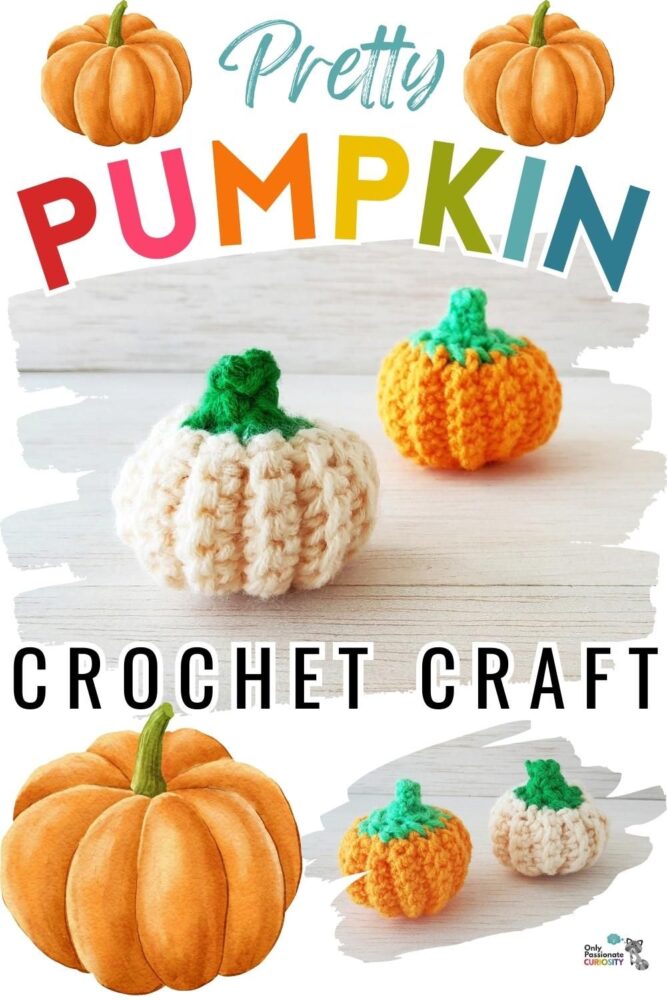
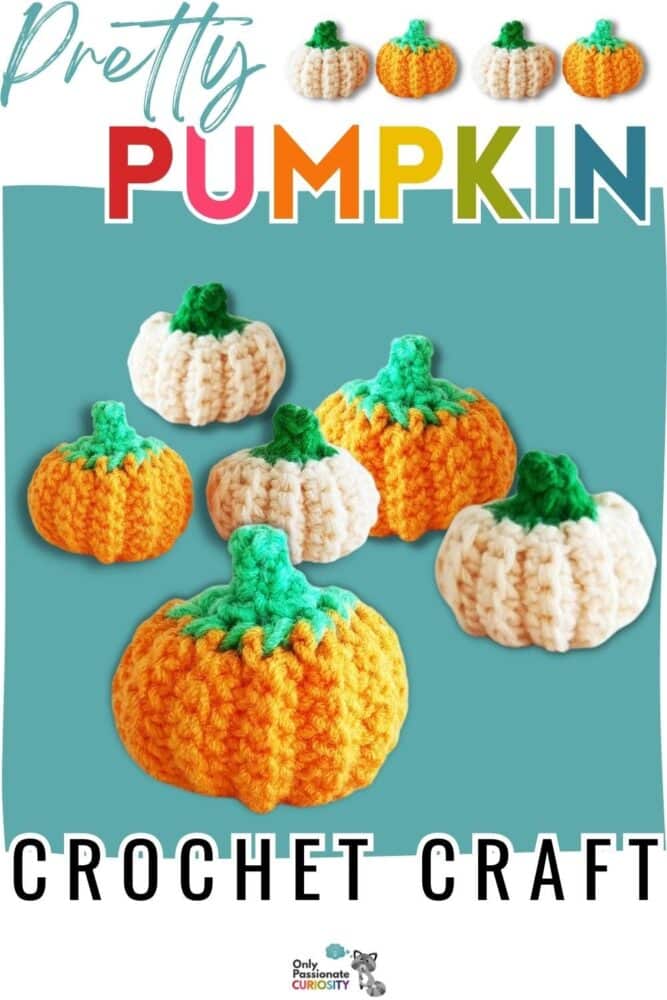
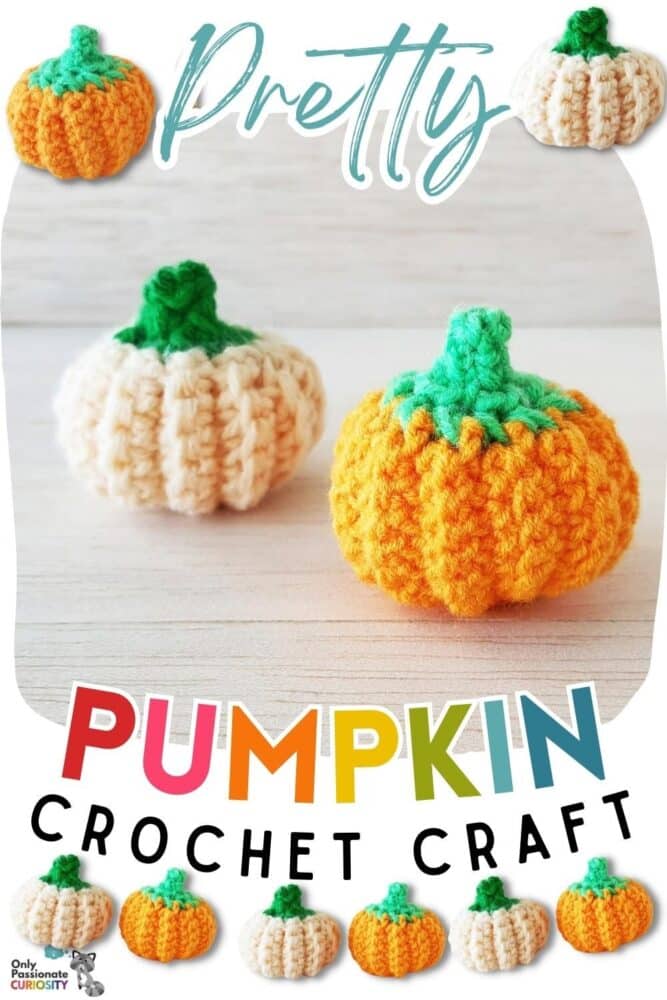
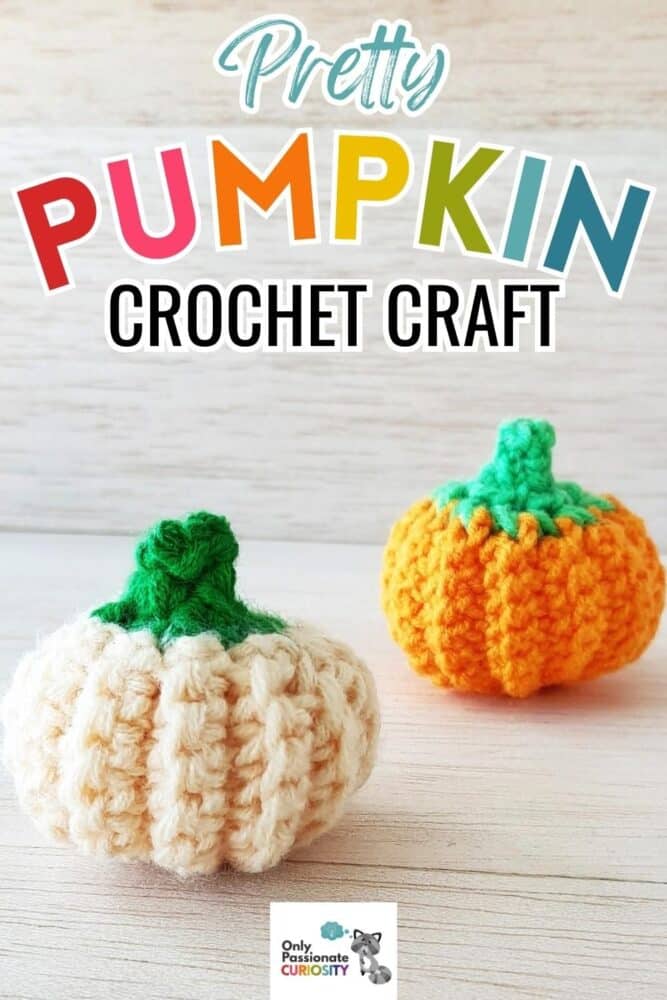
Are you teaching your kids how to crochet? If so, this pretty pumpkin crochet is a lovely fall craft they can work on. It might be fun for several of you to take on this project, with each of you choosing a fall-themed color. Then, once your pumpkin crochet crafts are complete, you’ll have some lovely fall decor to place around your house.
List of Supplies for Pumpkin Crochet
- Crochet yarn – medium light
- Crochet hook – 3.5 mm
- Tapestry needle
- Cotton
- A pair of scissors
Instructions for Pumpkin Crochet Craft
Step 1:
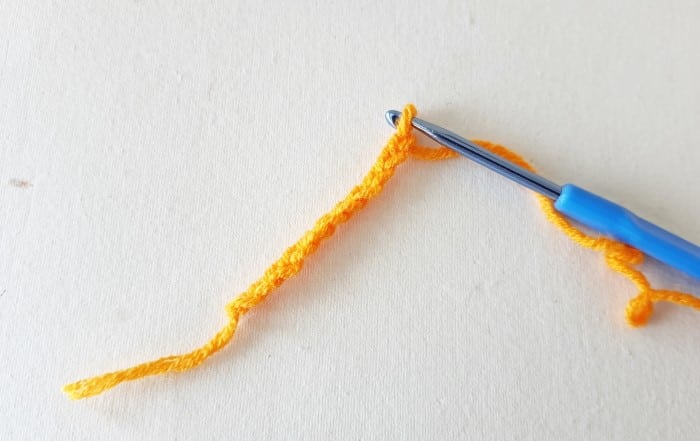
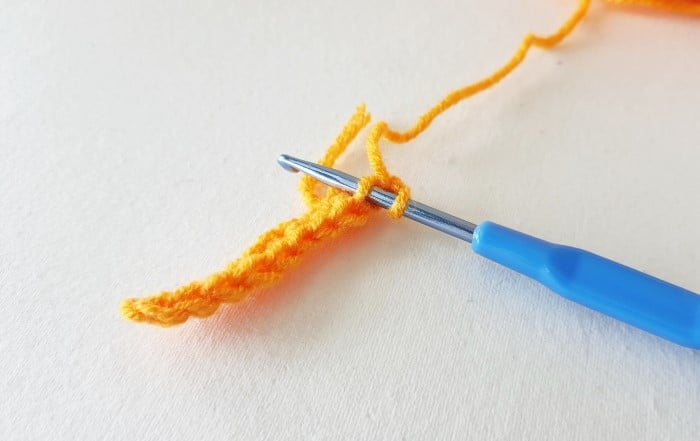
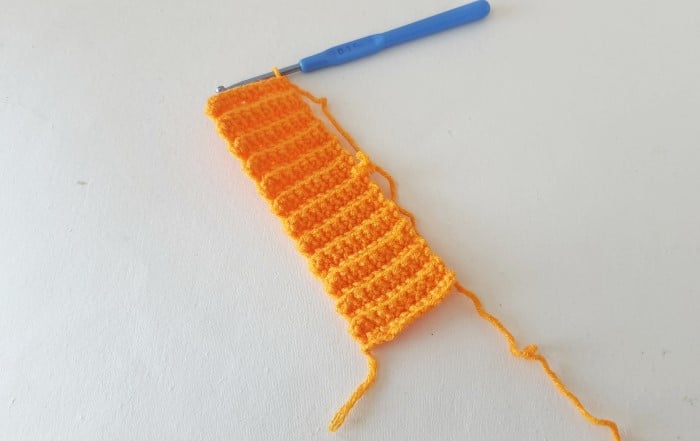
Select orange yarn for the pumpkin (or any other colored yarn of your choice). Start with a slip stitch and then chain 12.
Step 2:
Skip the chain next to the hook and insert the hook into the 2nd stitch from the hook.
Step 3:
Work a single crochet (SC) into that chain stitch. Work a single crochet into each stitch all the way to the other side. You’ll have a total of 11 stitches.
Step 4:
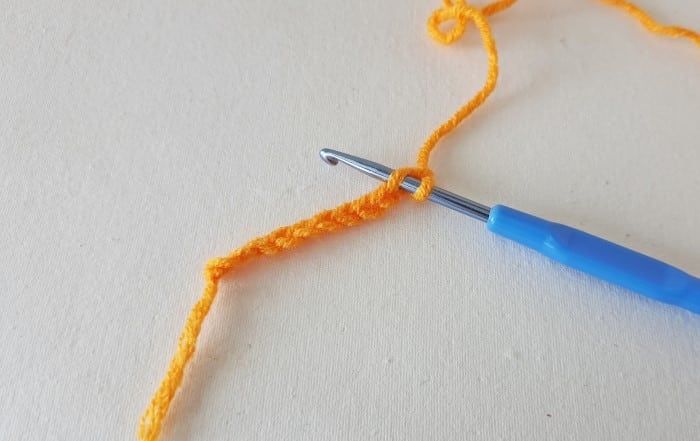
Flip the pattern to the other side and chain one.
Step 5:
While working into the top chain stitches, keep in mind to insert your hook into the back/ further loop of the top chain stitches. Do not insert the hook into both loops of a stitch.
Step 6:
Work your single crochet into the further loop of the first chain stitch.
Step 7:
Work the single crochet all the way to the other side, and then chain one.
Step 8:
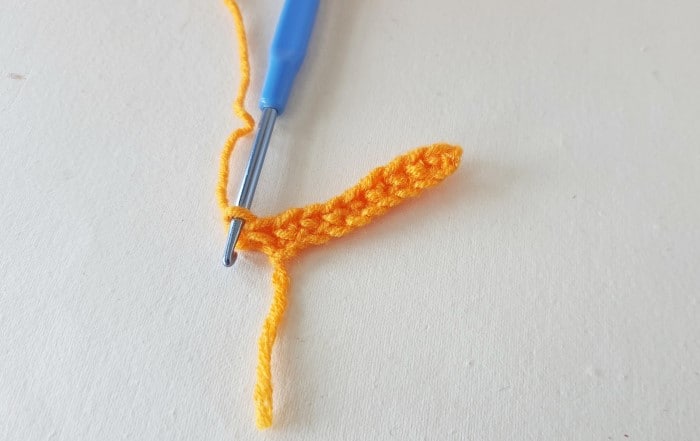
After the chain one, flip the pumpkin crochet pattern to the other side.
Step 9:
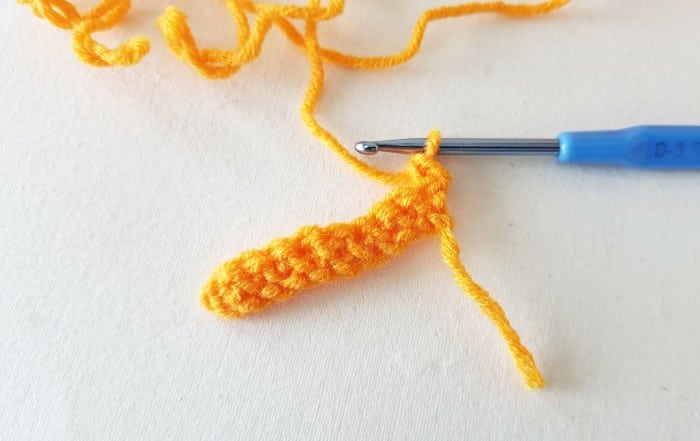
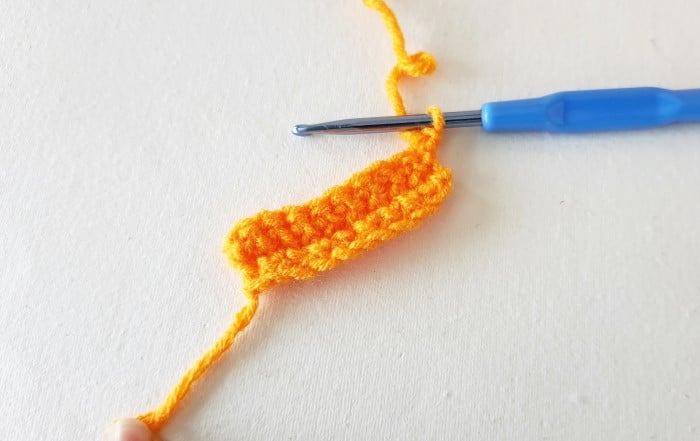
Continue to crochet until you have a total of 22 single crochet rows.
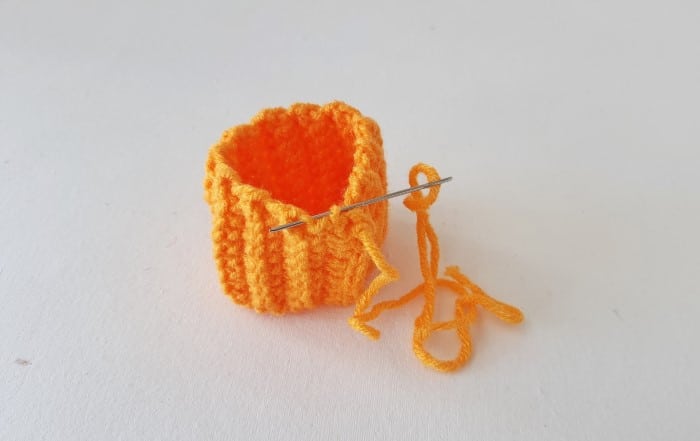
Step 10:
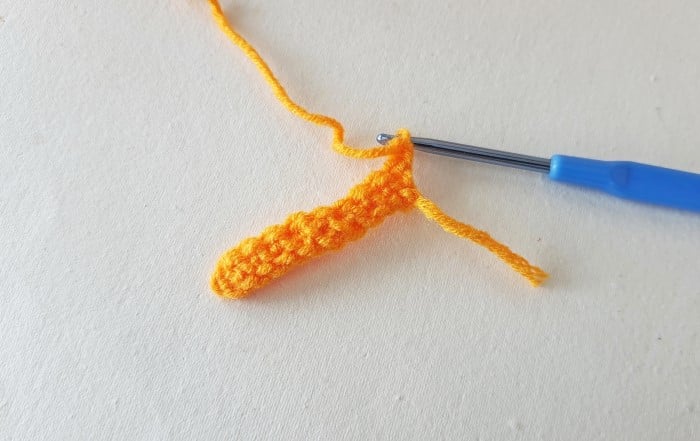
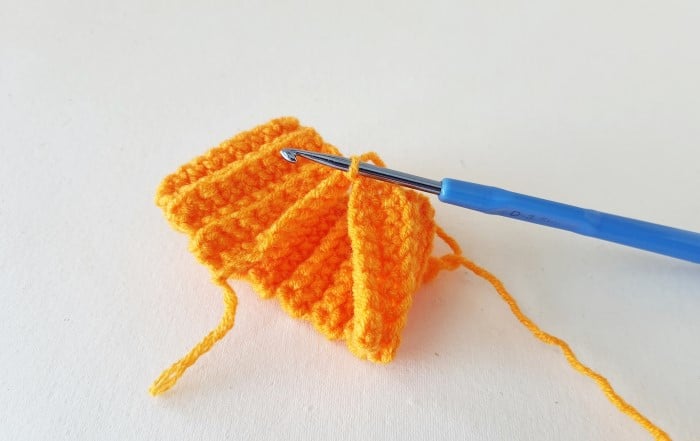
Once you’re done crocheting 22 rows, join both open ends of the crochet pattern together and align the stitches nicely and evenly. Insert hook in the 2 aligned foundation stitches of both open sides. Work a slip stitch to join them.
Step 11:
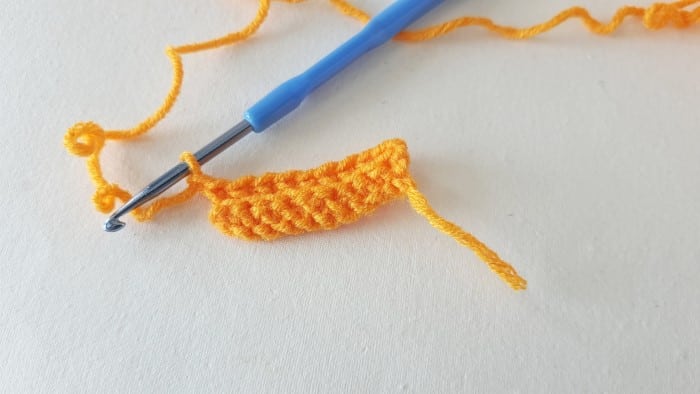
Now, insert your hook into the next 2 aligned foundation chain stitches and join them with a slip stitch.
Step 12:
Continue to join 2 aligned foundation chain stitches all the way to the other side. Keep 10-12 inches of yarn and then cut off the rest. Thread a tapestry needle into the remaining yarn.
Step 13:
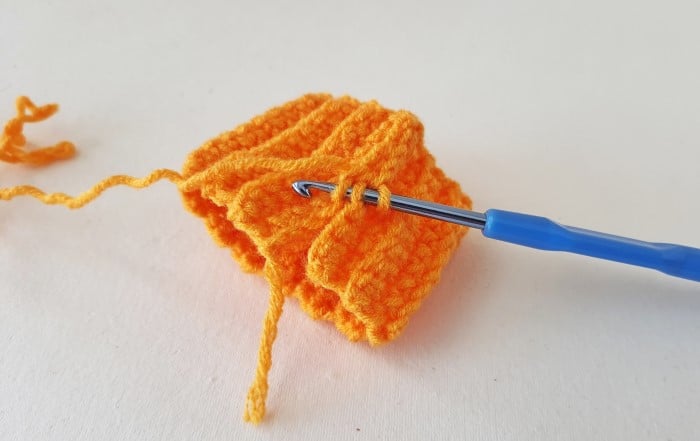
We are going to close the adjacent open end of the crochet-cylinder pattern. Insert the needle in and out (like a running stitch) of the loops of that end.
Step 14:
After several stitches, pull the yarn carefully to bring the loops closer.
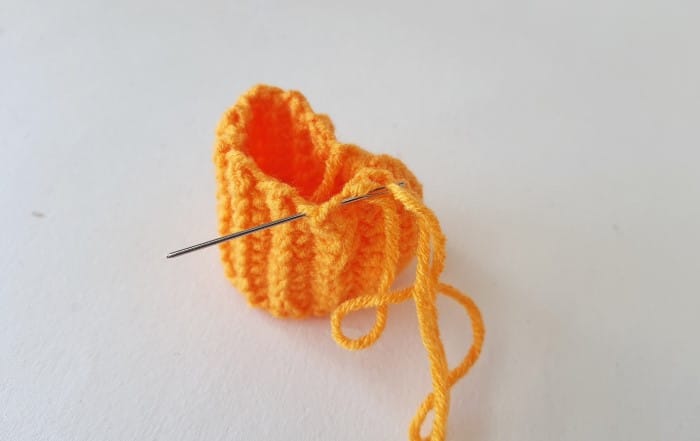
Step 15:
Once you’re done stitching the pattern all the way around, pull the yarn nicely and tightly to close that end.
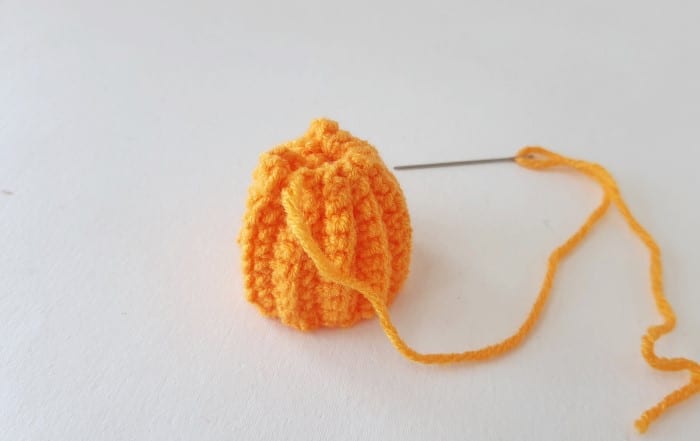
Step 16:
Stitch through the end to close it neatly.
Step 17:
Once that end is closed neatly, insert the needle inside the pattern, tie a tight knot, and take the needle out of the yarn.
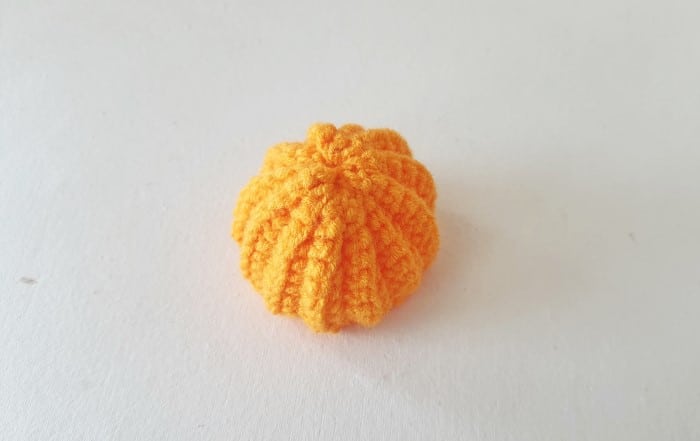
Step 18:
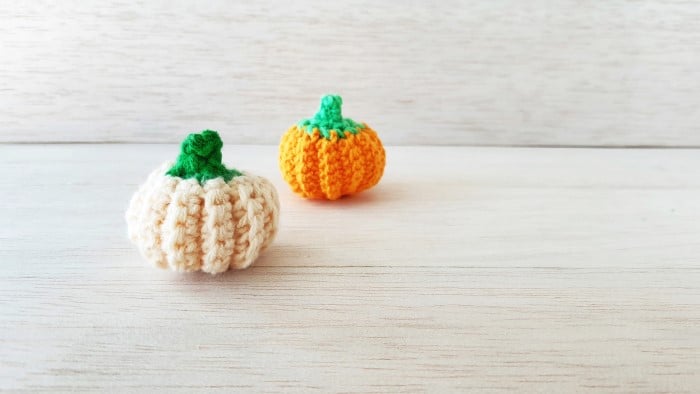
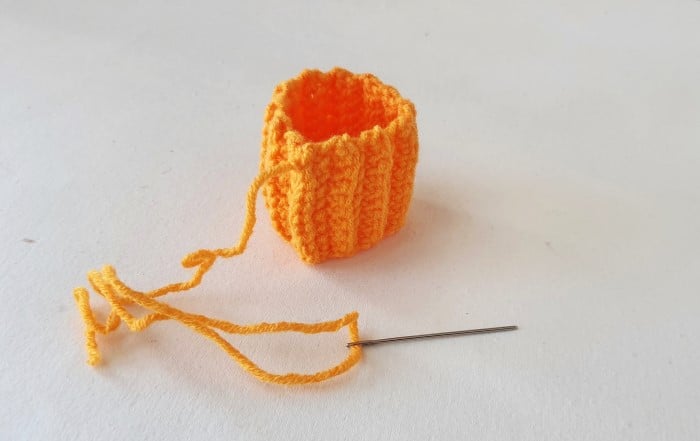
This is what the other end (open) of the pumpkin crochet pattern should look like now.

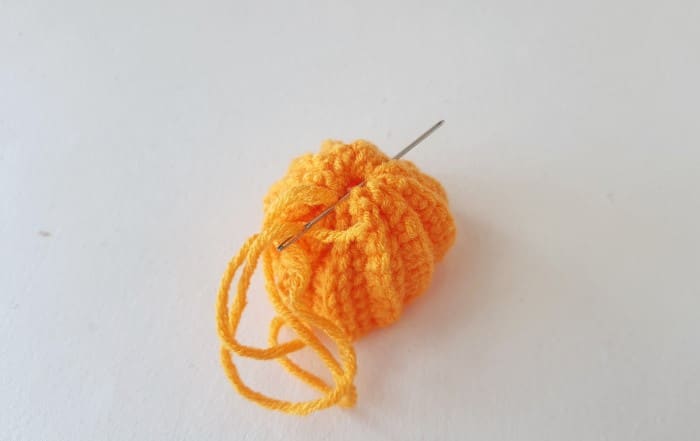
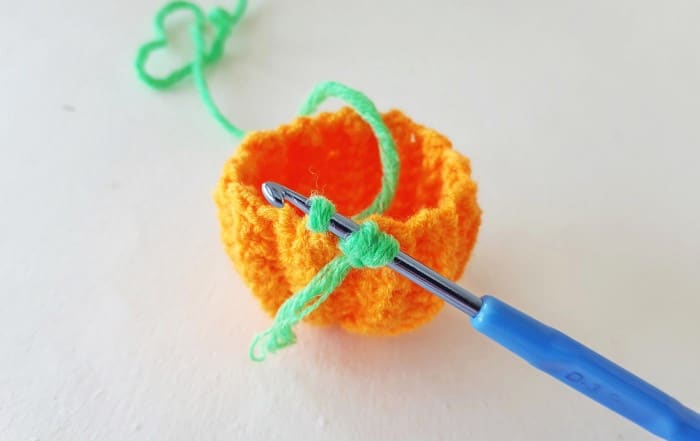
Step 19:
Select a green yarn and make a slip knot with it. Insert the hook into the slip knot and then into any loop at the open end of the pumpkin base pattern.
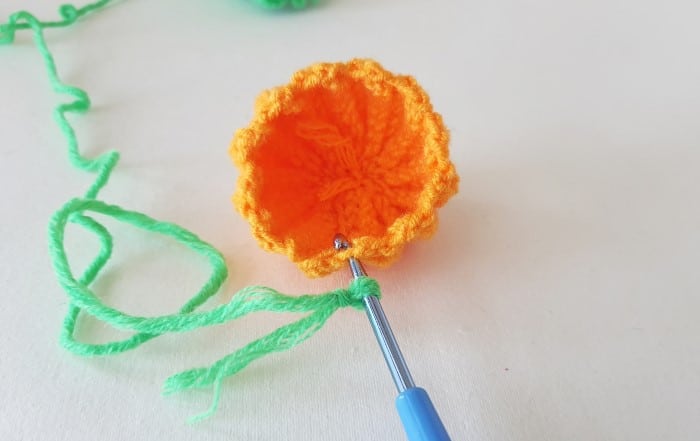
Step 20:
Pull yarn through that loop (note that counting loops or stitches isn’t necessary at this step).
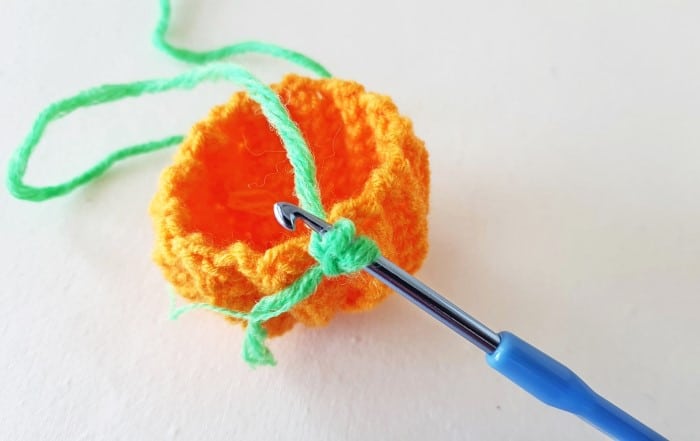
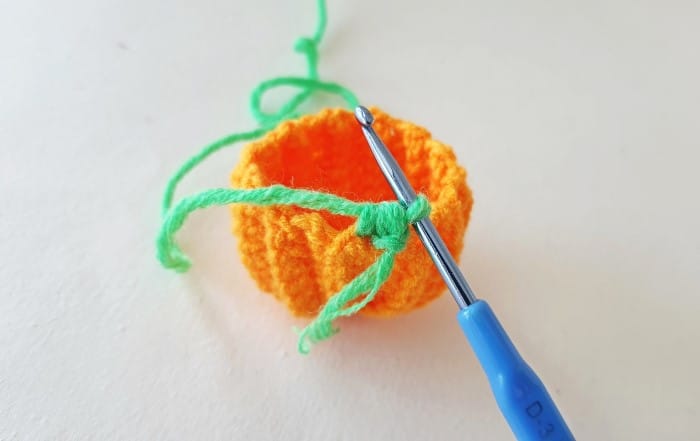
Step 21:
Now, insert the hook into any next loop (but not too far).
Step 22:
Pull the yarn through that loop.
Step 23:
You should have 3 loops in the hook (including the first slip knot). Now, pull the yarn through all 3 loops on the hook.
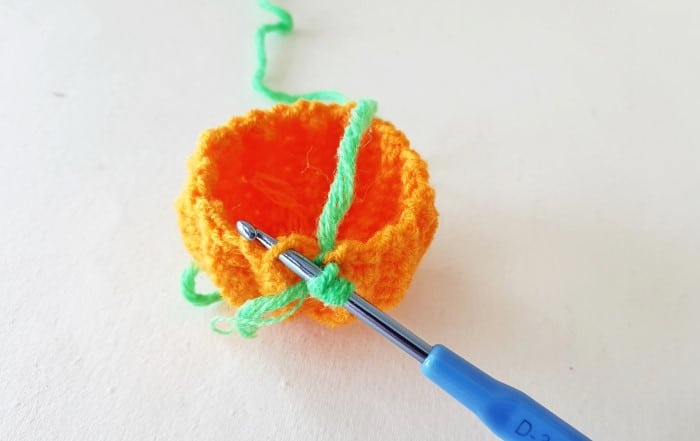
Step 24:
To continue, insert the hook through the next edge loop and pull the yarn through. Keep that loop on the hook. Insert the hook into the next loop and pull the yarn through again. Check if you have 3 loops in the hook.
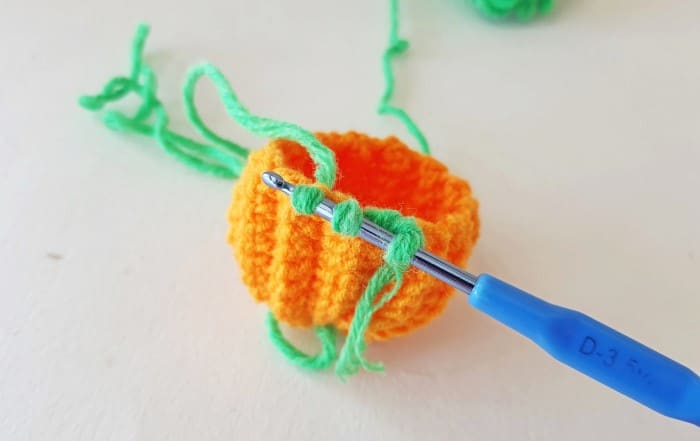
Step 25:
Pull the yarn through all 3 loops on the hook.
Step 26:
Continue this process all the way around the open end.
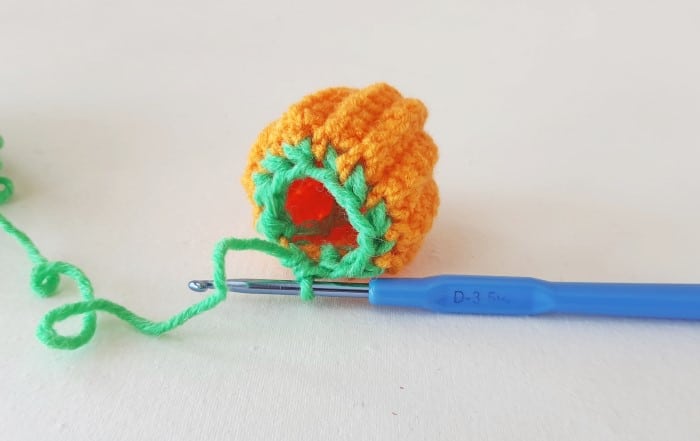
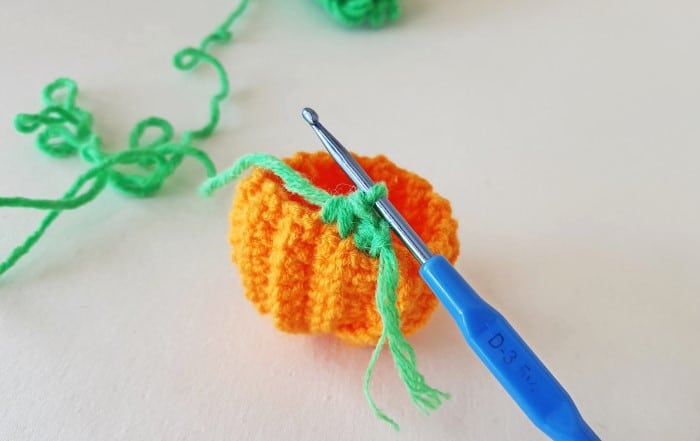
Step 27:
Stuff the pumpkin crochet base with cotton. Keep the stuffing nice and fluffy; not too tight, nor too light.
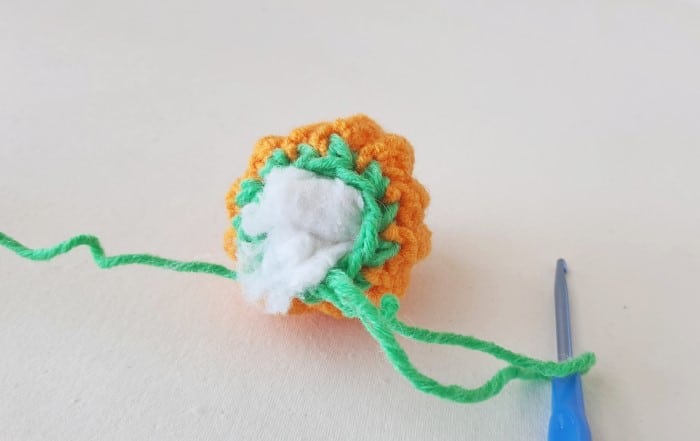
Step 28:
Continue to crochet around the open end.
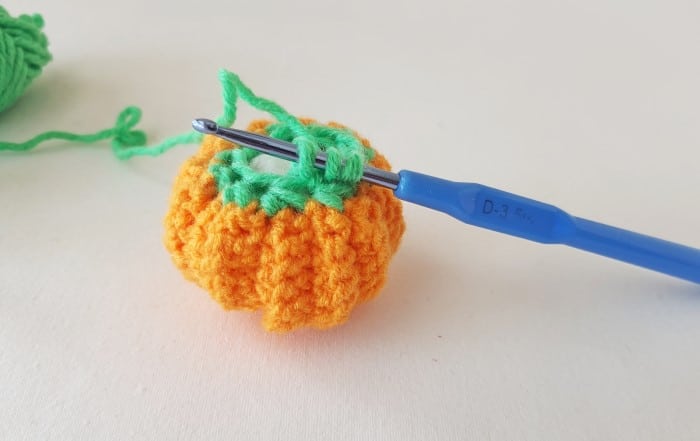
Step 29:
Decrease your stitch count as you continue to crochet. This will eventually bring the stitch towards the center and close that end.
Step 30:
Once you reach the center, continue the process without decreasing the stitch count. This time, keep the stitch count the same to crochet the stem of the pumpkin crochet.
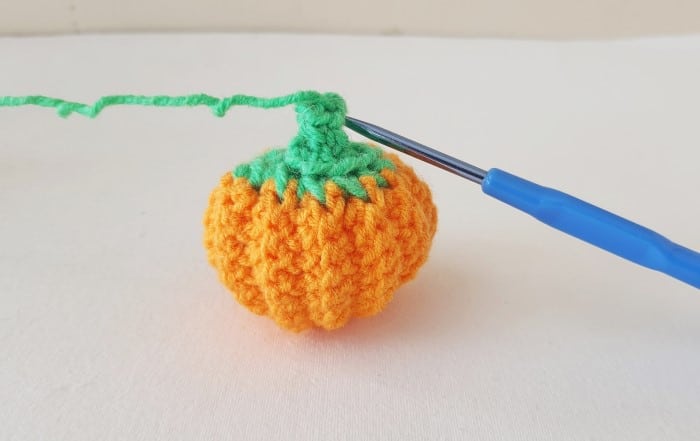
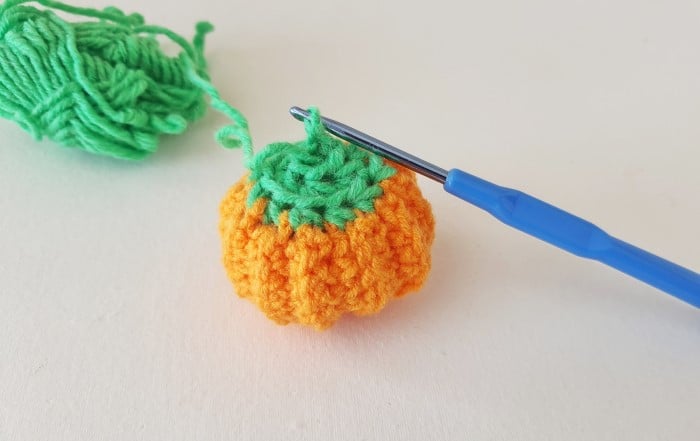
Step 31:
Finish the stem pattern with a slip stitch and then pull out a few inches of the yarn and cut off the extra. Insert a tapestry needle through the open end of the yarn strand.
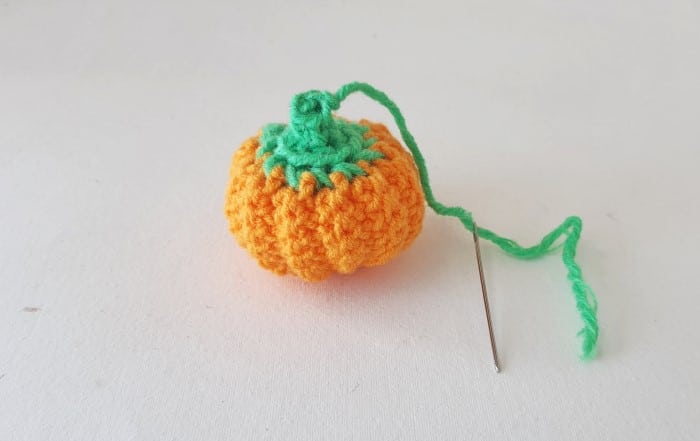
Step 32:
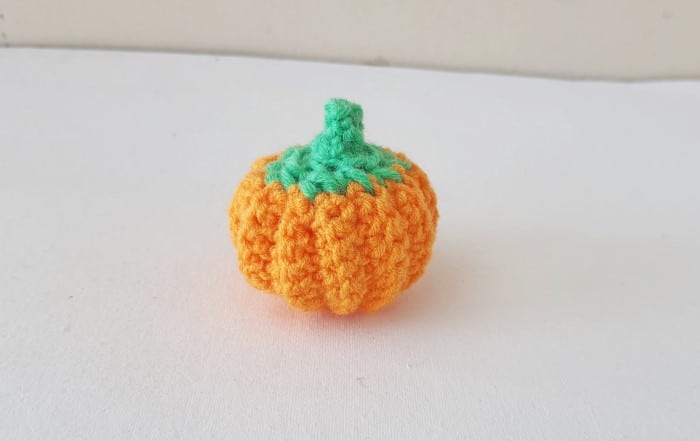
Stitch the remaining yarn inside the pumpkin pattern randomly and then cut off any extra yarn, if needed.
Other Projects
Here’s another knitting project, one that you might use as a handcrafted gift for others: Knitting a Basic Washcloth
Pumpkins make great decor, don’t they? A fun project like this felt pumpkin craft is another sewing craft you can do.
Younger students might enjoy this foam clay pumpkin craft, a perfect hands-on project for children.