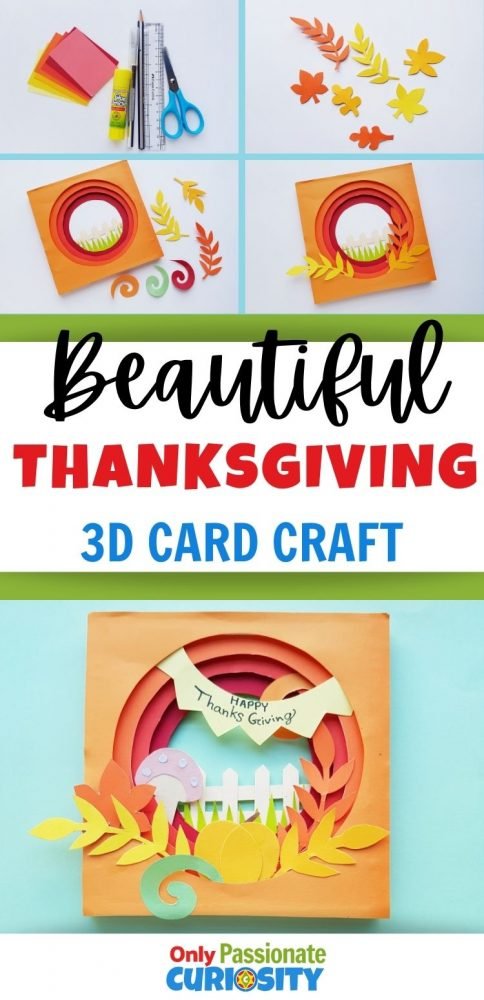
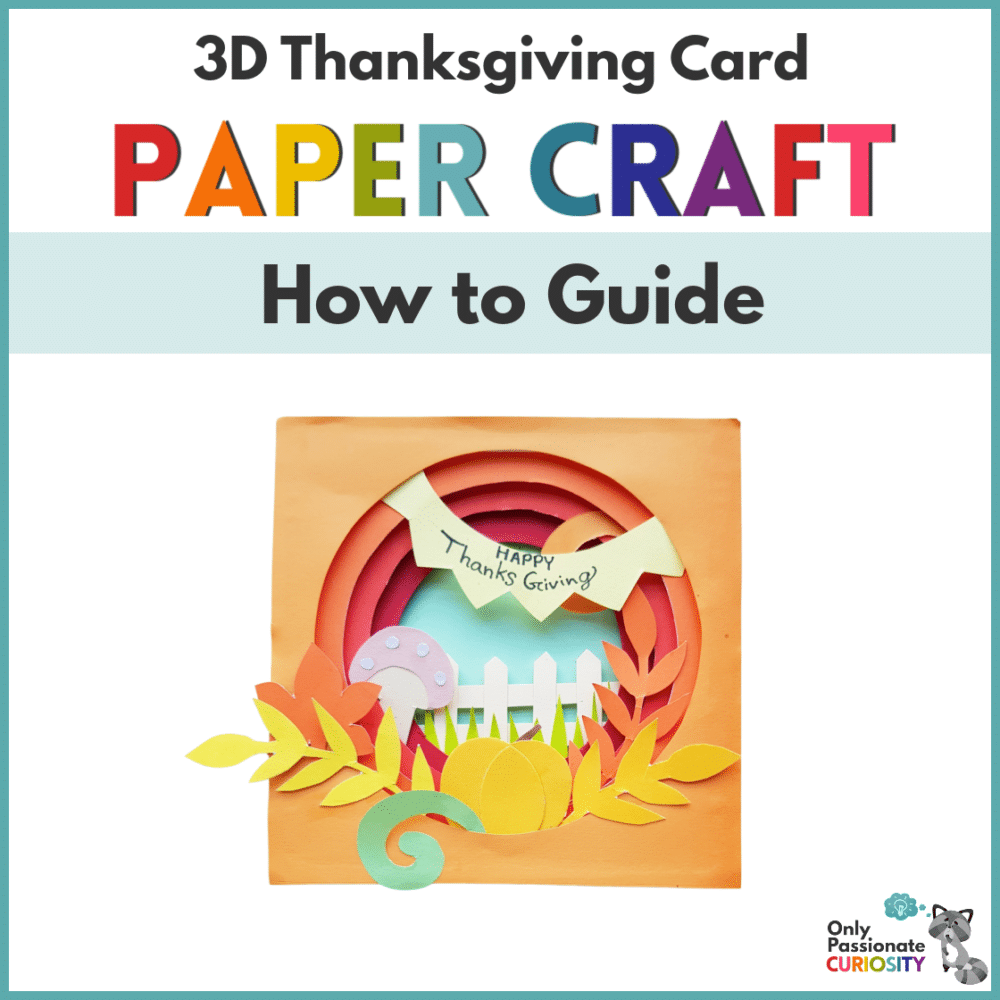
Beautiful 3D Thanksgiving Card Craft
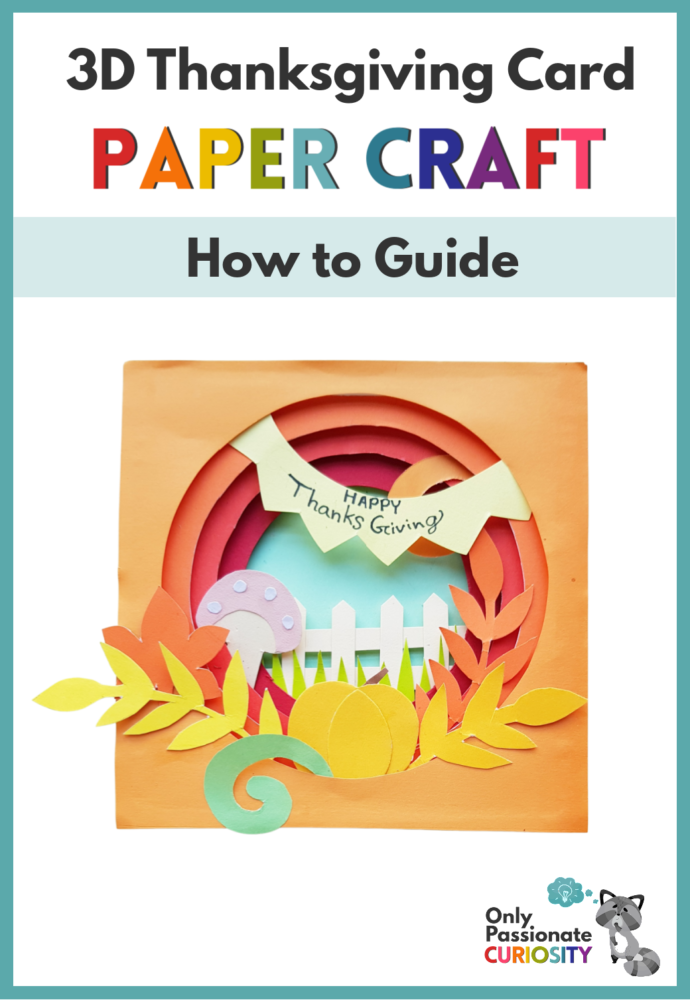
Looking for creative ways to celebrate Thanksgiving over the next few weeks? We’ve got several ideas for crafts and Thanksgiving-themed learning/activities coming up over the next few weeks here at Only Passionate Curiosity. This 3D Thanksgiving Card Craft is perfect for teens and adults!
I’m recommending this card for an older age bracket because it requires some sequencing skills, hand-eye coordination and a bit of work with an X-acto knife. Of course, you can use your own discretion about what your kids can handle and help them out along the way! The end result is an absolutely beautiful piece of 3D art that you can use to decorate your own home or gift to someone you are thankful for! This would also make a thoughtful thank you gift for your Thanksgiving host and/or hostess!
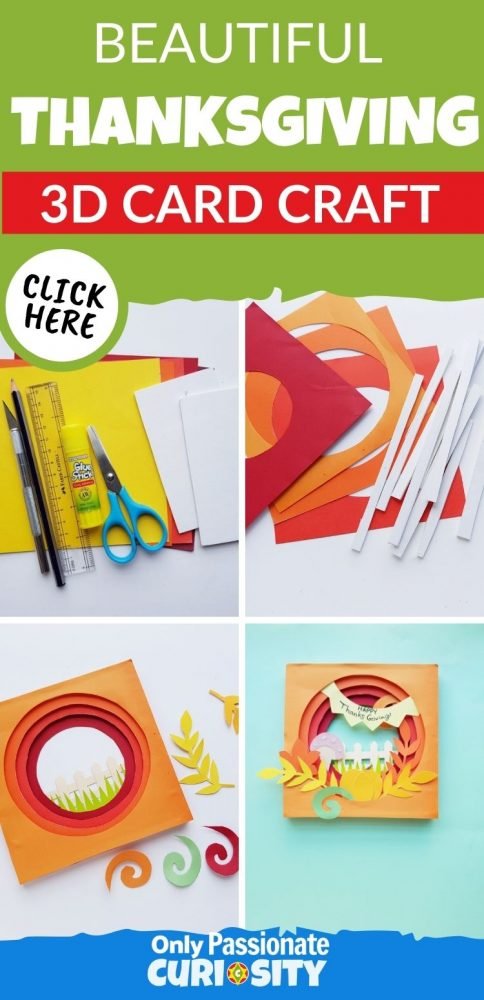
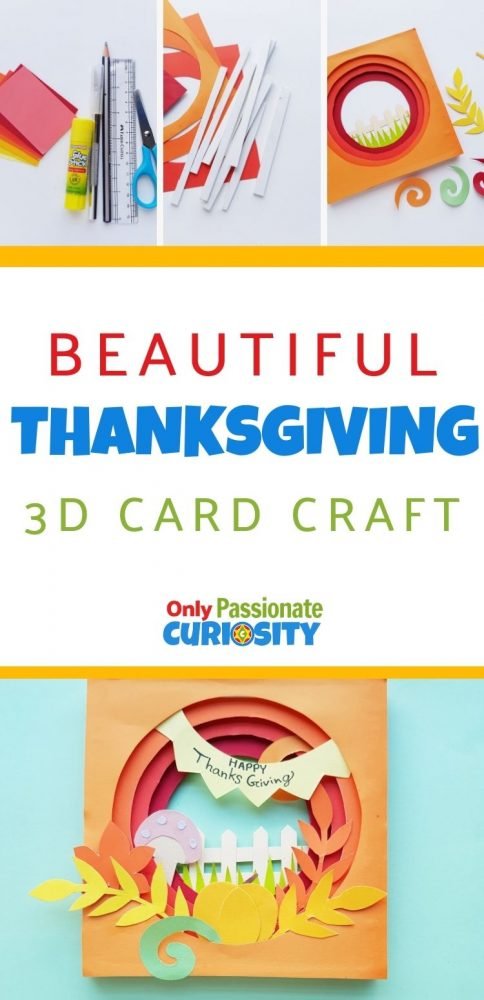
What You’ll Need:
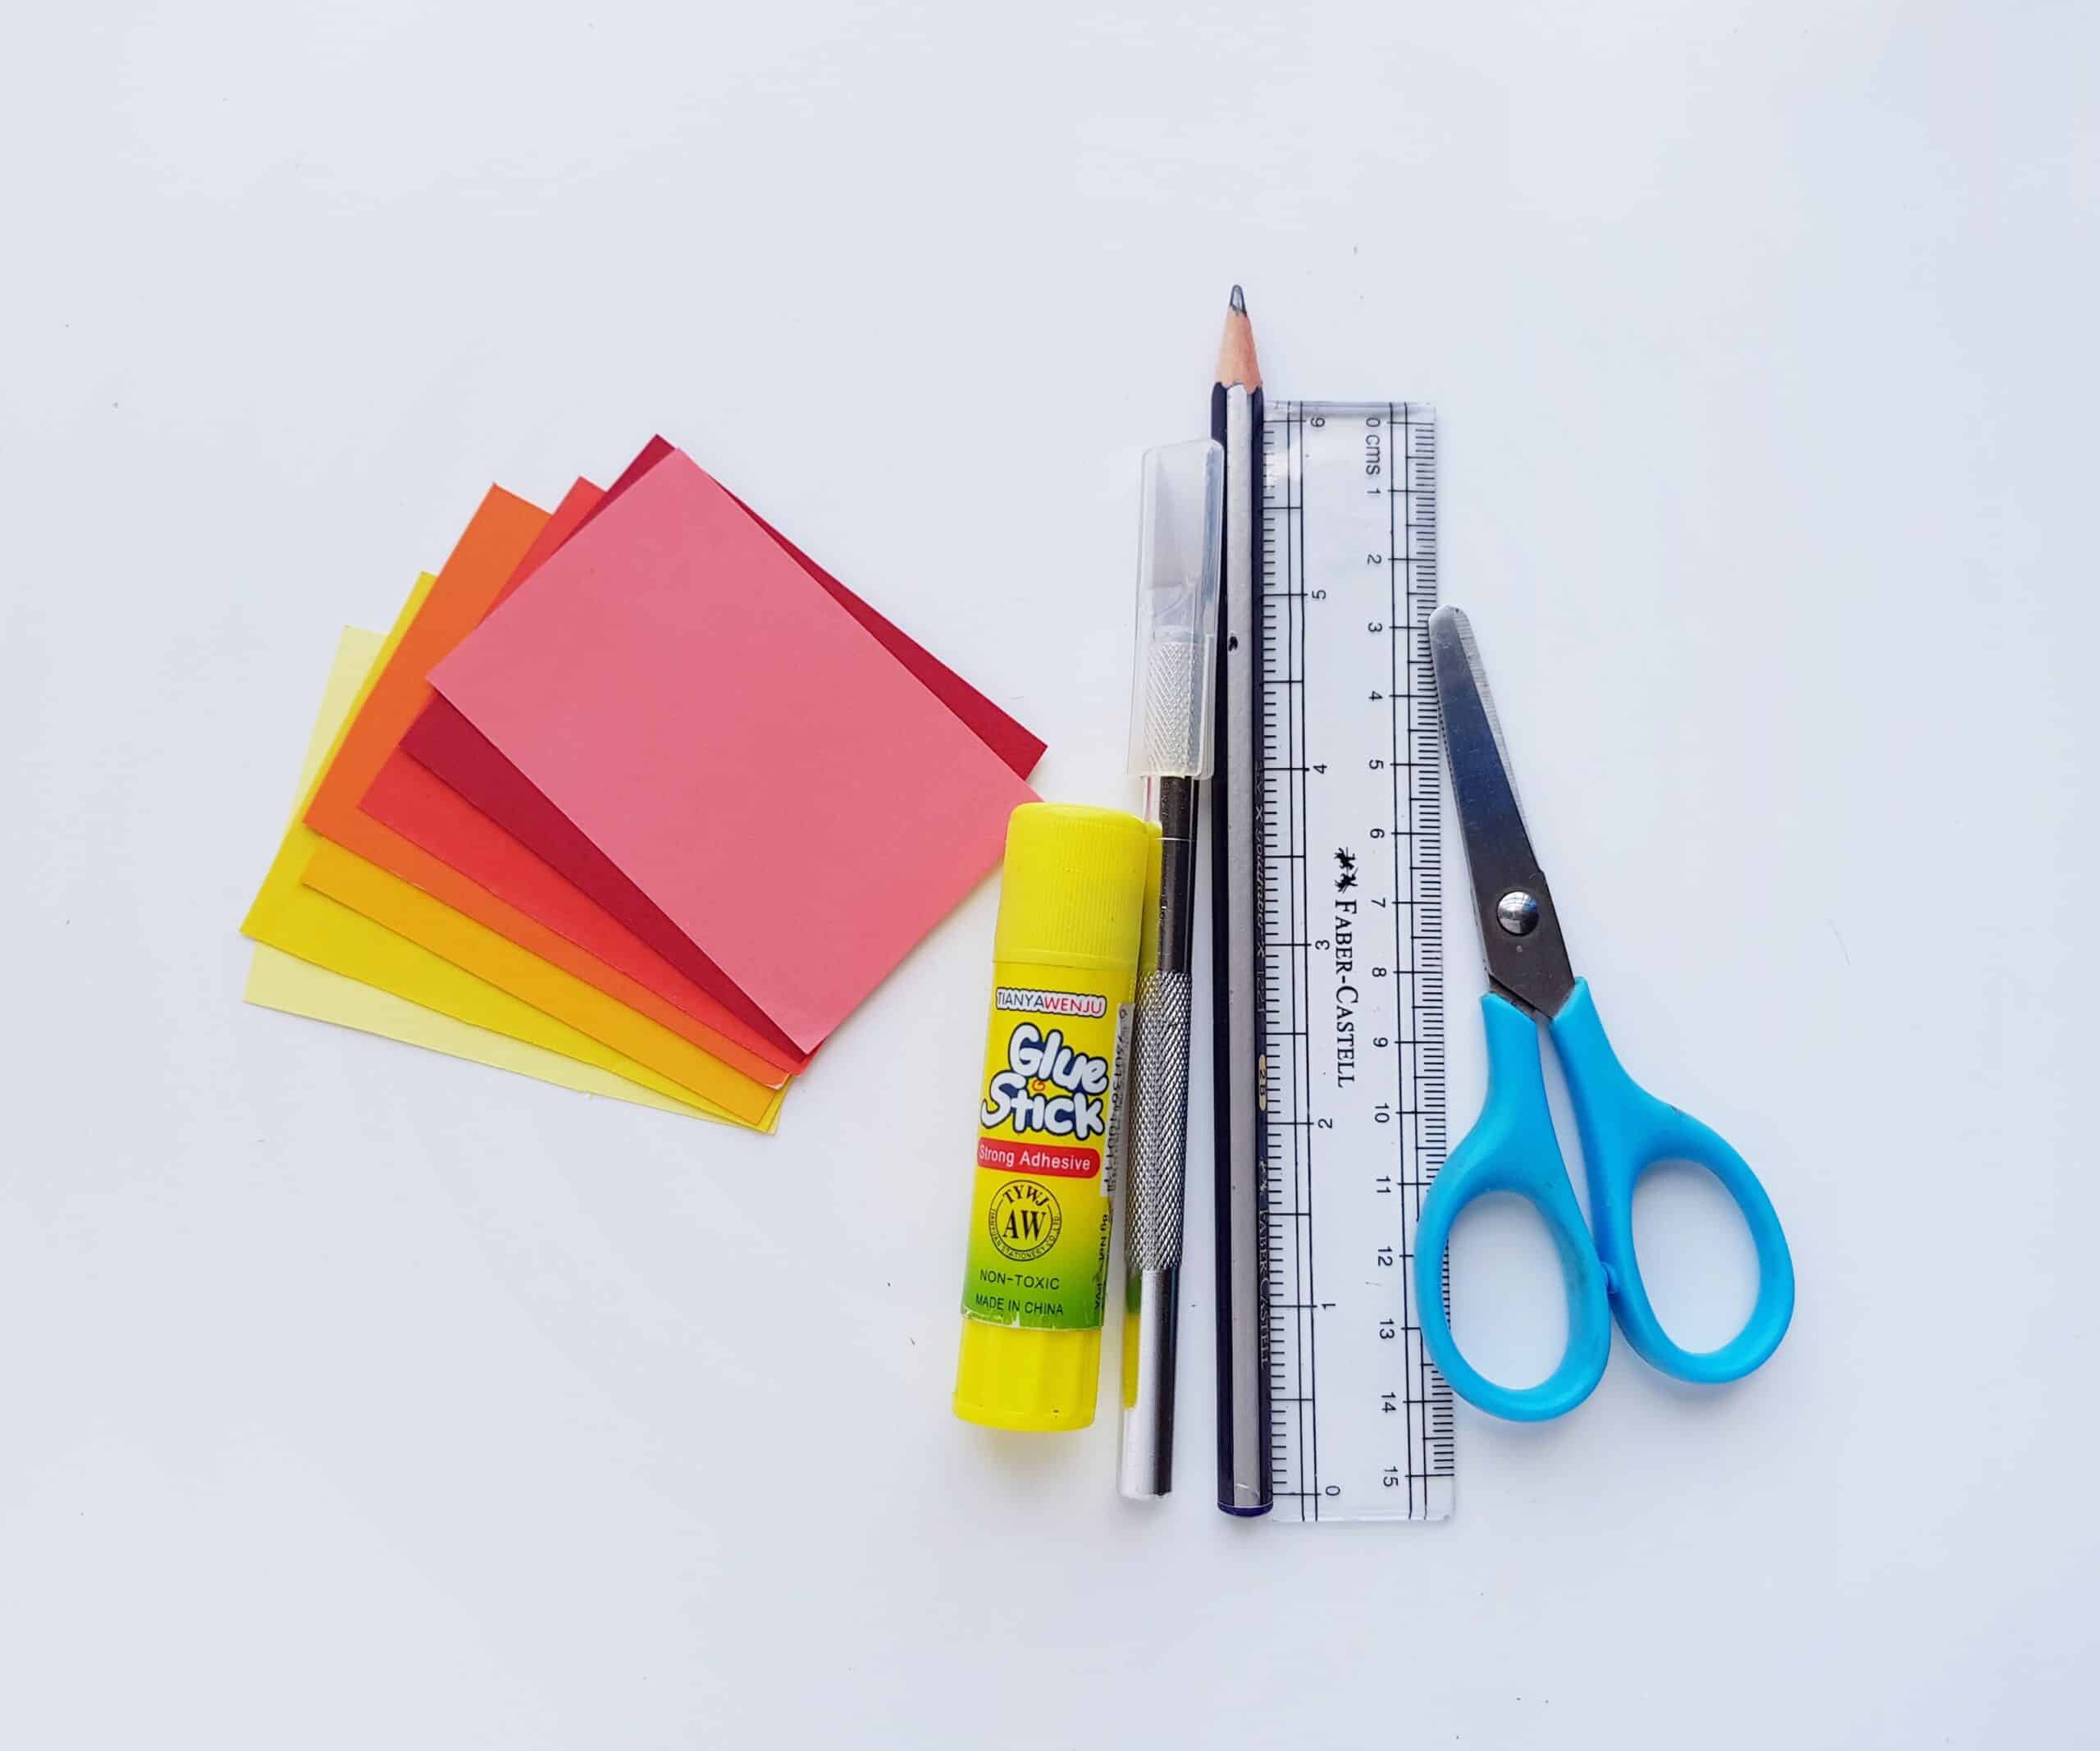
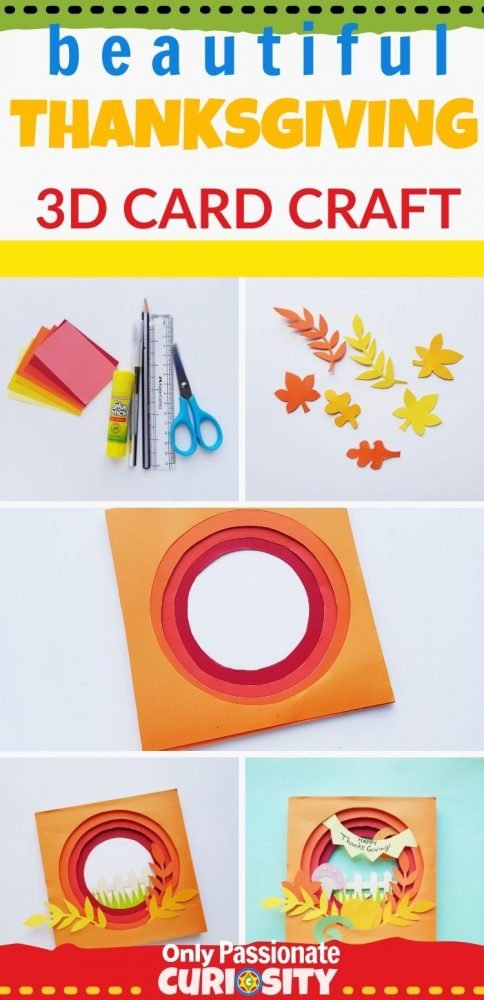
- Colored cardstock paper
- Pencil
- Scissors
- X-ACTO knife
- Ruler
- Craft glue
- Craft foam board
- Optional: Drawing Compass
Free Printable Templates
Please note: you’ll need to download these online templates by clicking the link at the bottom of this article!)
- Square Pattern
- Circle Patterns
- Decorative Items for Thanksgiving Card
How to Make a 3D Thanksgiving Card:
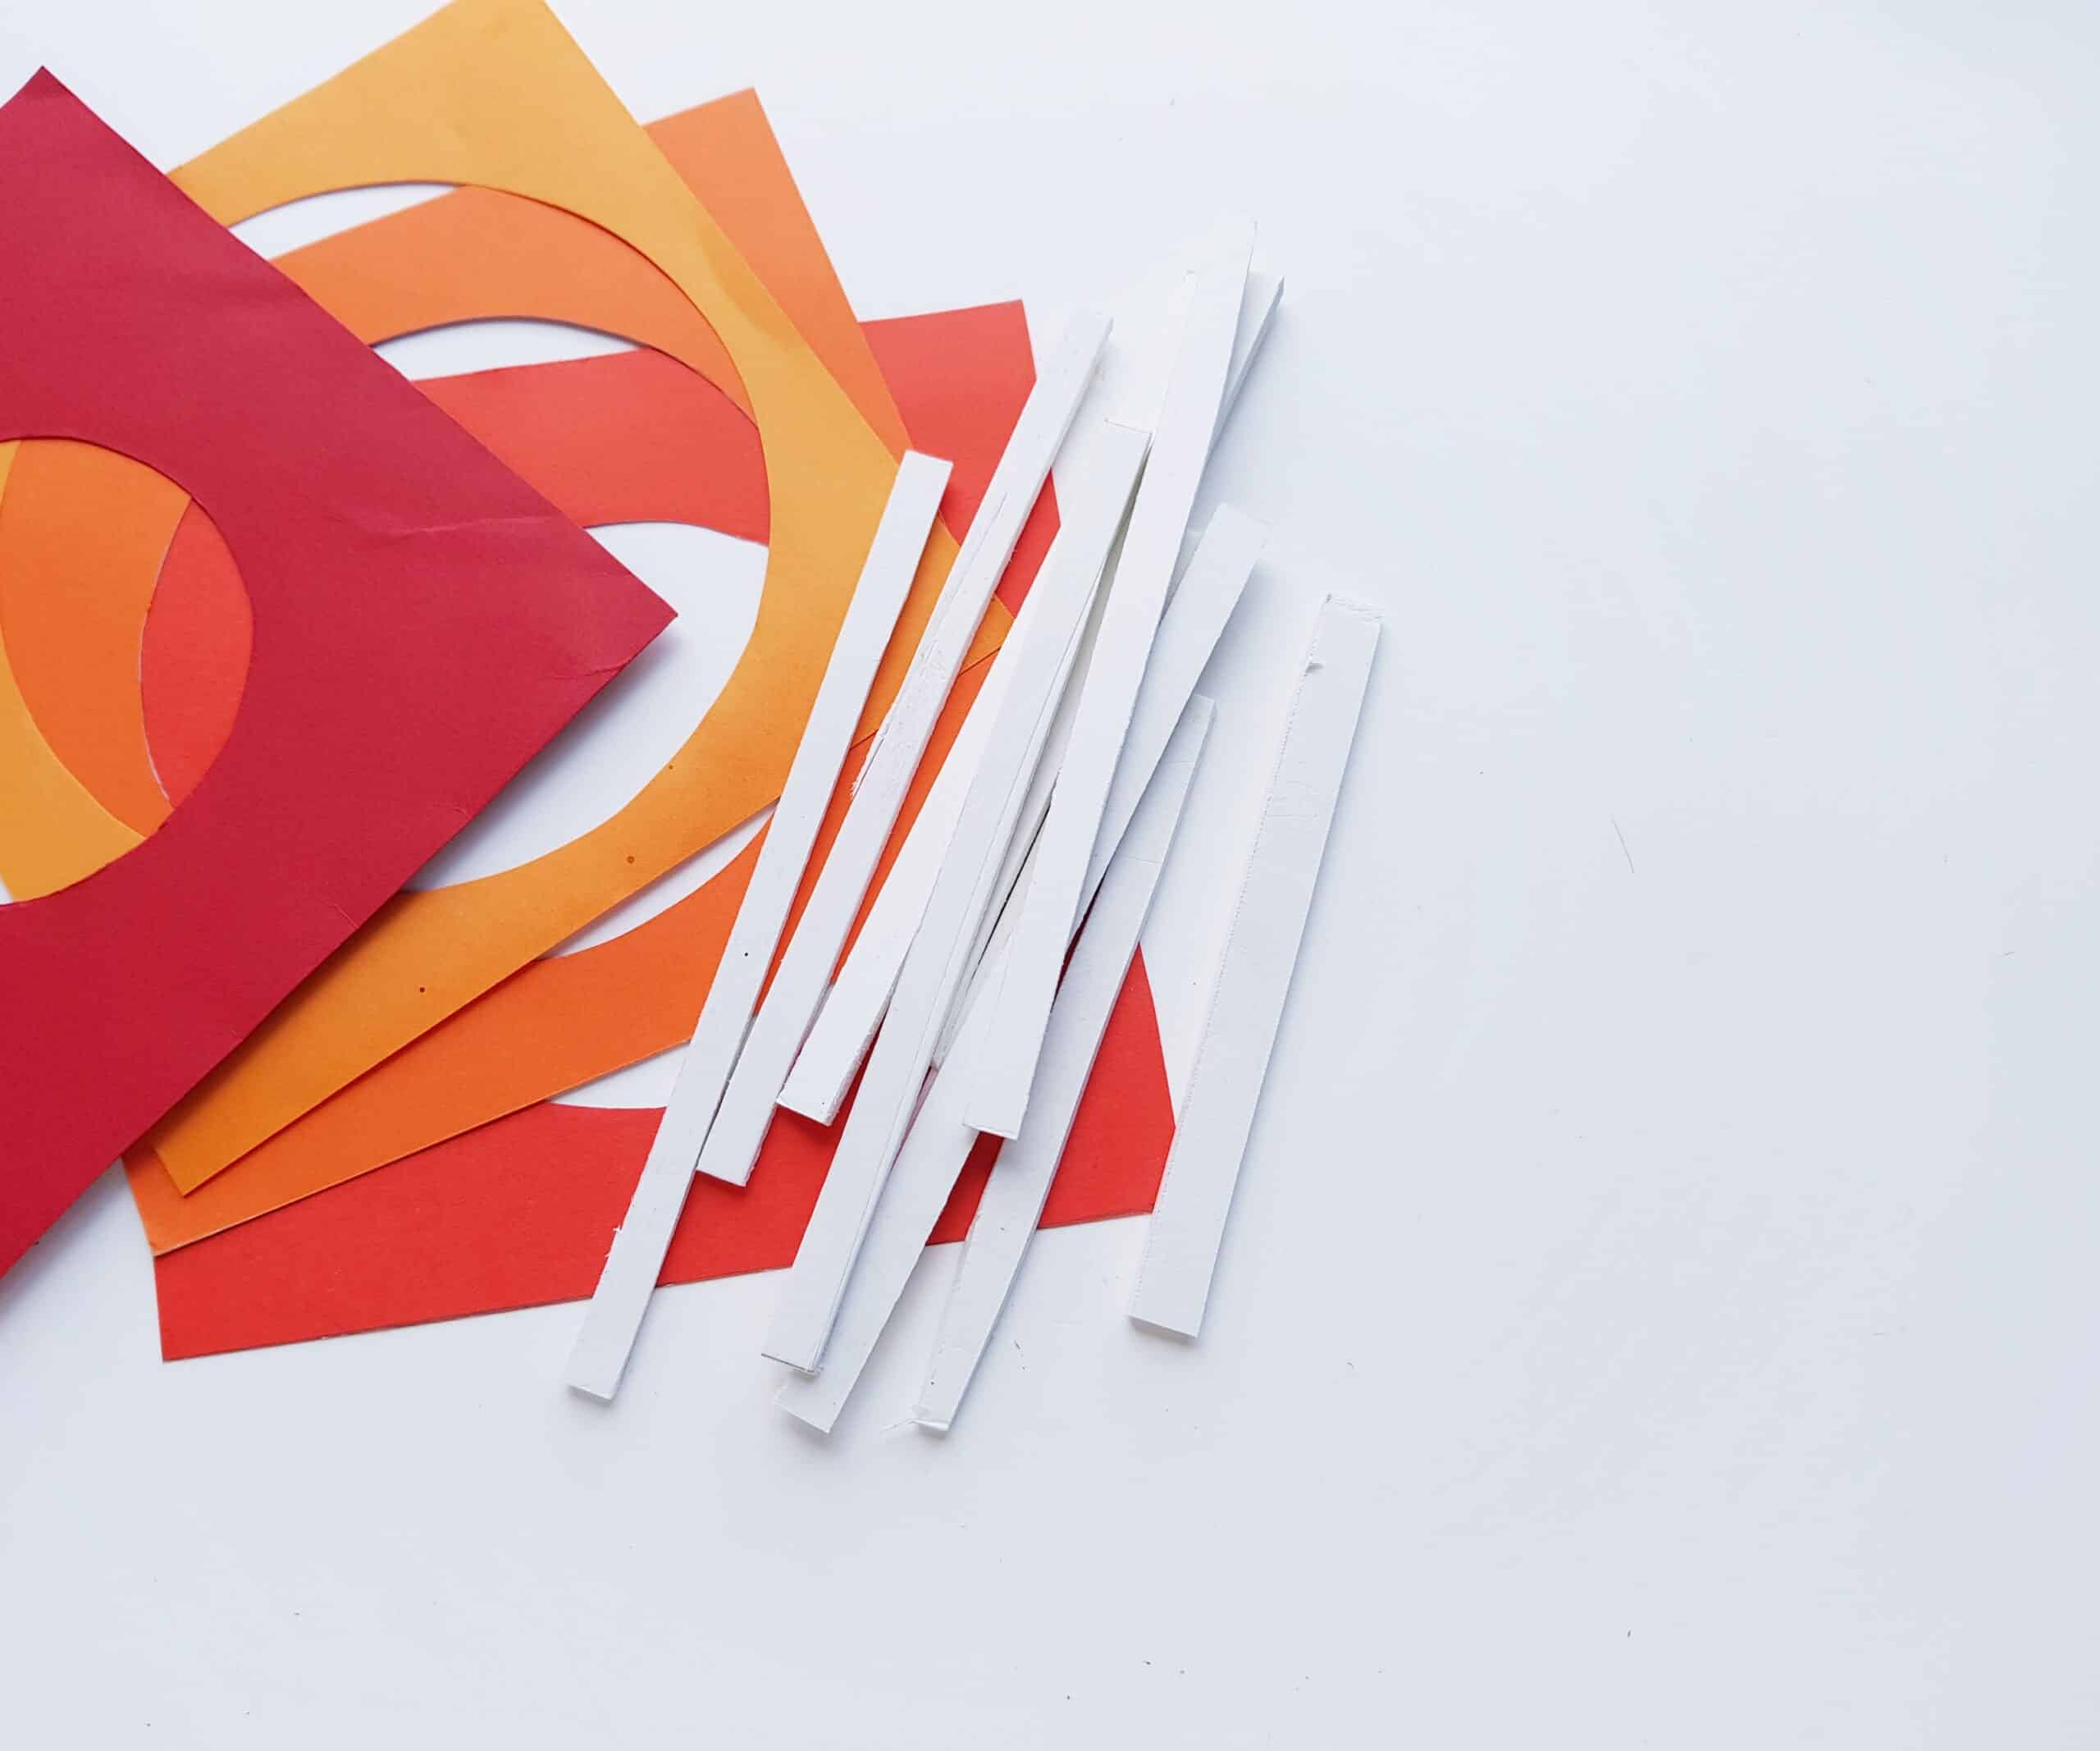
To get started with this card, you’re going to pick out four “autumnal” colors of cardstock for the four layers of your card. Arrange the layers in the order that you’d like for the final card. You want all of the layers to be shaped like a square (and the same size). To make this easy, you can use the square pattern we provided in the attached PDF (link below). Use top square on the PDF page to trace and cut out your card stock squares.
(Note: If you use the PDF, don’t worry about the square with the “frame.” That is a guideline to help you out, later on. )
Creating the Circular Cut-Outs
Once you’ve traced and cut out the layers into squares, you will want to cut circles in the middle of each layer (starting small for the layer that will be in the back and getting bigger with each subsequent layer going forward, so that you can see all the colors.)
 To create your circles, you’ll want to use your drawing compass to make sure that each layer has a perfectly round circle in the middle that gets progressively larger for each layer.
If you’d like additional guidance, use the downloadable circular pattern (found by clicking the link at the bottom of this article): the smaller circle on the printable PDF will be the smallest circle (layer 1) and the larger circle will be the largest circle (layer 4). You’ll need to use your compass to create 2 additional circles that are in-between these two sizes. (This a great activity for teens who are taking geometry!)
Cut out the circles using the X-ACTO knife, so that you don’t have to bend or fold the paper. Whether you “freestyle” your circles or use the PDF, you’ll want the end-result to align something like this:
 Decorative Items
Once you have all of the basic layers, it’s time to get creative! Check out the printable page of decorative items (also available via the link below) that you can use to make your card beautiful and unique. Choose the items you love and trace/ cut them out on your choice of cardstock colors.

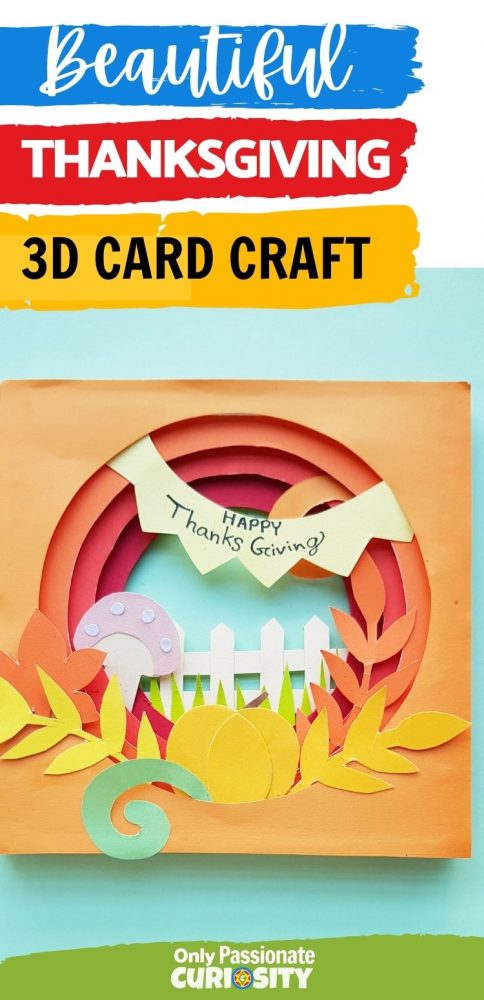
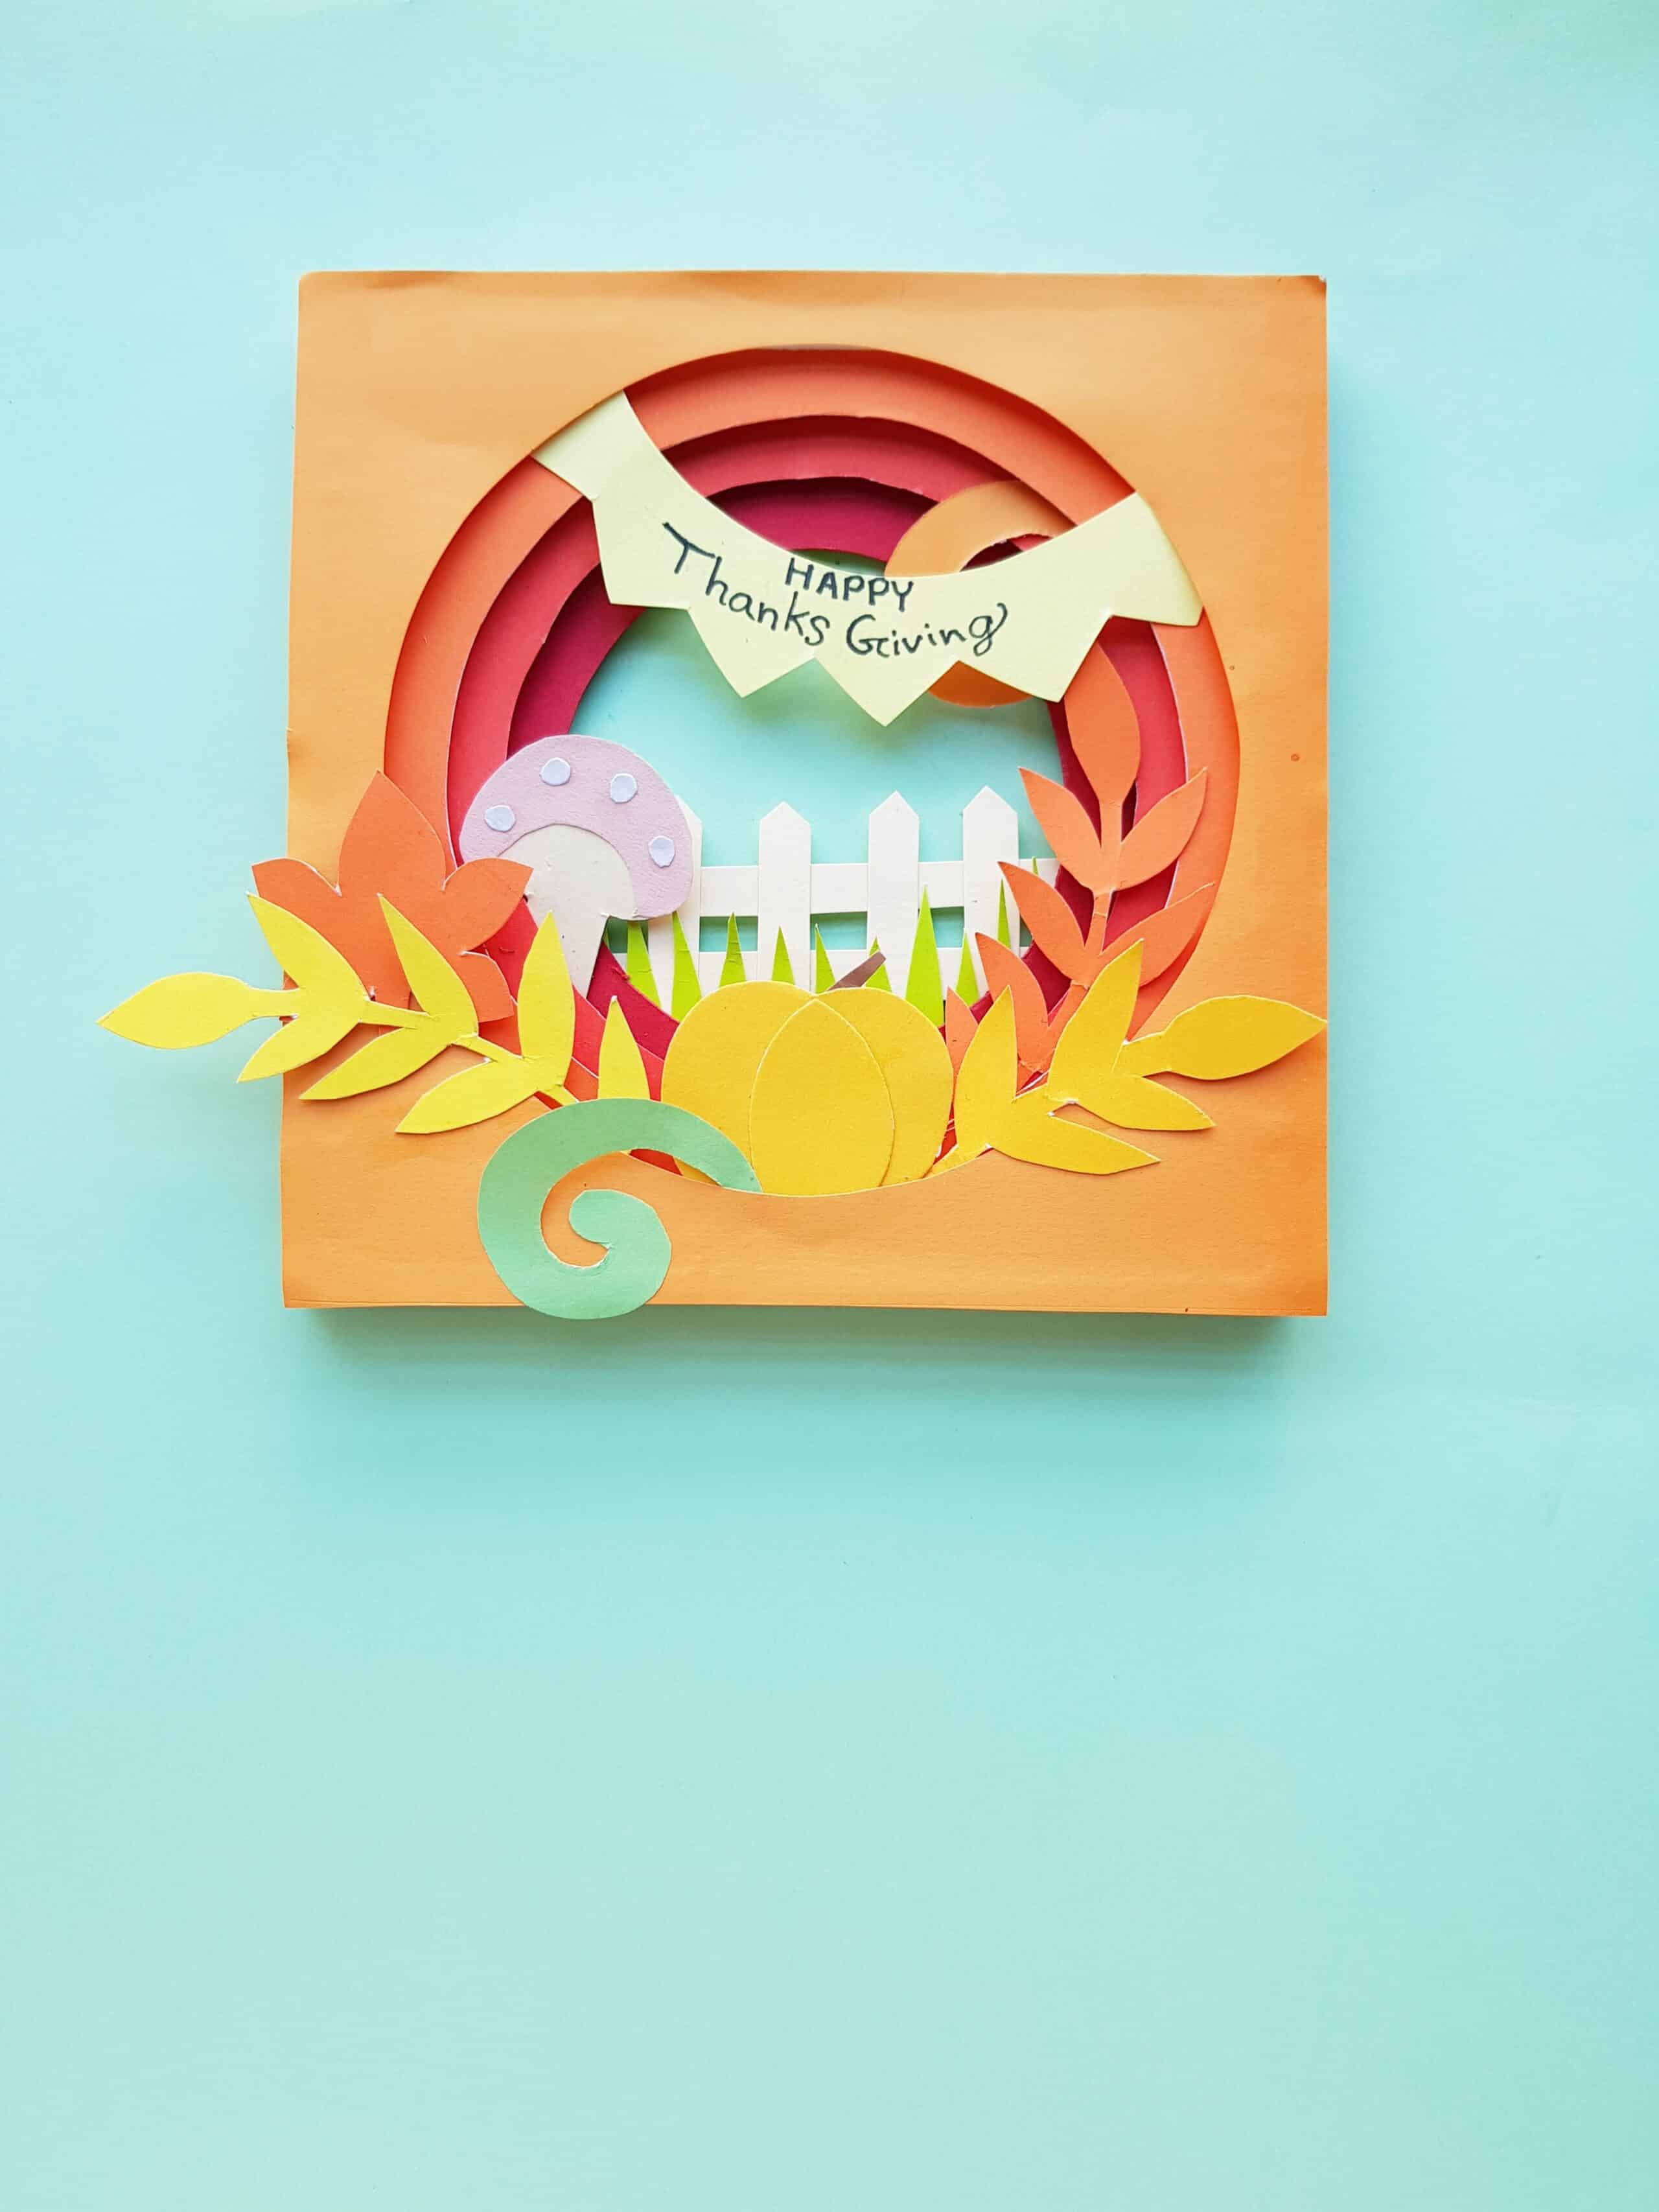
However you customize the colors of the other decorative items, I suggest that you trace/cut out the banner and fence in white or cream cardstock (to provide contrast and readability)! After you cut out the banner, write “Happy Thanksgiving,” on it!
Assembly
Time to put everything together! The first thing you are going to do is grab the final layer (the one with the smallest circular cut-out) and apply a “frame” of foam strips to it (the frame drawing on the square PDF kind of shows you what this should look like). Applying strips of craft foam board between each layer of cardstock is what gives this craft it’s 3D “pop!”
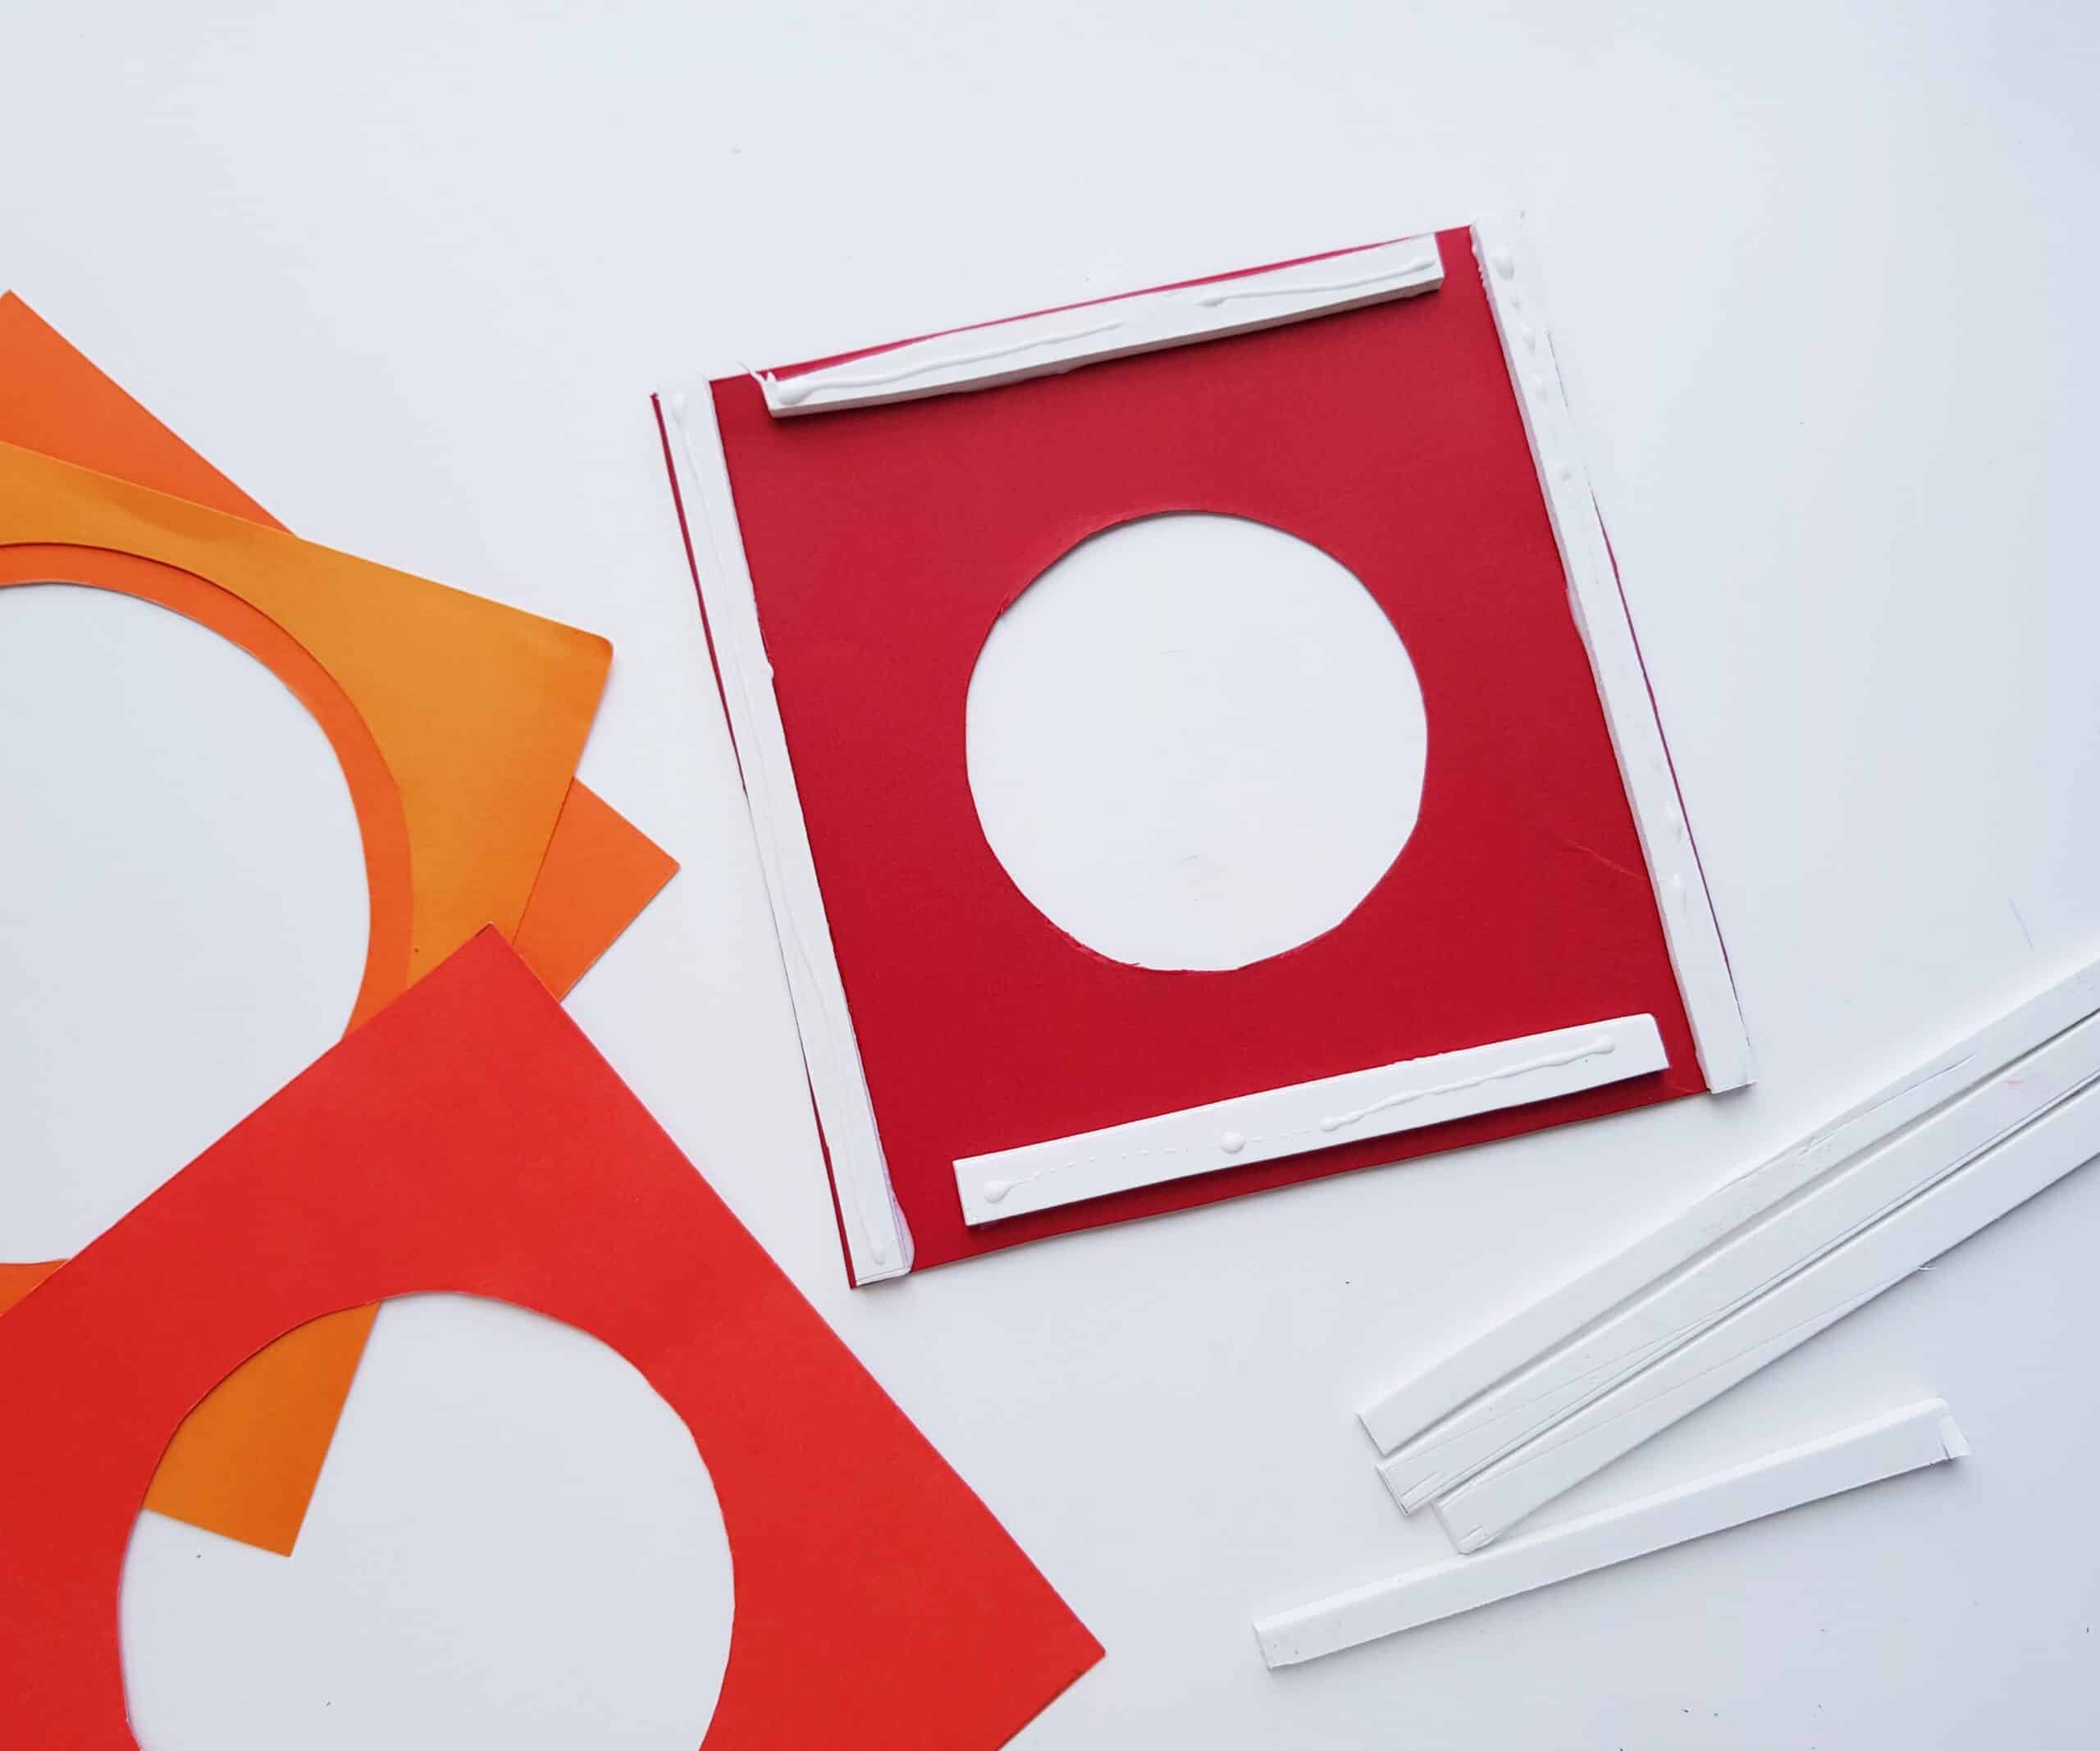
Next, flip the same layer over and grab your grass/fence cut outs.
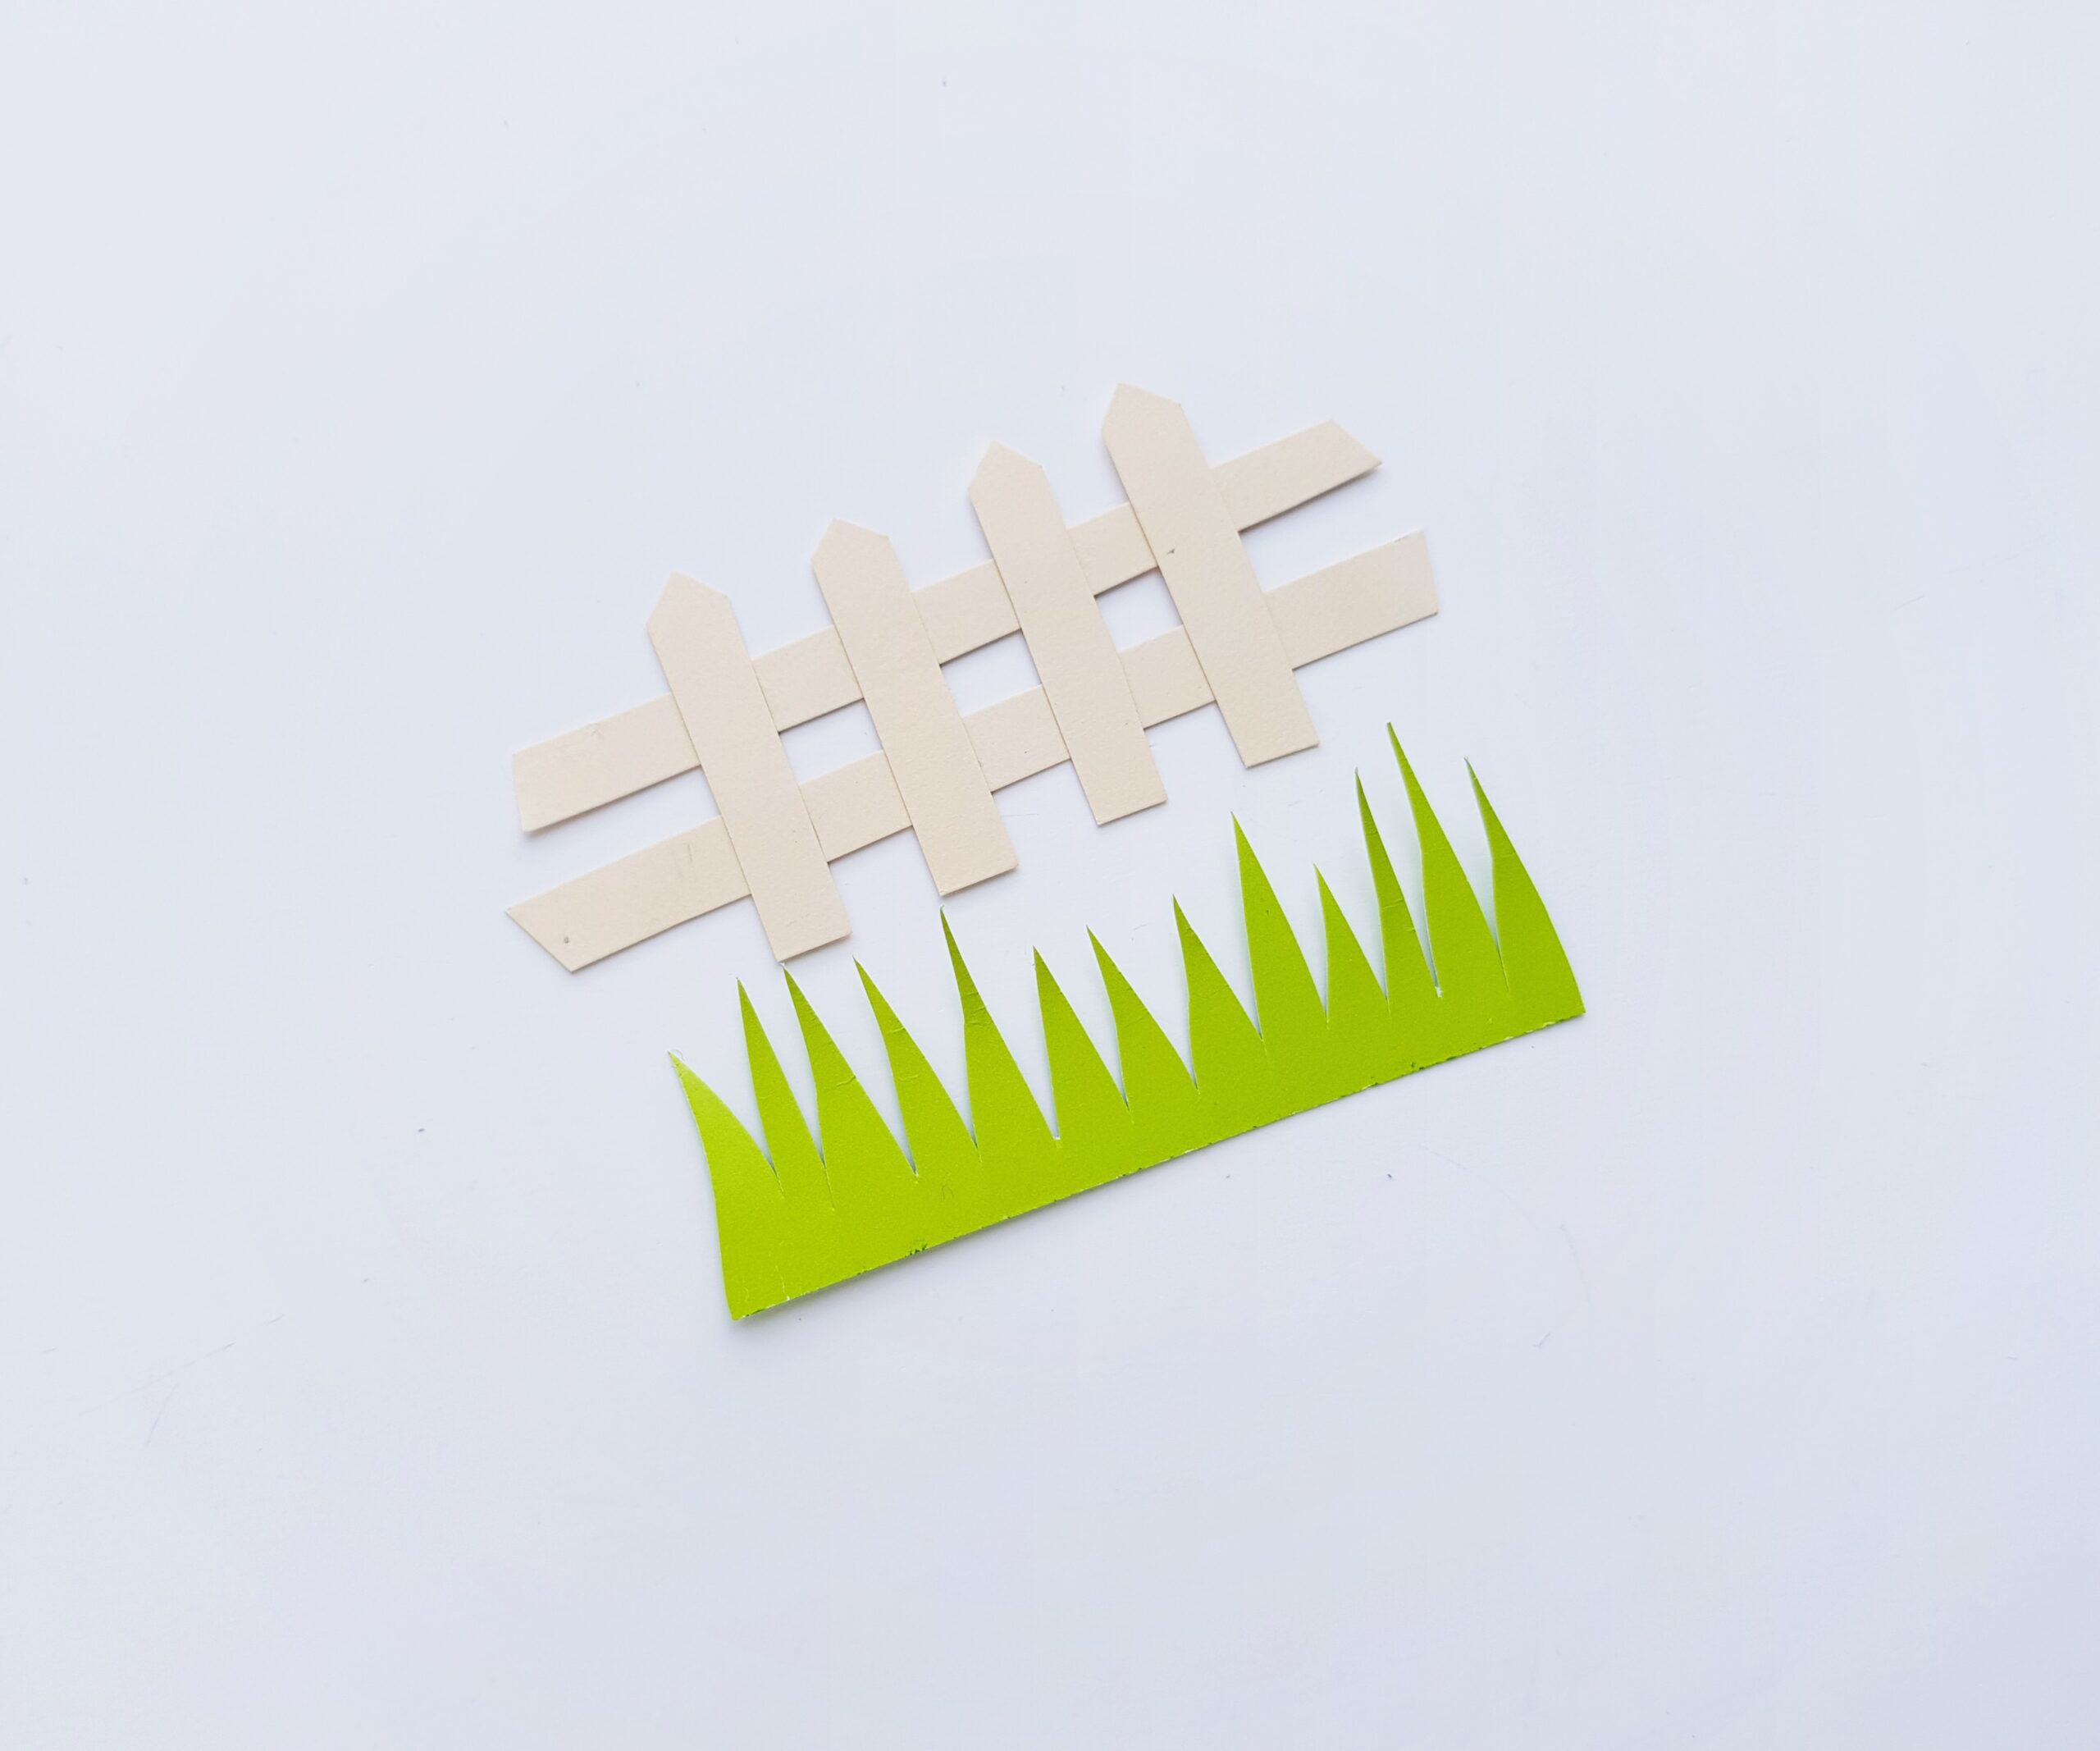
You want to glue the grass and fence to the back of this layer, so that it crosses over hole, as pictured:

Once you’ve applied the foam and grass, flip the layer back over (the side with the foam strips should be facing up).
Continue to build the layers of the card. To do this, you’ll simply apply a frame of craft foam between each layer of card stock. You should end up with something like this:

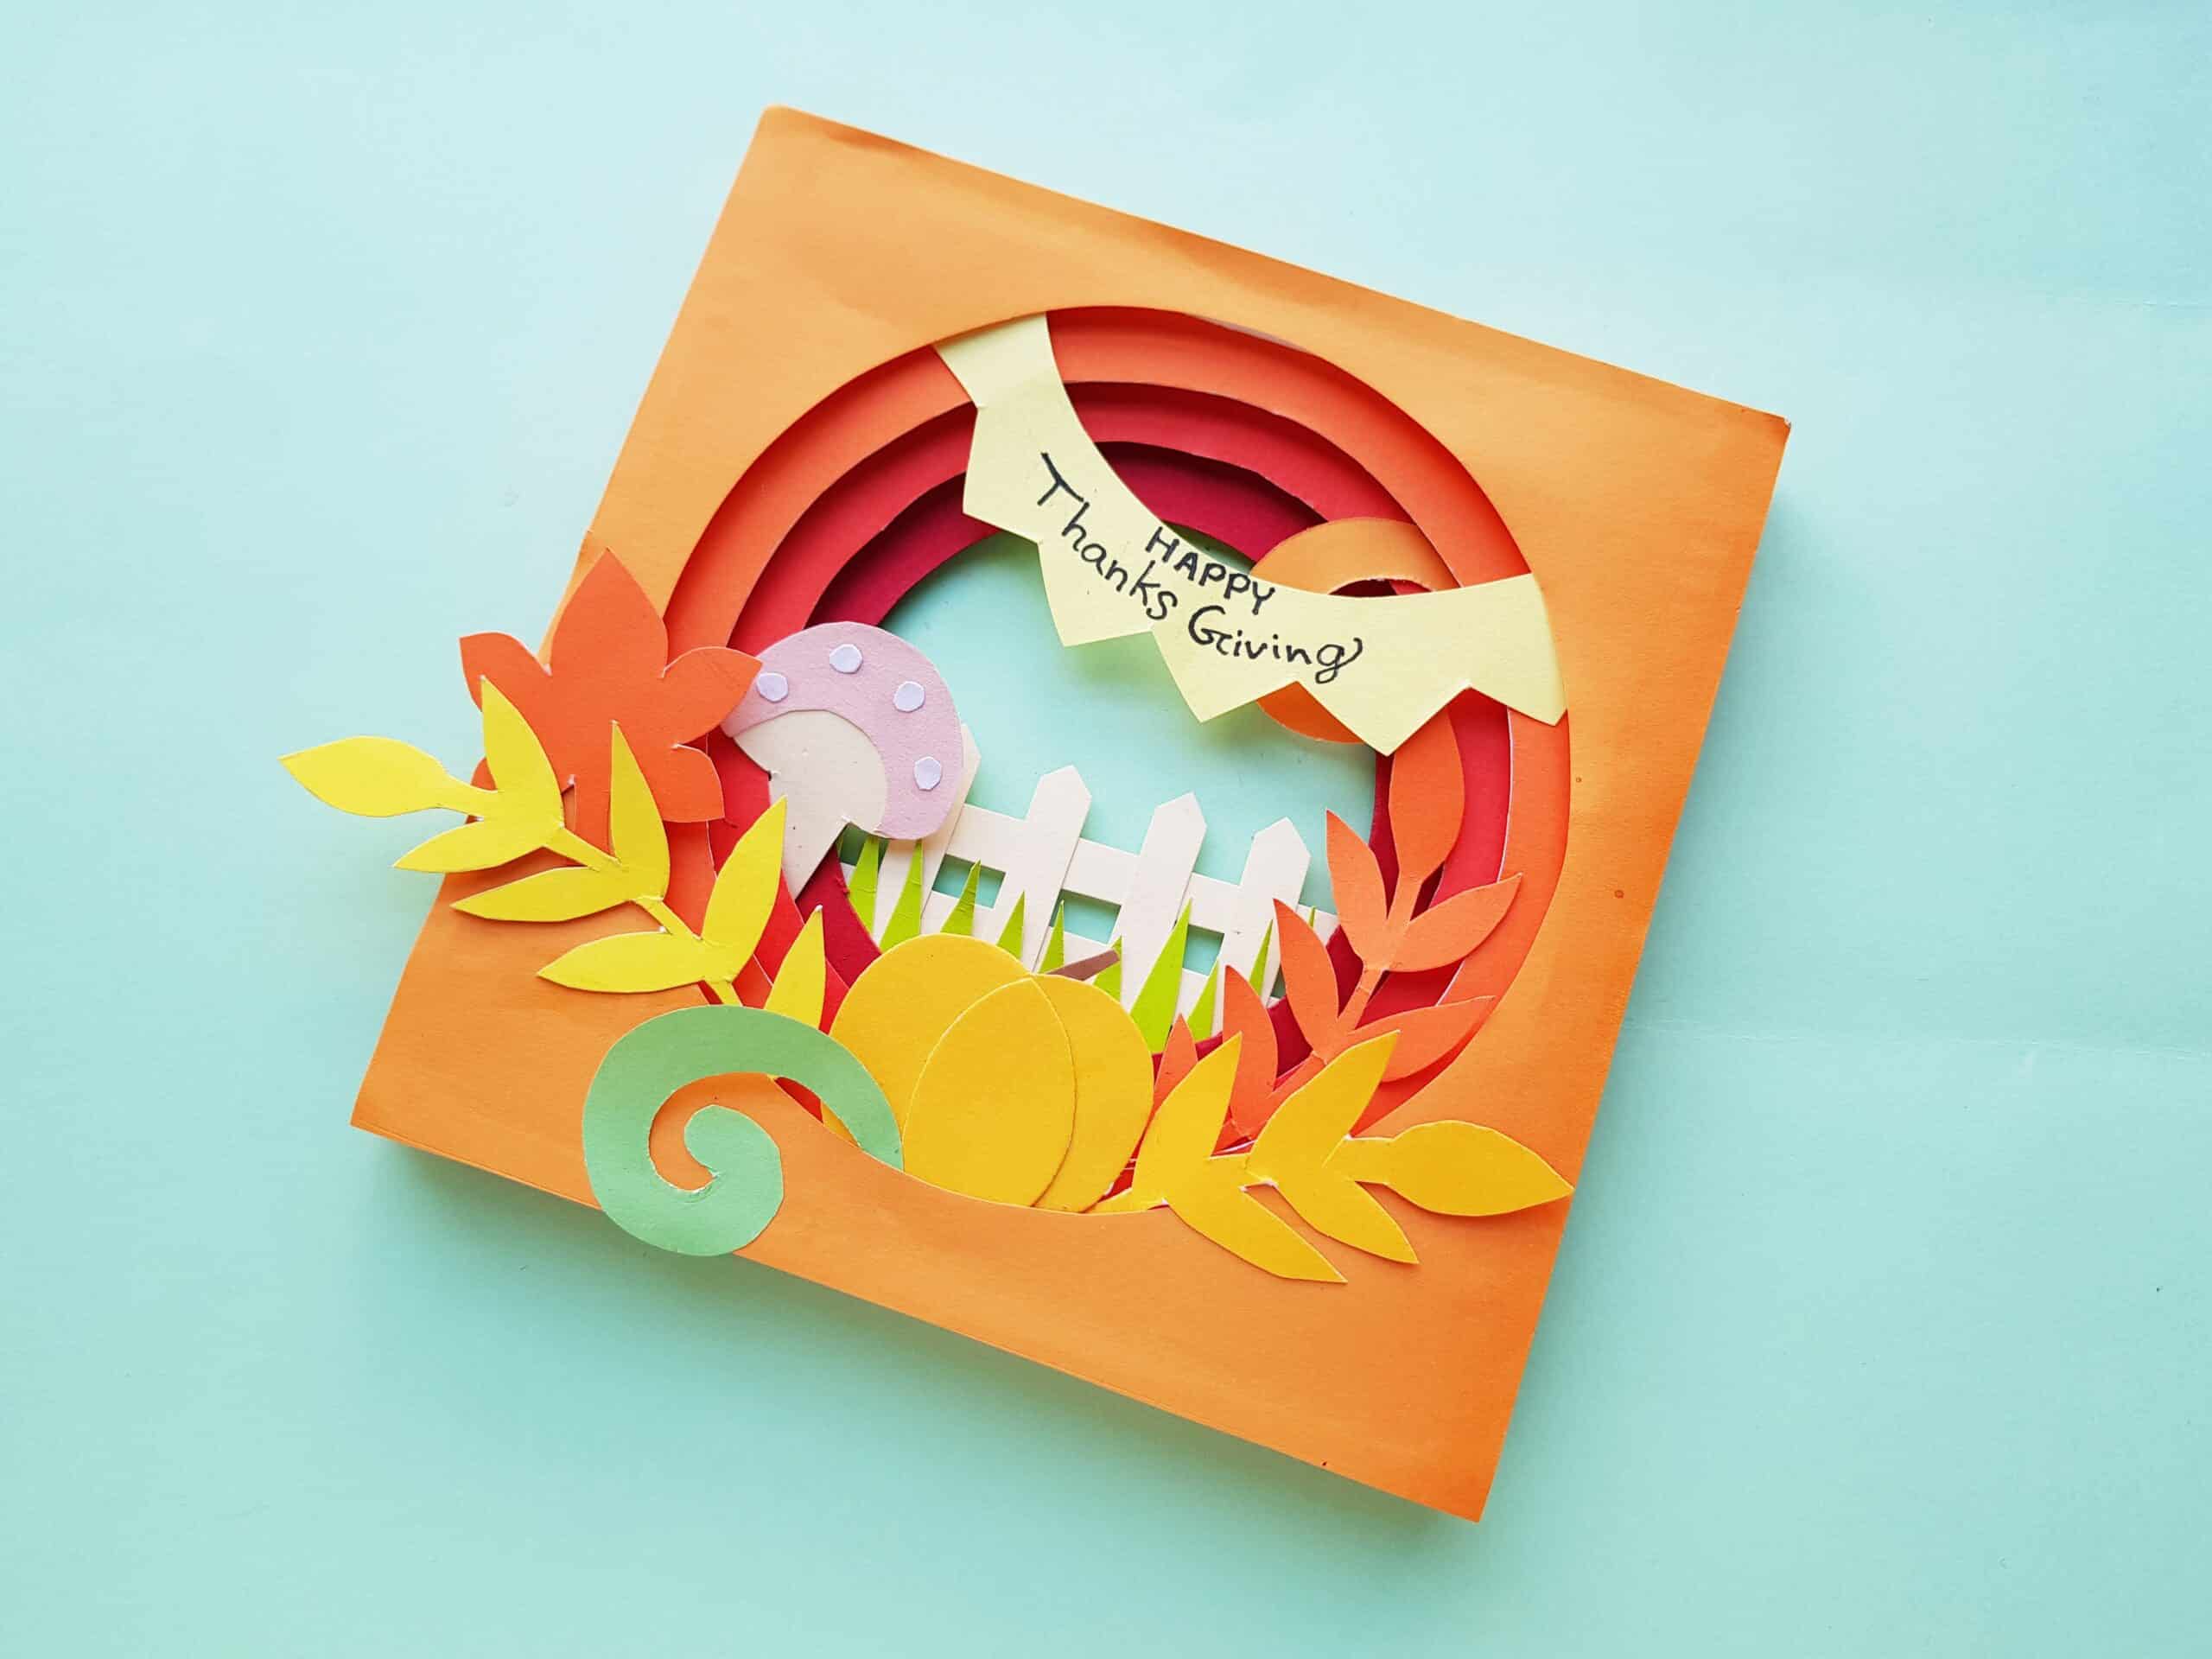
Isn’t the 3D effect cool?! To make it “pop” even more, you’ll add the final decorative touches to some of the different layers you’ve created.
Final Touches
To finish your 3D Thanksgiving Card, take the decorative items that you cut out and arrange/glue them to various layers of the card. The more you vary which layers you attach the items to, the more three dimensional your end-result will look!
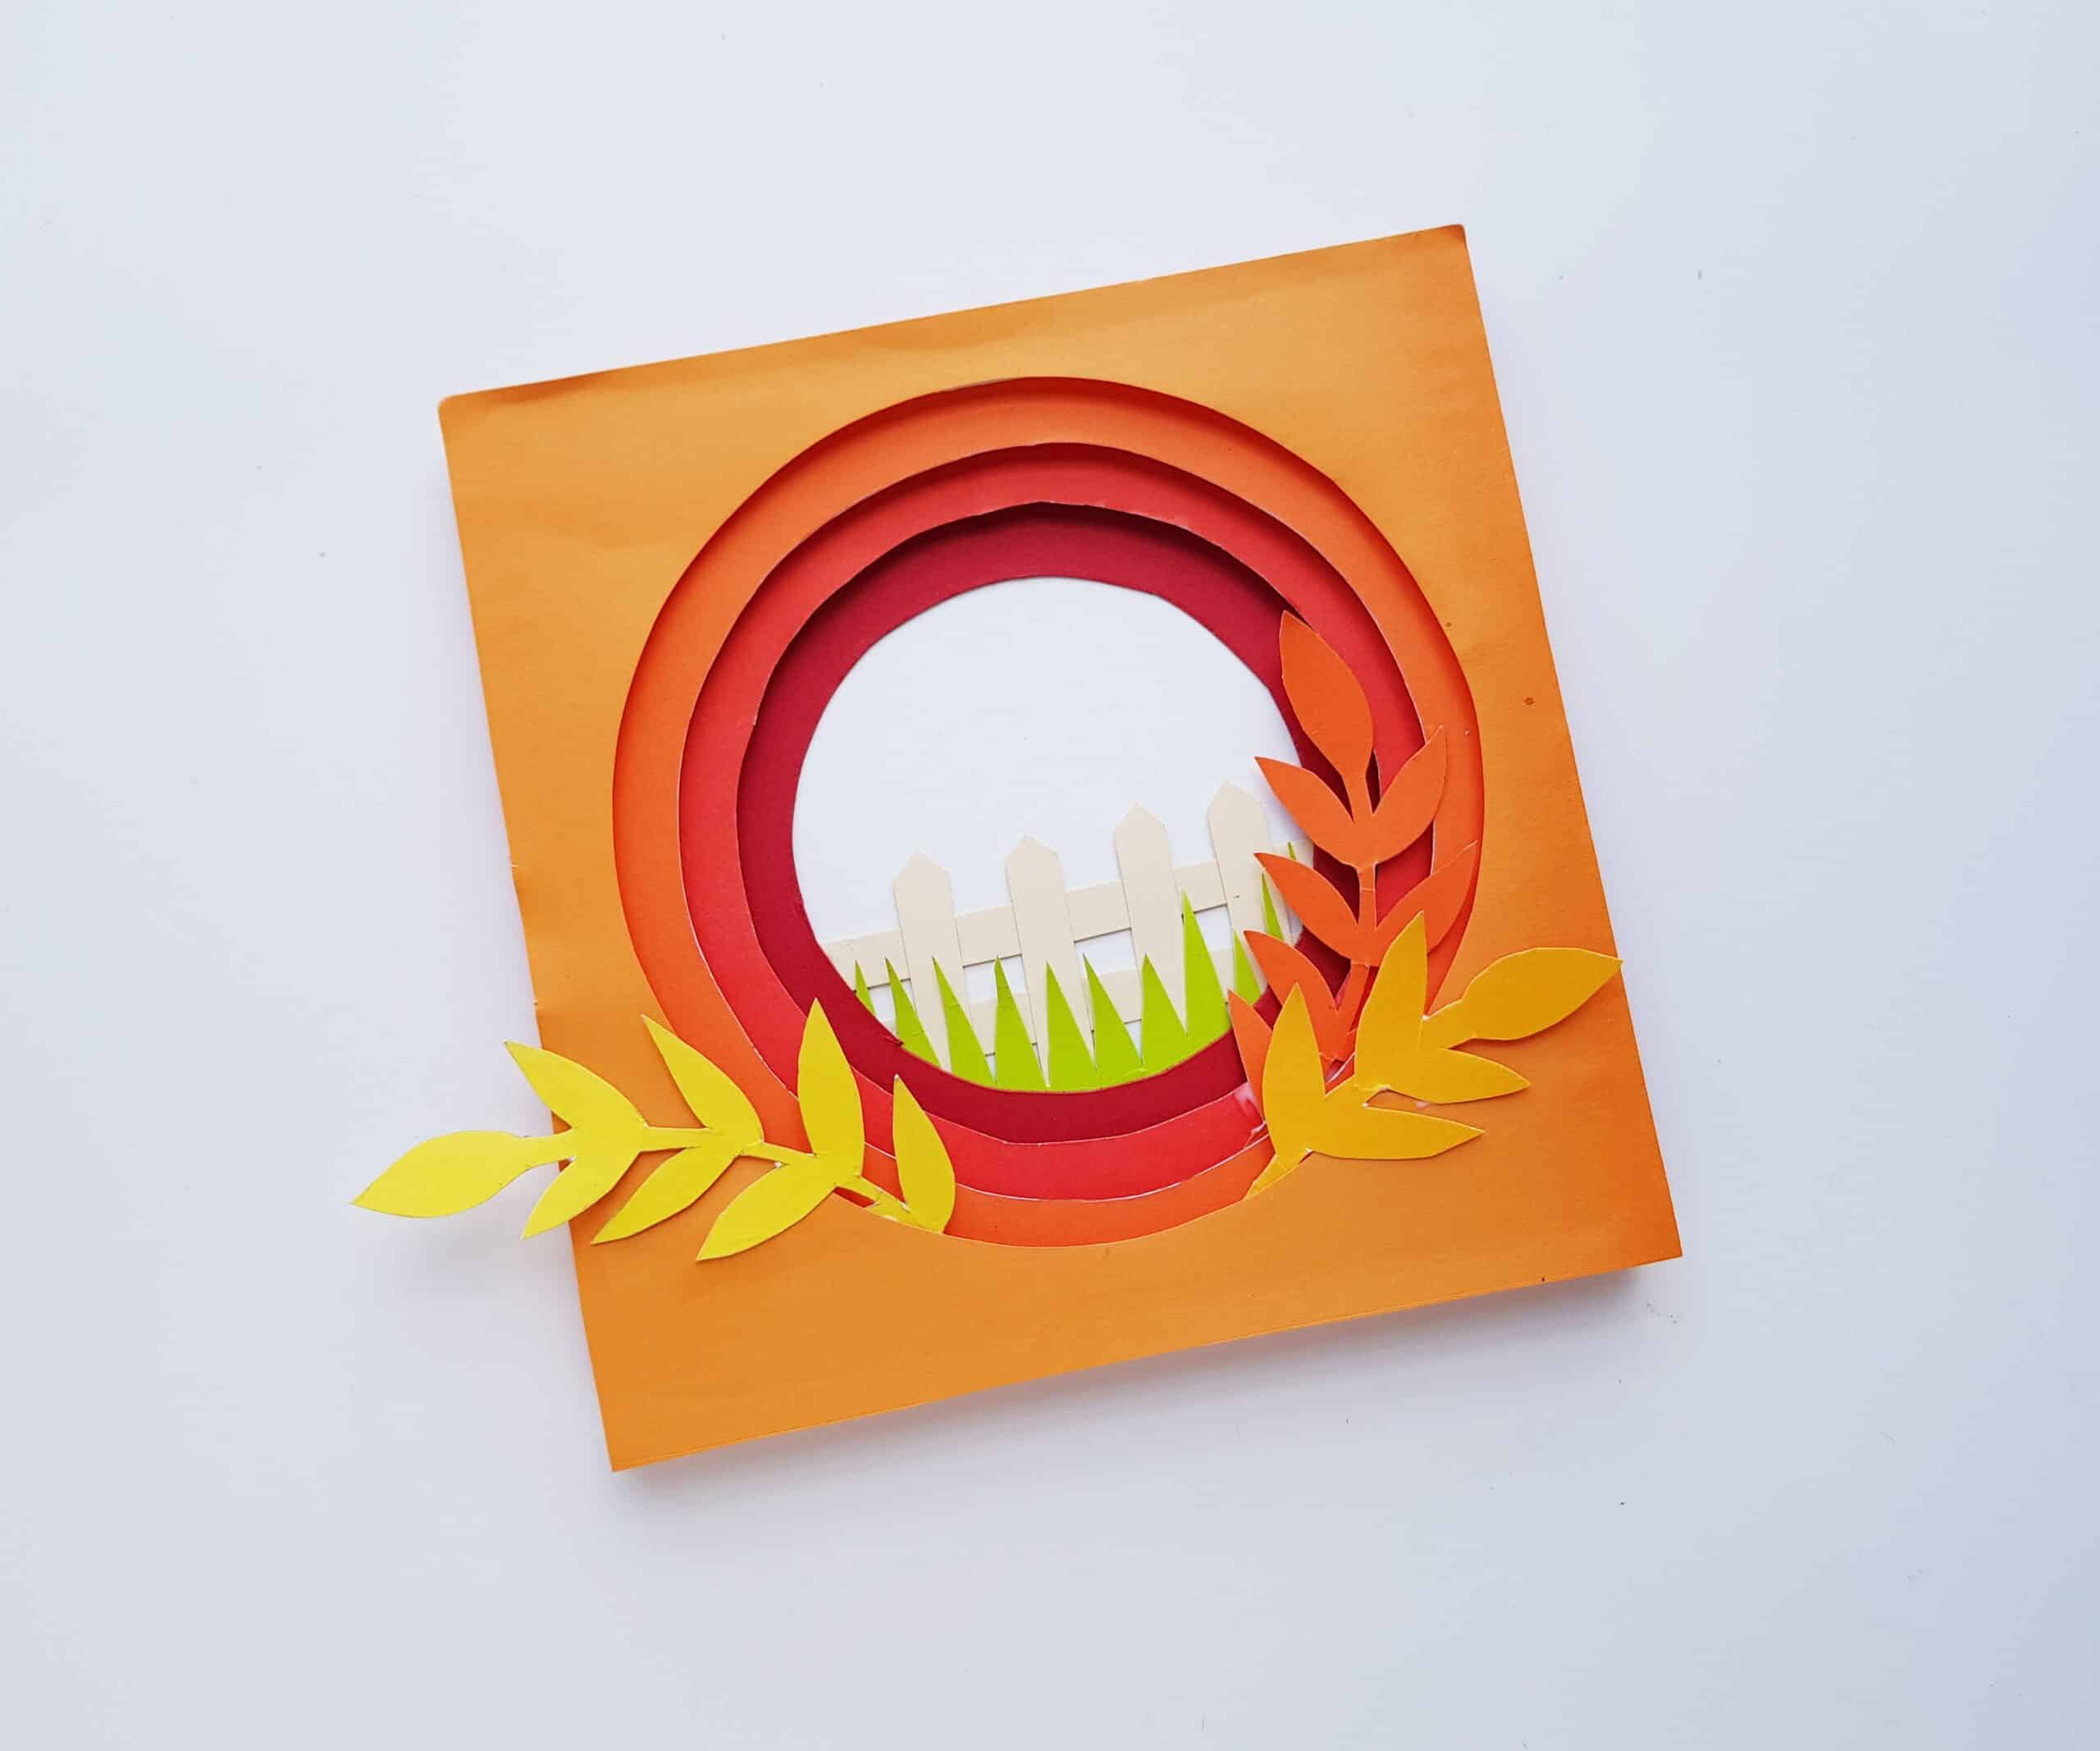
Lastly, attach your pumpkin (I suggest centering it in the front of the card). Glue your “Happy Thanksgiving!” banner between the first and second layer of the card (as shown).
We hope you enjoy making this craft and displaying (or gifting) the finished product! Keep an eye out on our site this month for more fun Thanksgiving crafts and ideas to incorporate into your homeschool! And don’t forget the downloadable templates that you need for this craft (they are currently free in our online store!) Grab them by clicking the link below.
Click Here to Get the Templates for This Craft
Do you and your family enjoy Thanksgiving crafts? What is one of your favorite creative things to do in preparation for this holiday?