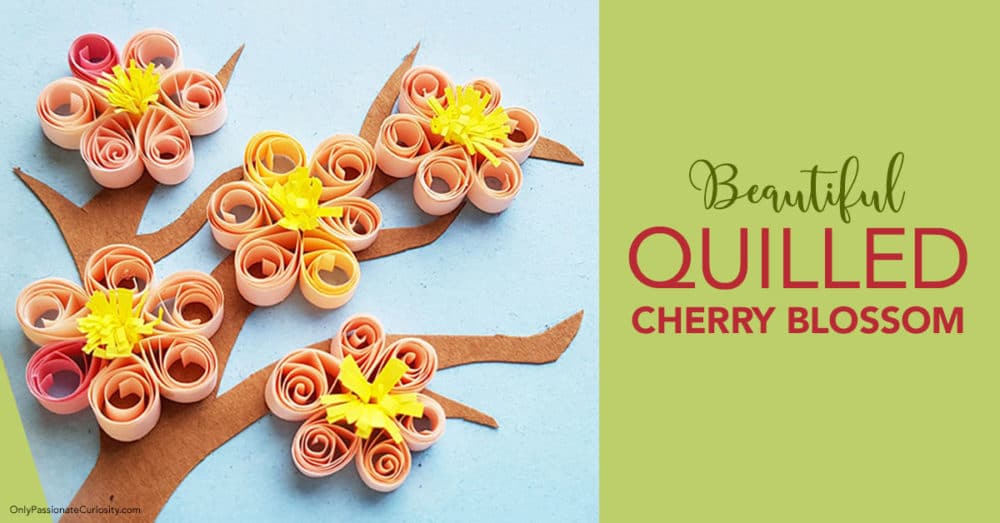
Beautiful Quilled Cherry Blossoms

Looking for a fun craft that you can do with kids of all ages? You should try paper quilling! The art of paper quilling produces beautiful and intricate rolls of paper which can be arranged into different images. However, while quilling can produce some complicated-looking designs, it’s not hard at all to do. Kids of any age can learn how to do paper quilling crafts with a little bit of guidance! Today, we’re bringing you this Beautiful Quilled Cherry Blossom Craft.
What You’ll Need:
- paper quilling strips
- brown craft paper
- slotted quilling tool
- scissors
- craft glue
- quilling tweezers (optional but helpful)
How to Make It:
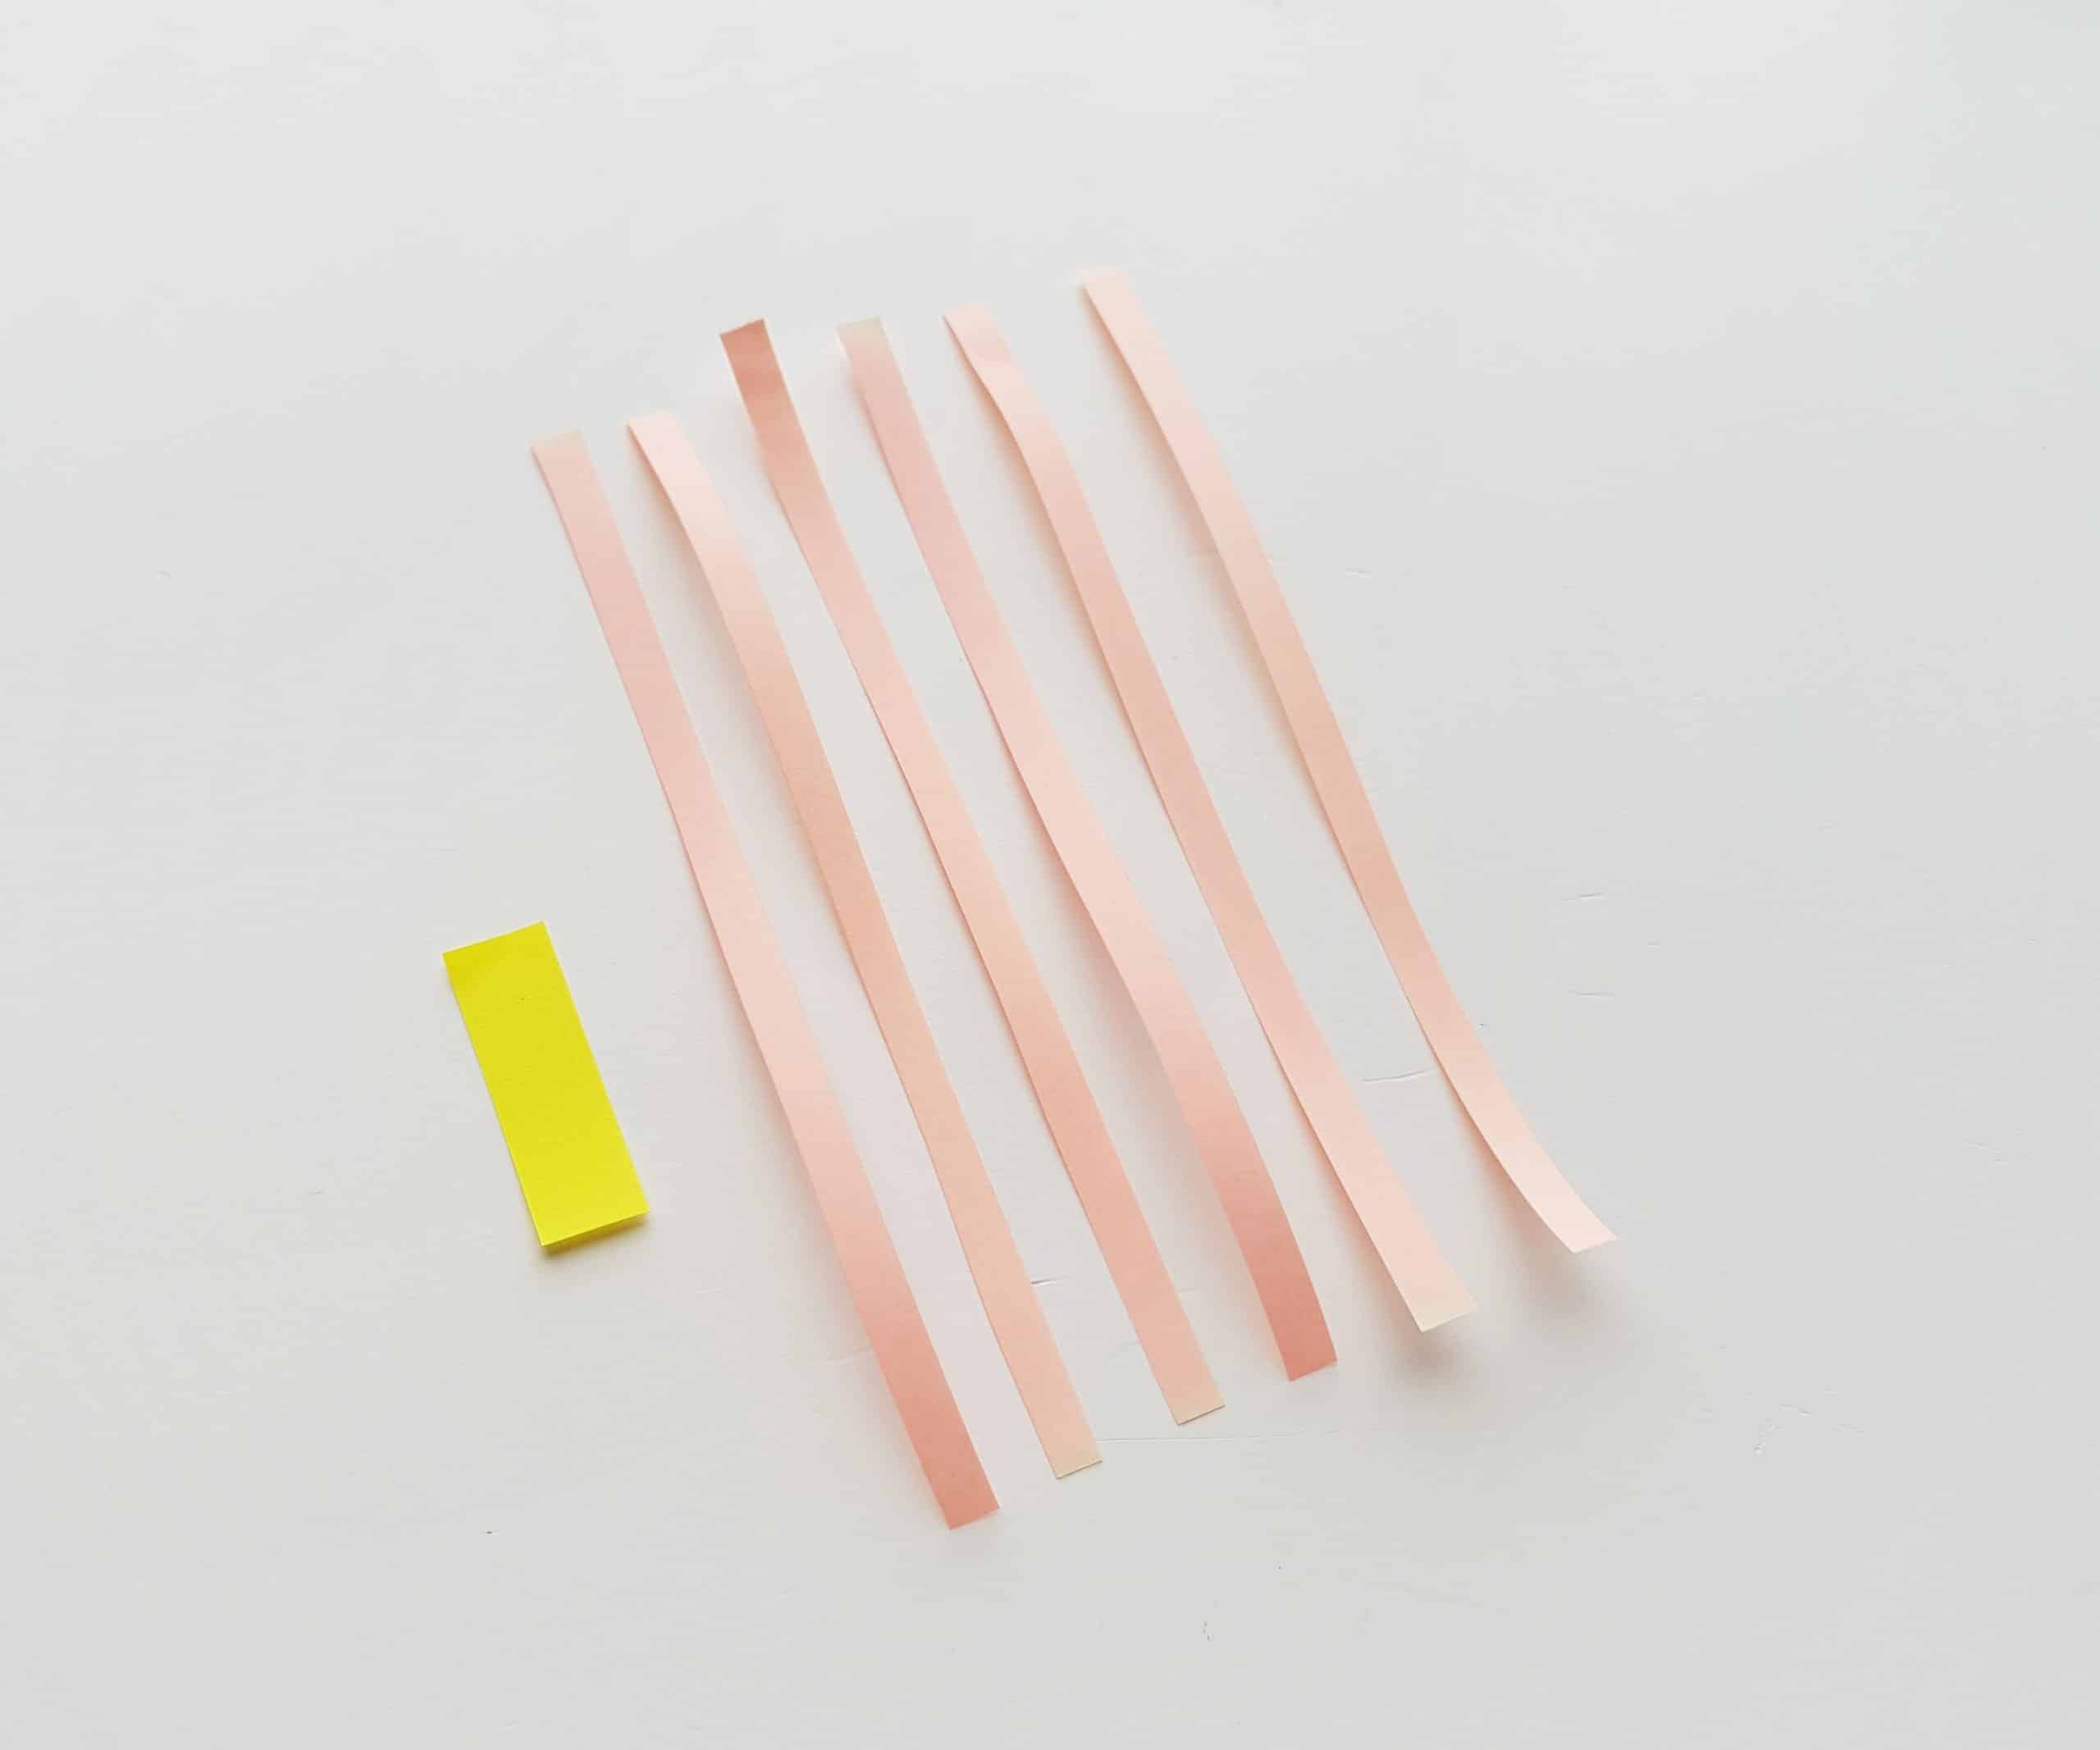
To start out with this craft, choose quilling strips for your cherry blossom blooms: any sort of pink shade (or a mixture of pink and white) works perfectly! Select 6 thin quilling strips of any length you want (I used 15 cm long strips). You will also want a 4 or 5 cm long yellow quilling strip. However, the thickness of the yellow strip should be double that of the pink ones, as shown below.
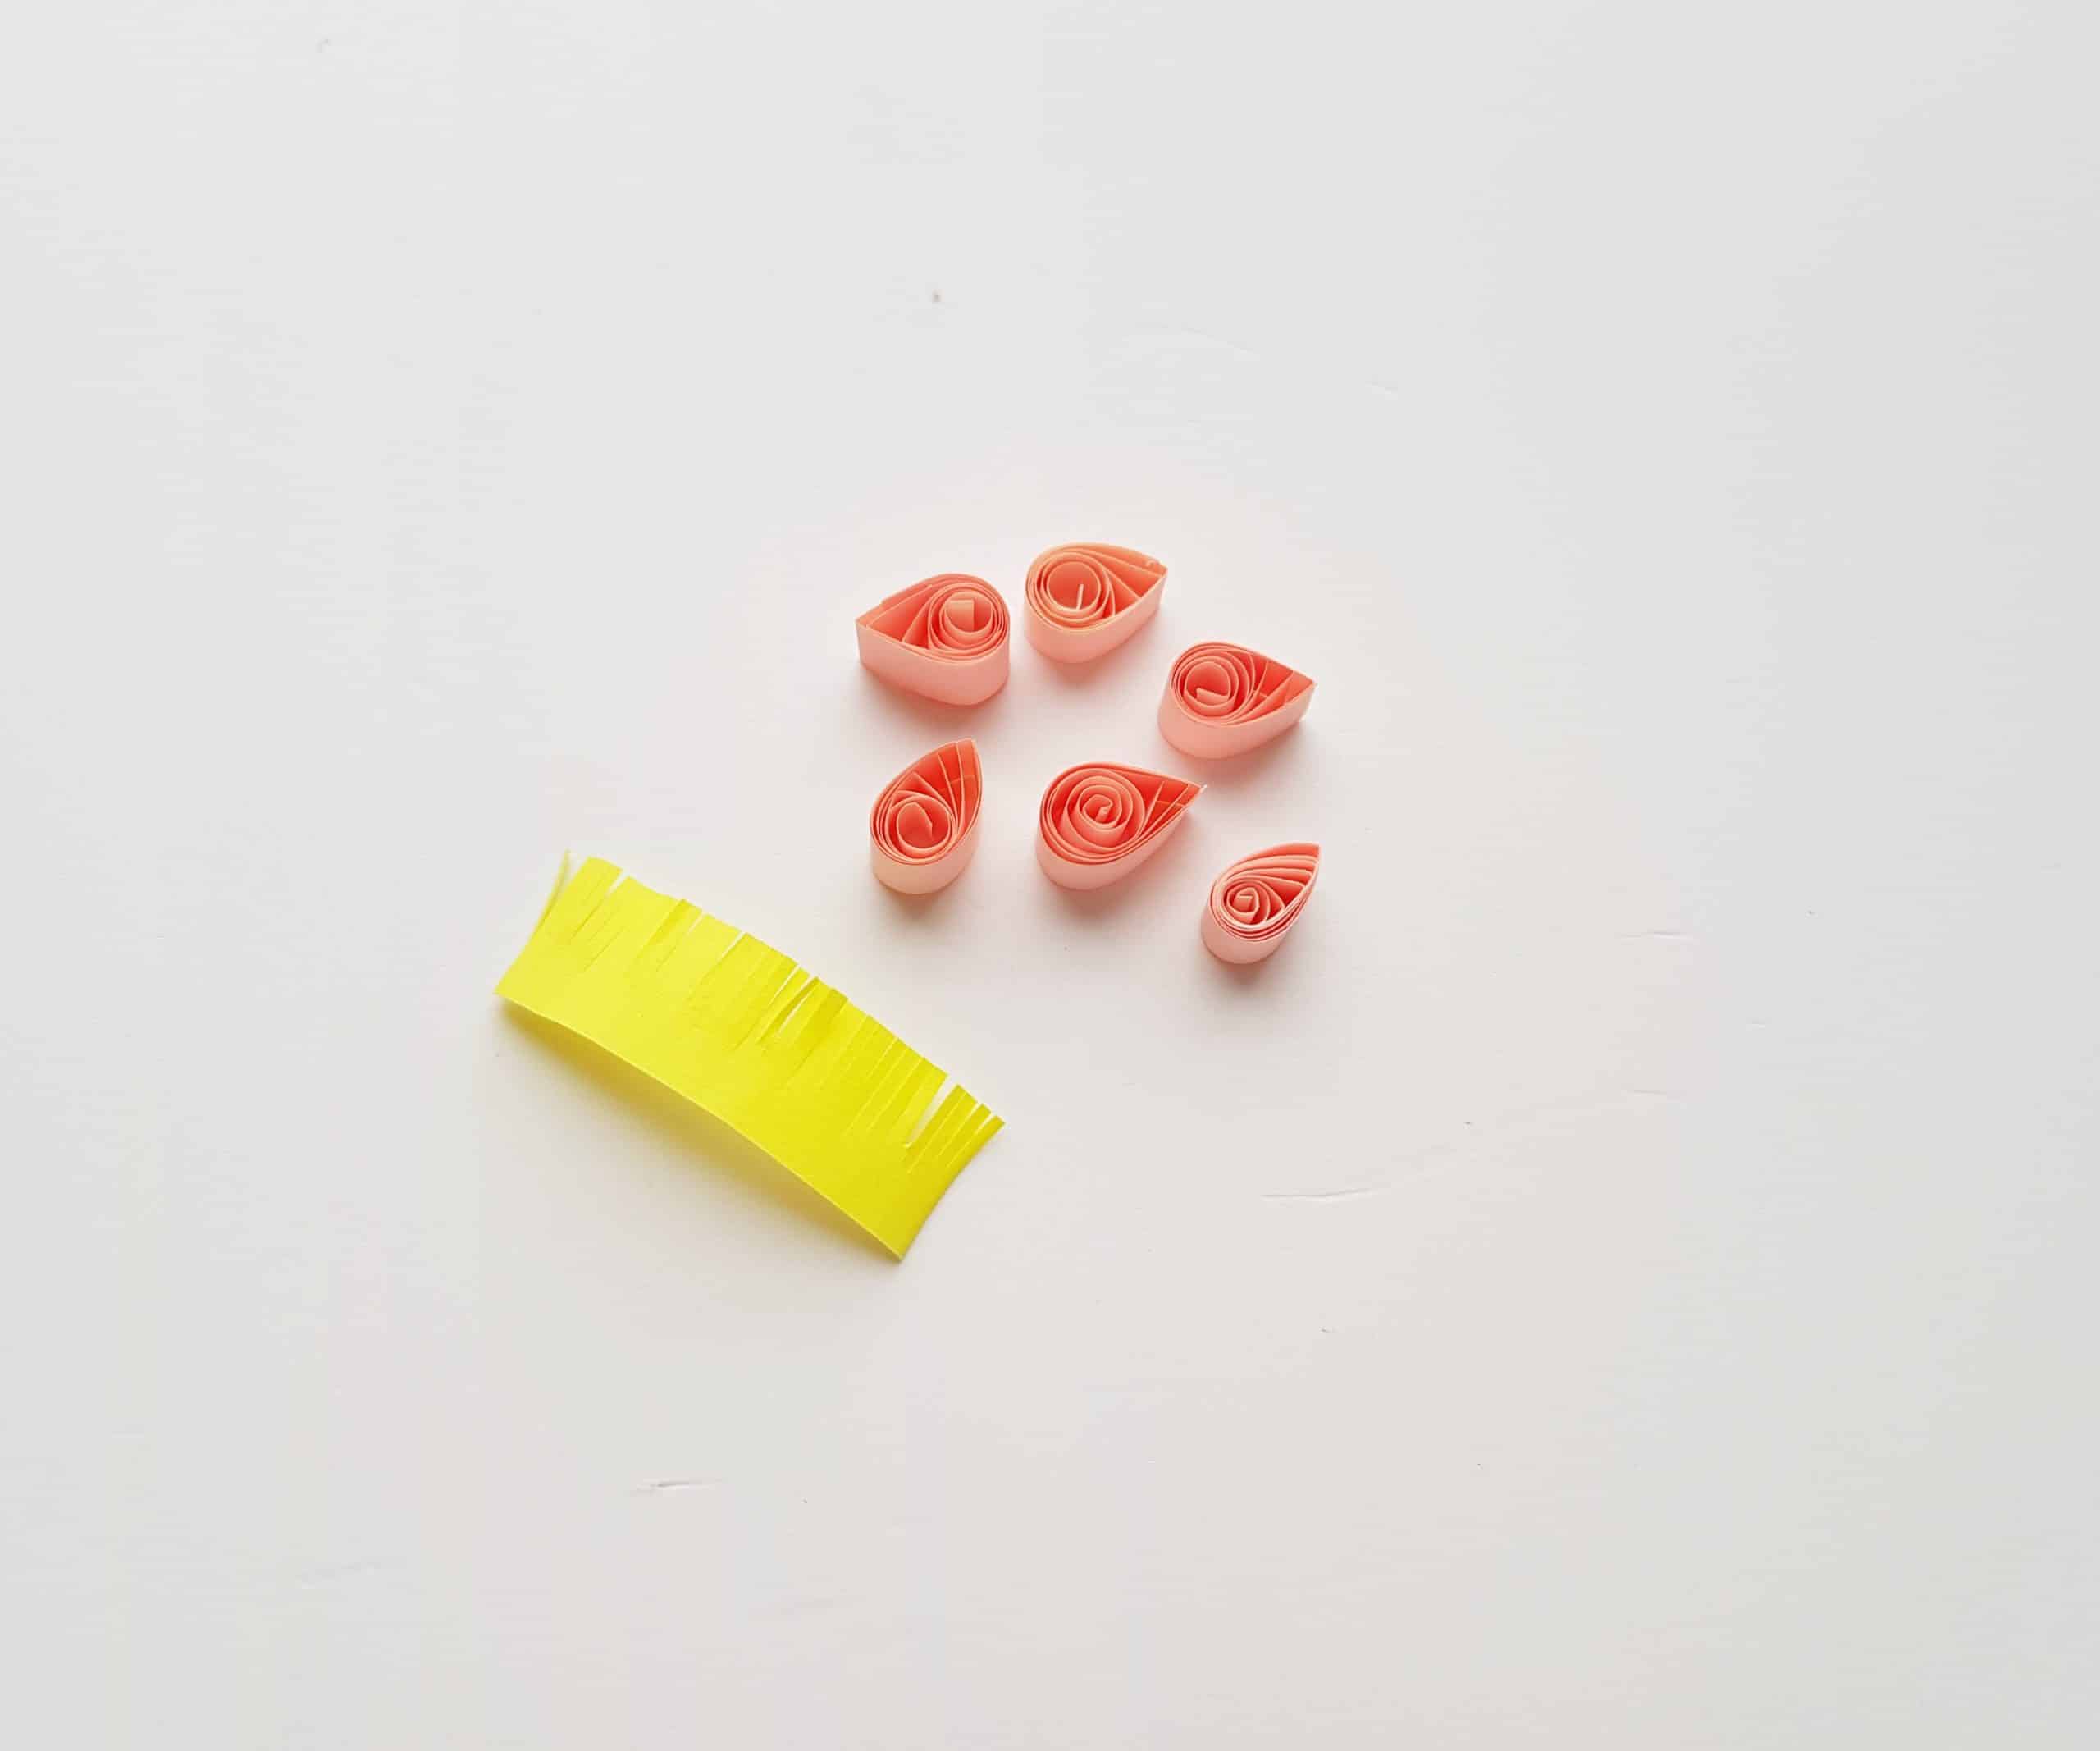
 Using the quilling tool, coil each of the pink quilling strips. Then create a teardrop shape by folding one of the open ends over the round shape and pinching it together on one side (you can use the quilling tweezers to do this.)
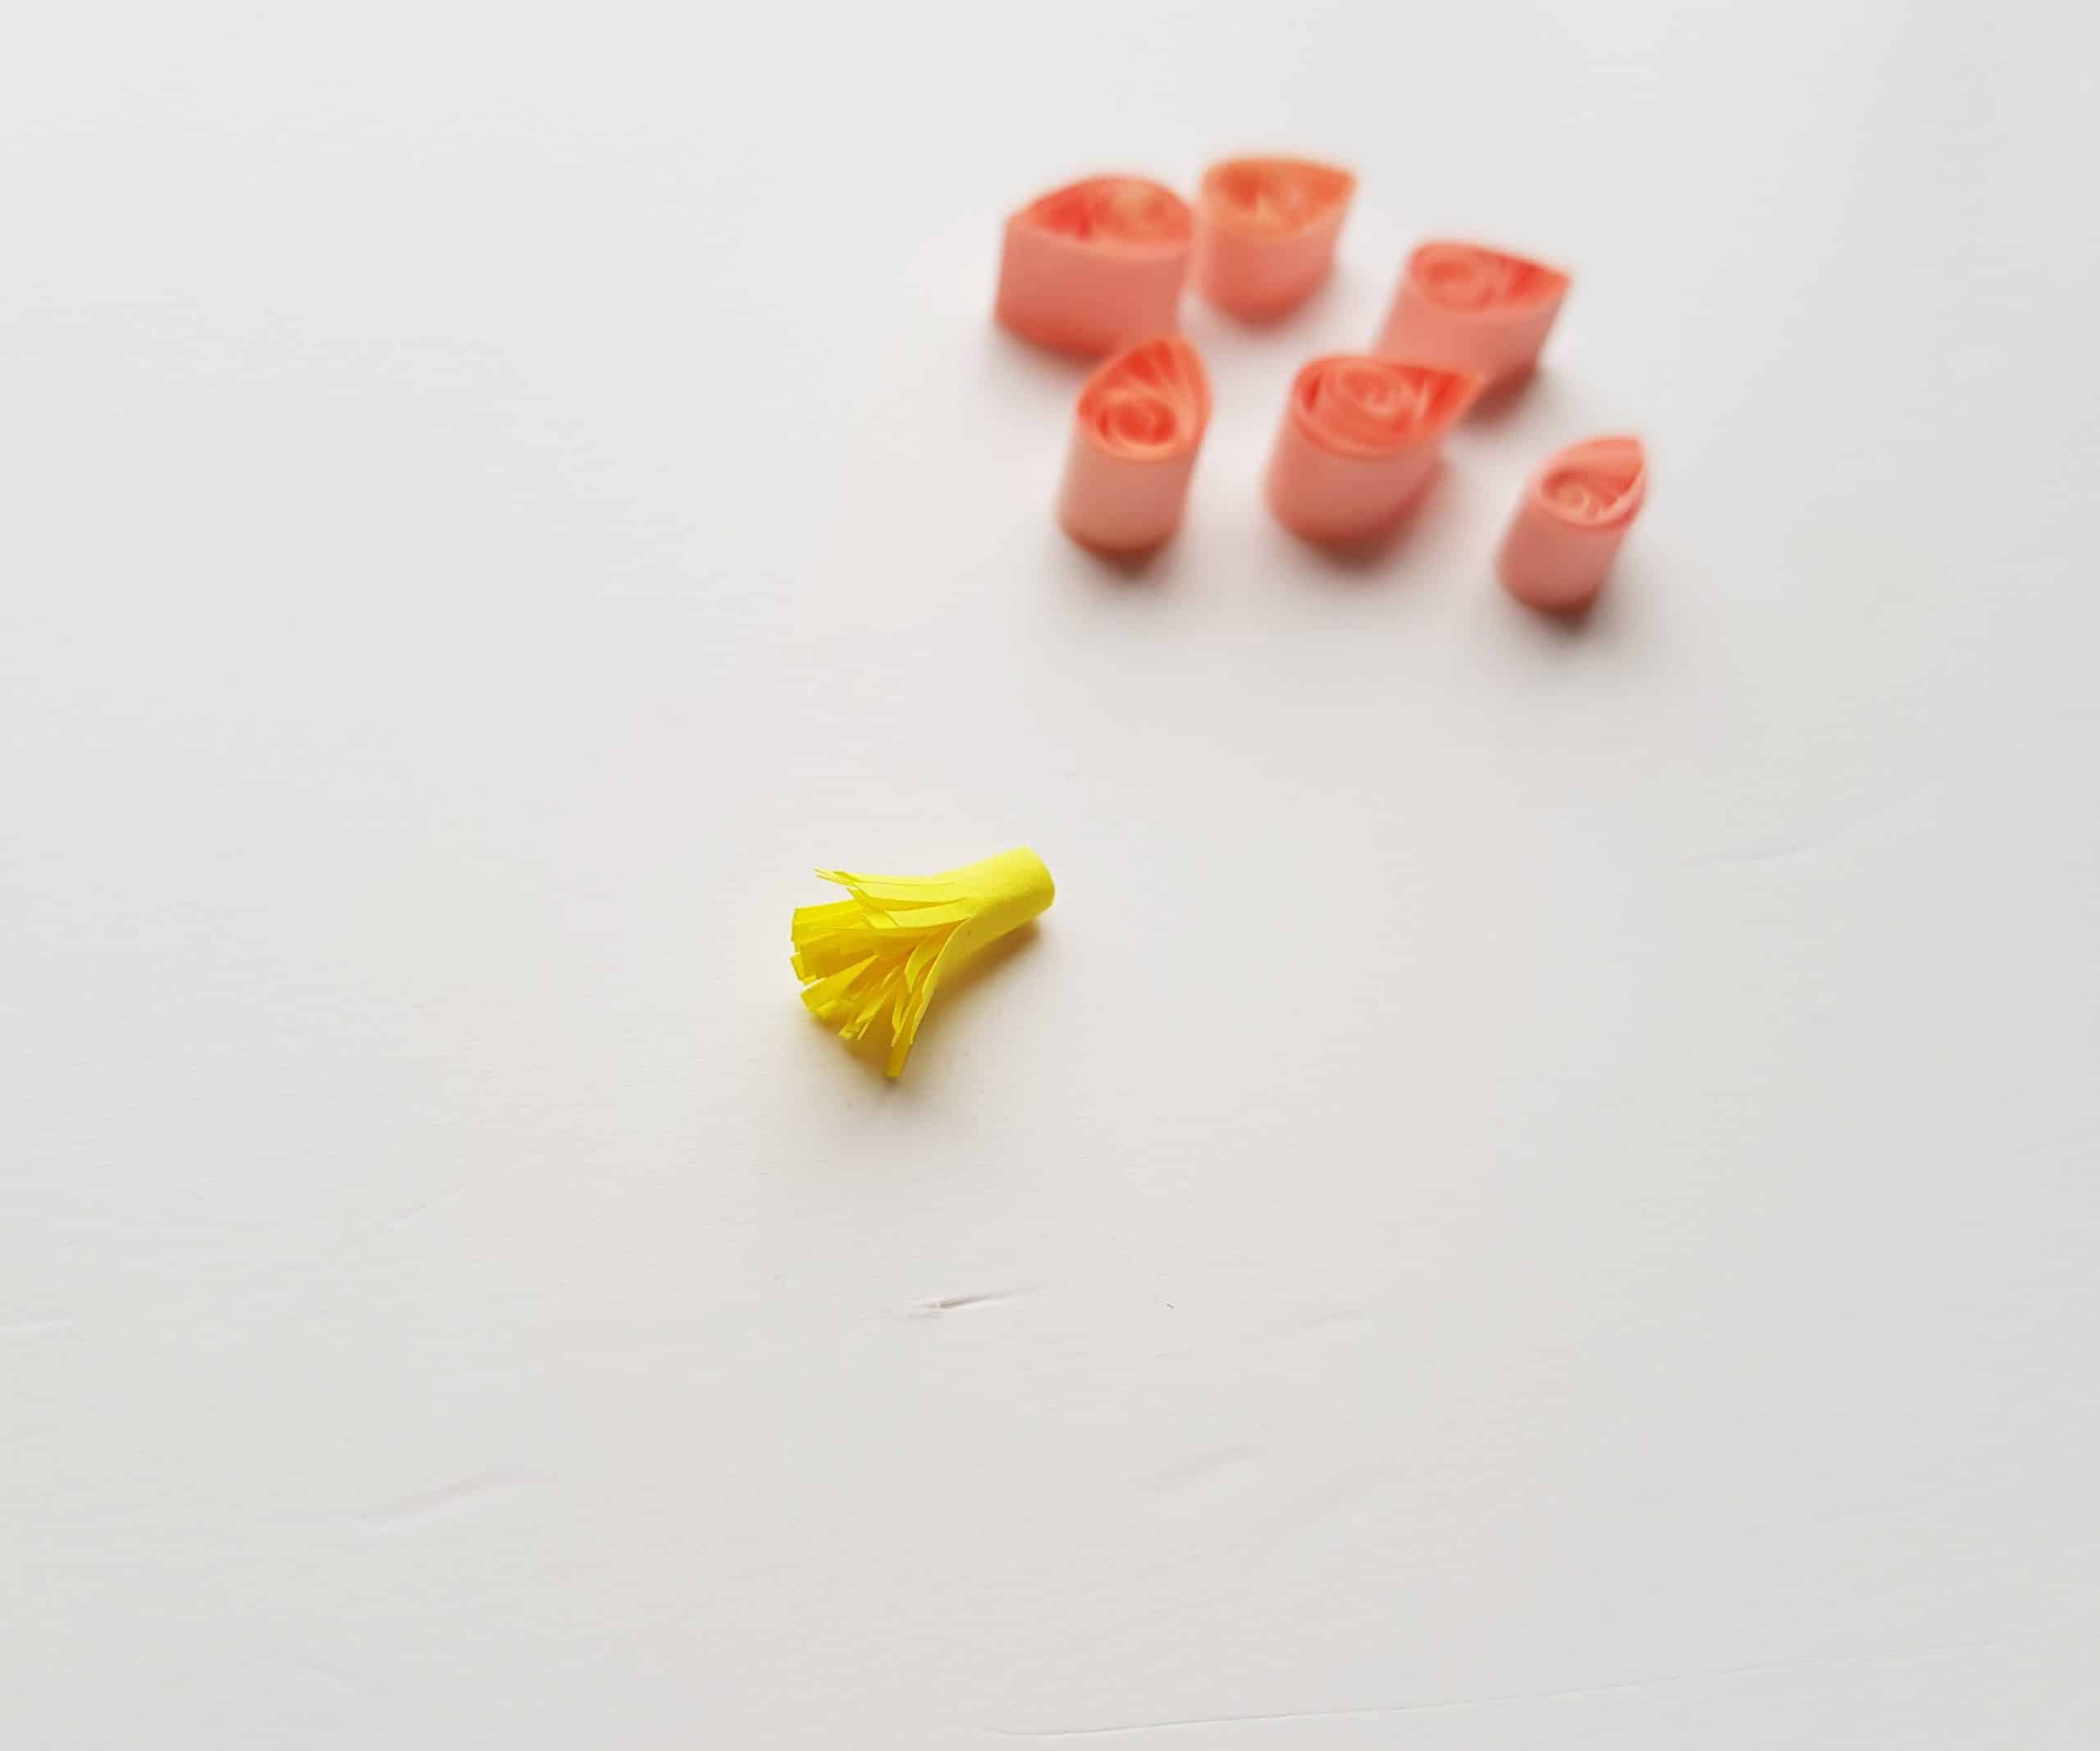
After you’ve created six teardrop shapes, you’ll take the yellow strip and cut a thin fringe along one side.
Next, roll up the yellow-fringed strip and apply glue at the end of the roll to secure it, as shown.
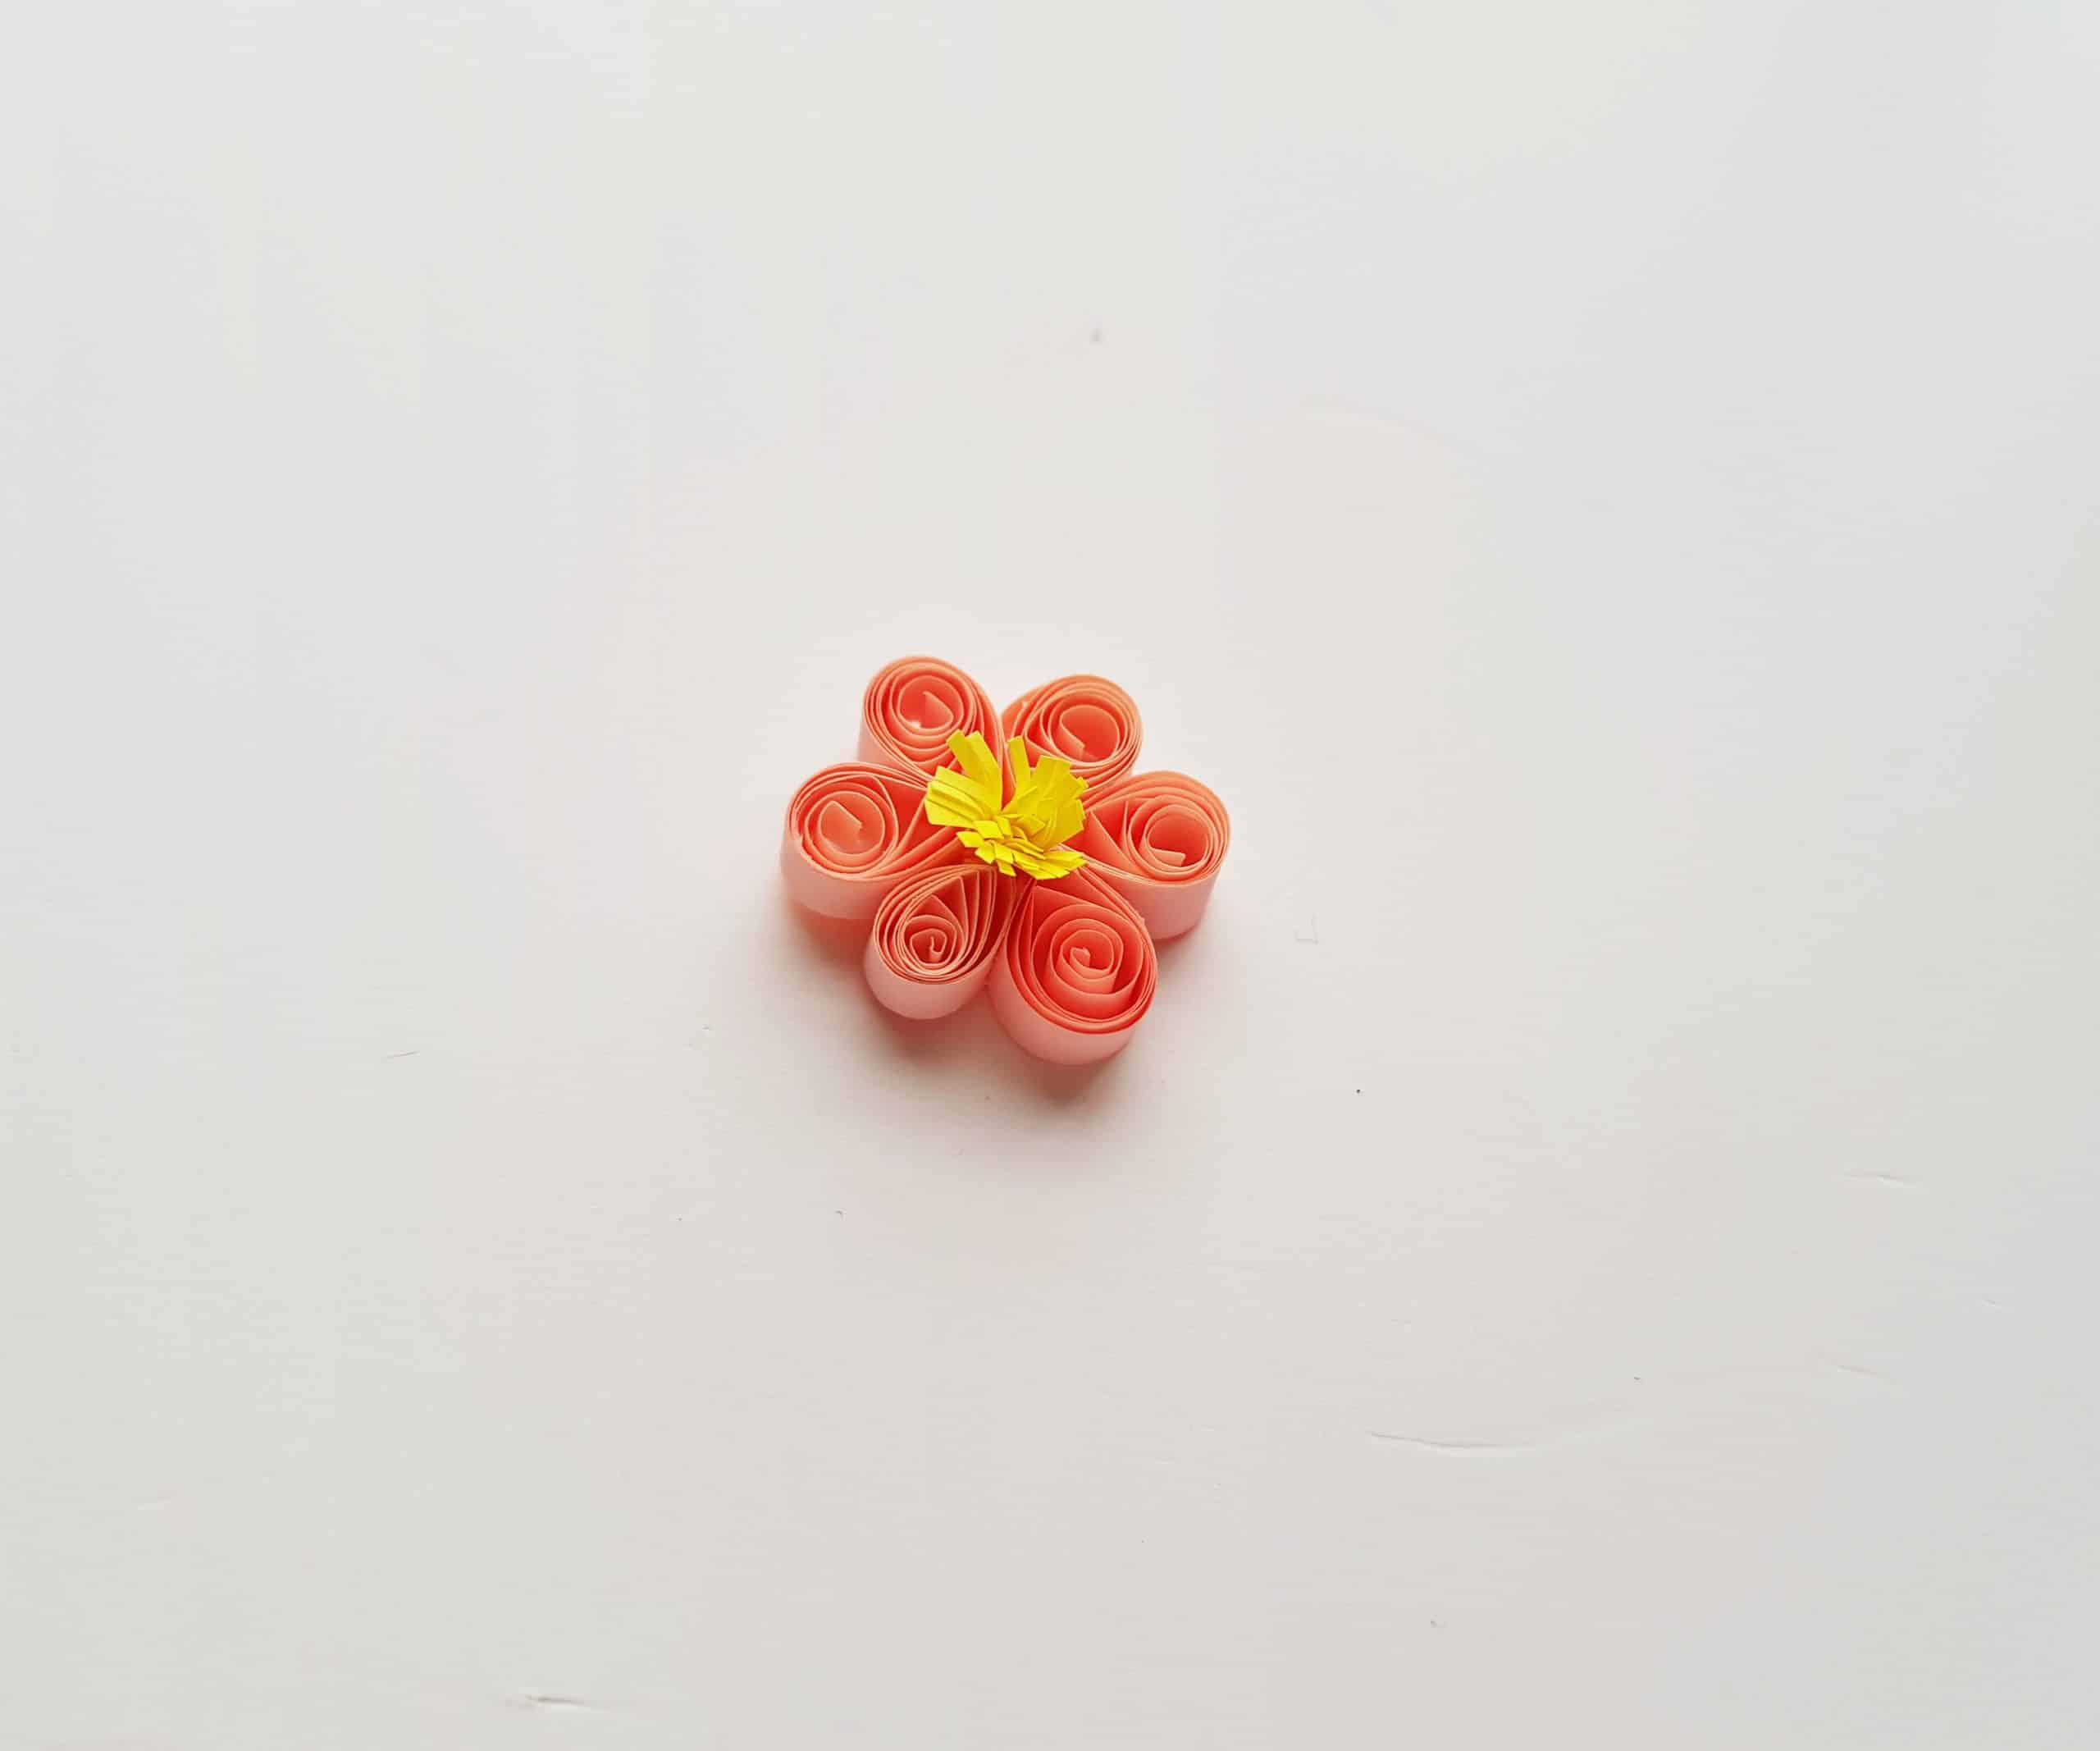
 Now it’s time to assemble your cherry blossom! Place the 6 teardrop shapes together form a cherry blossom flower, with the pointed tips facing inward. Use a bit of glue between each quilled shape and press them together for a few moments. Then carefully place a dot of glue in the center and press the yellow fringed roll of paper into the center of the quilled cherry blossom flower.
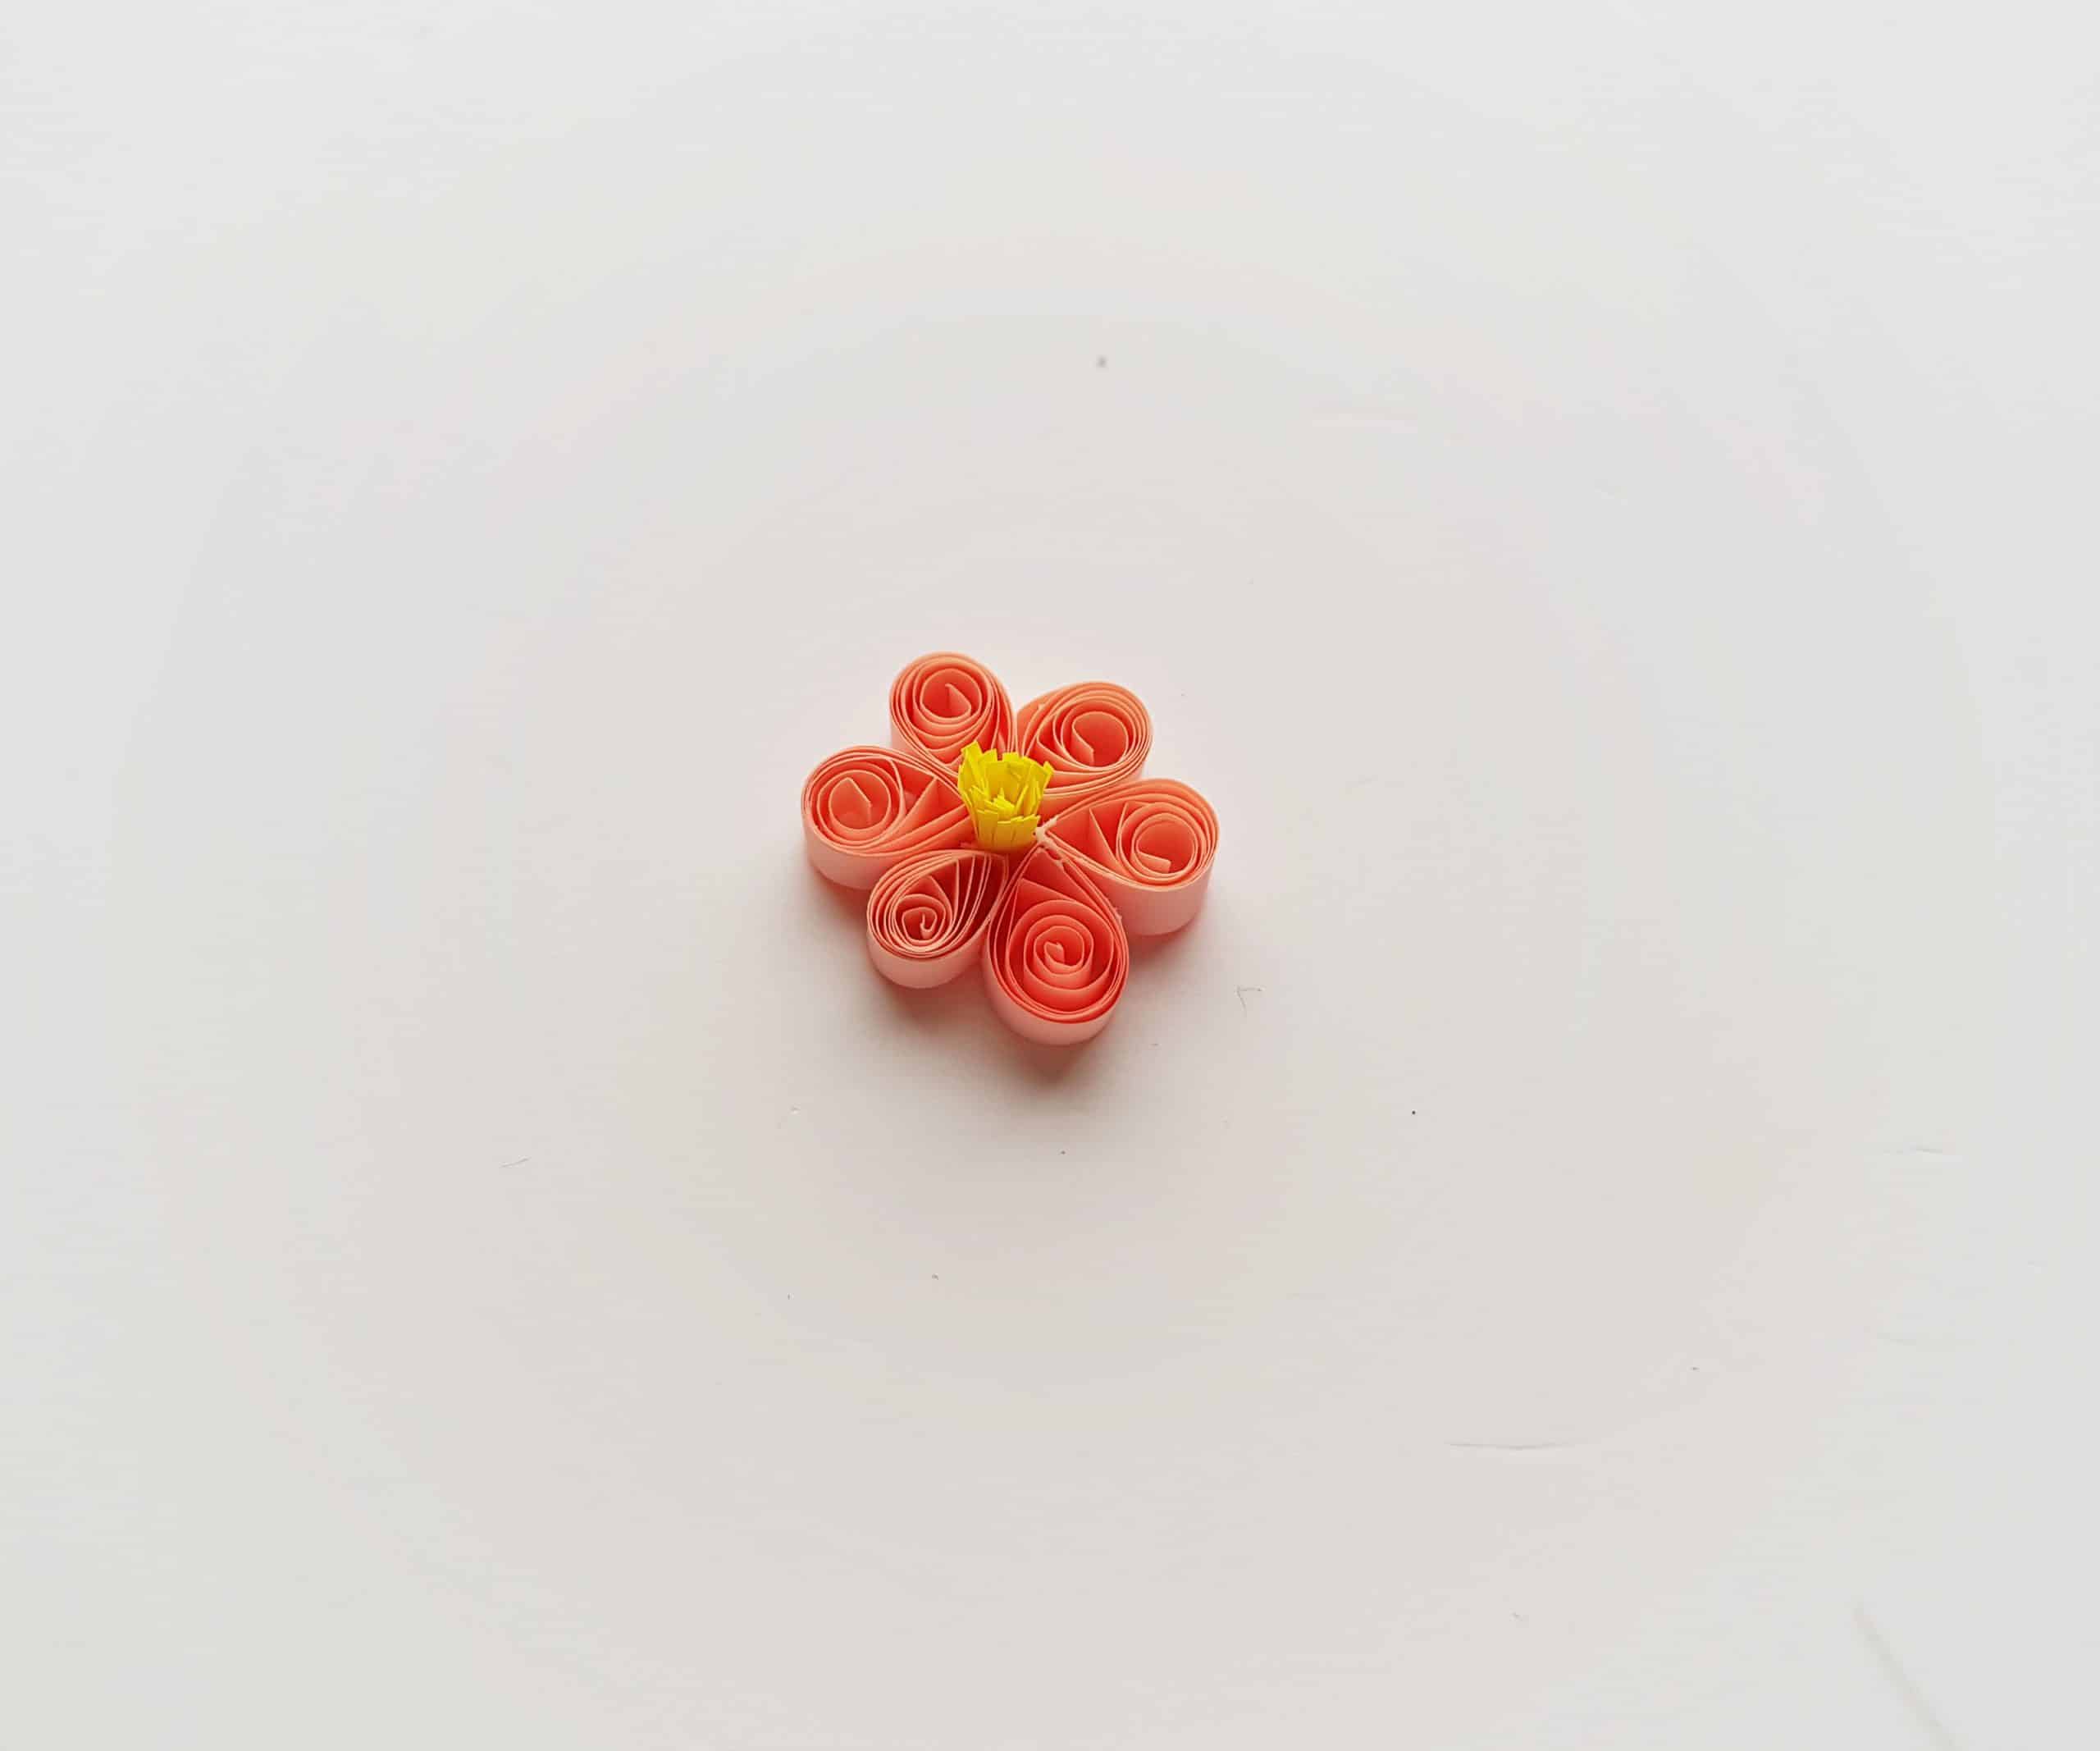 To finish off the look of your cherry blossom, spread out the fringes of the yellow coil in the middle with your fingers a little bit.
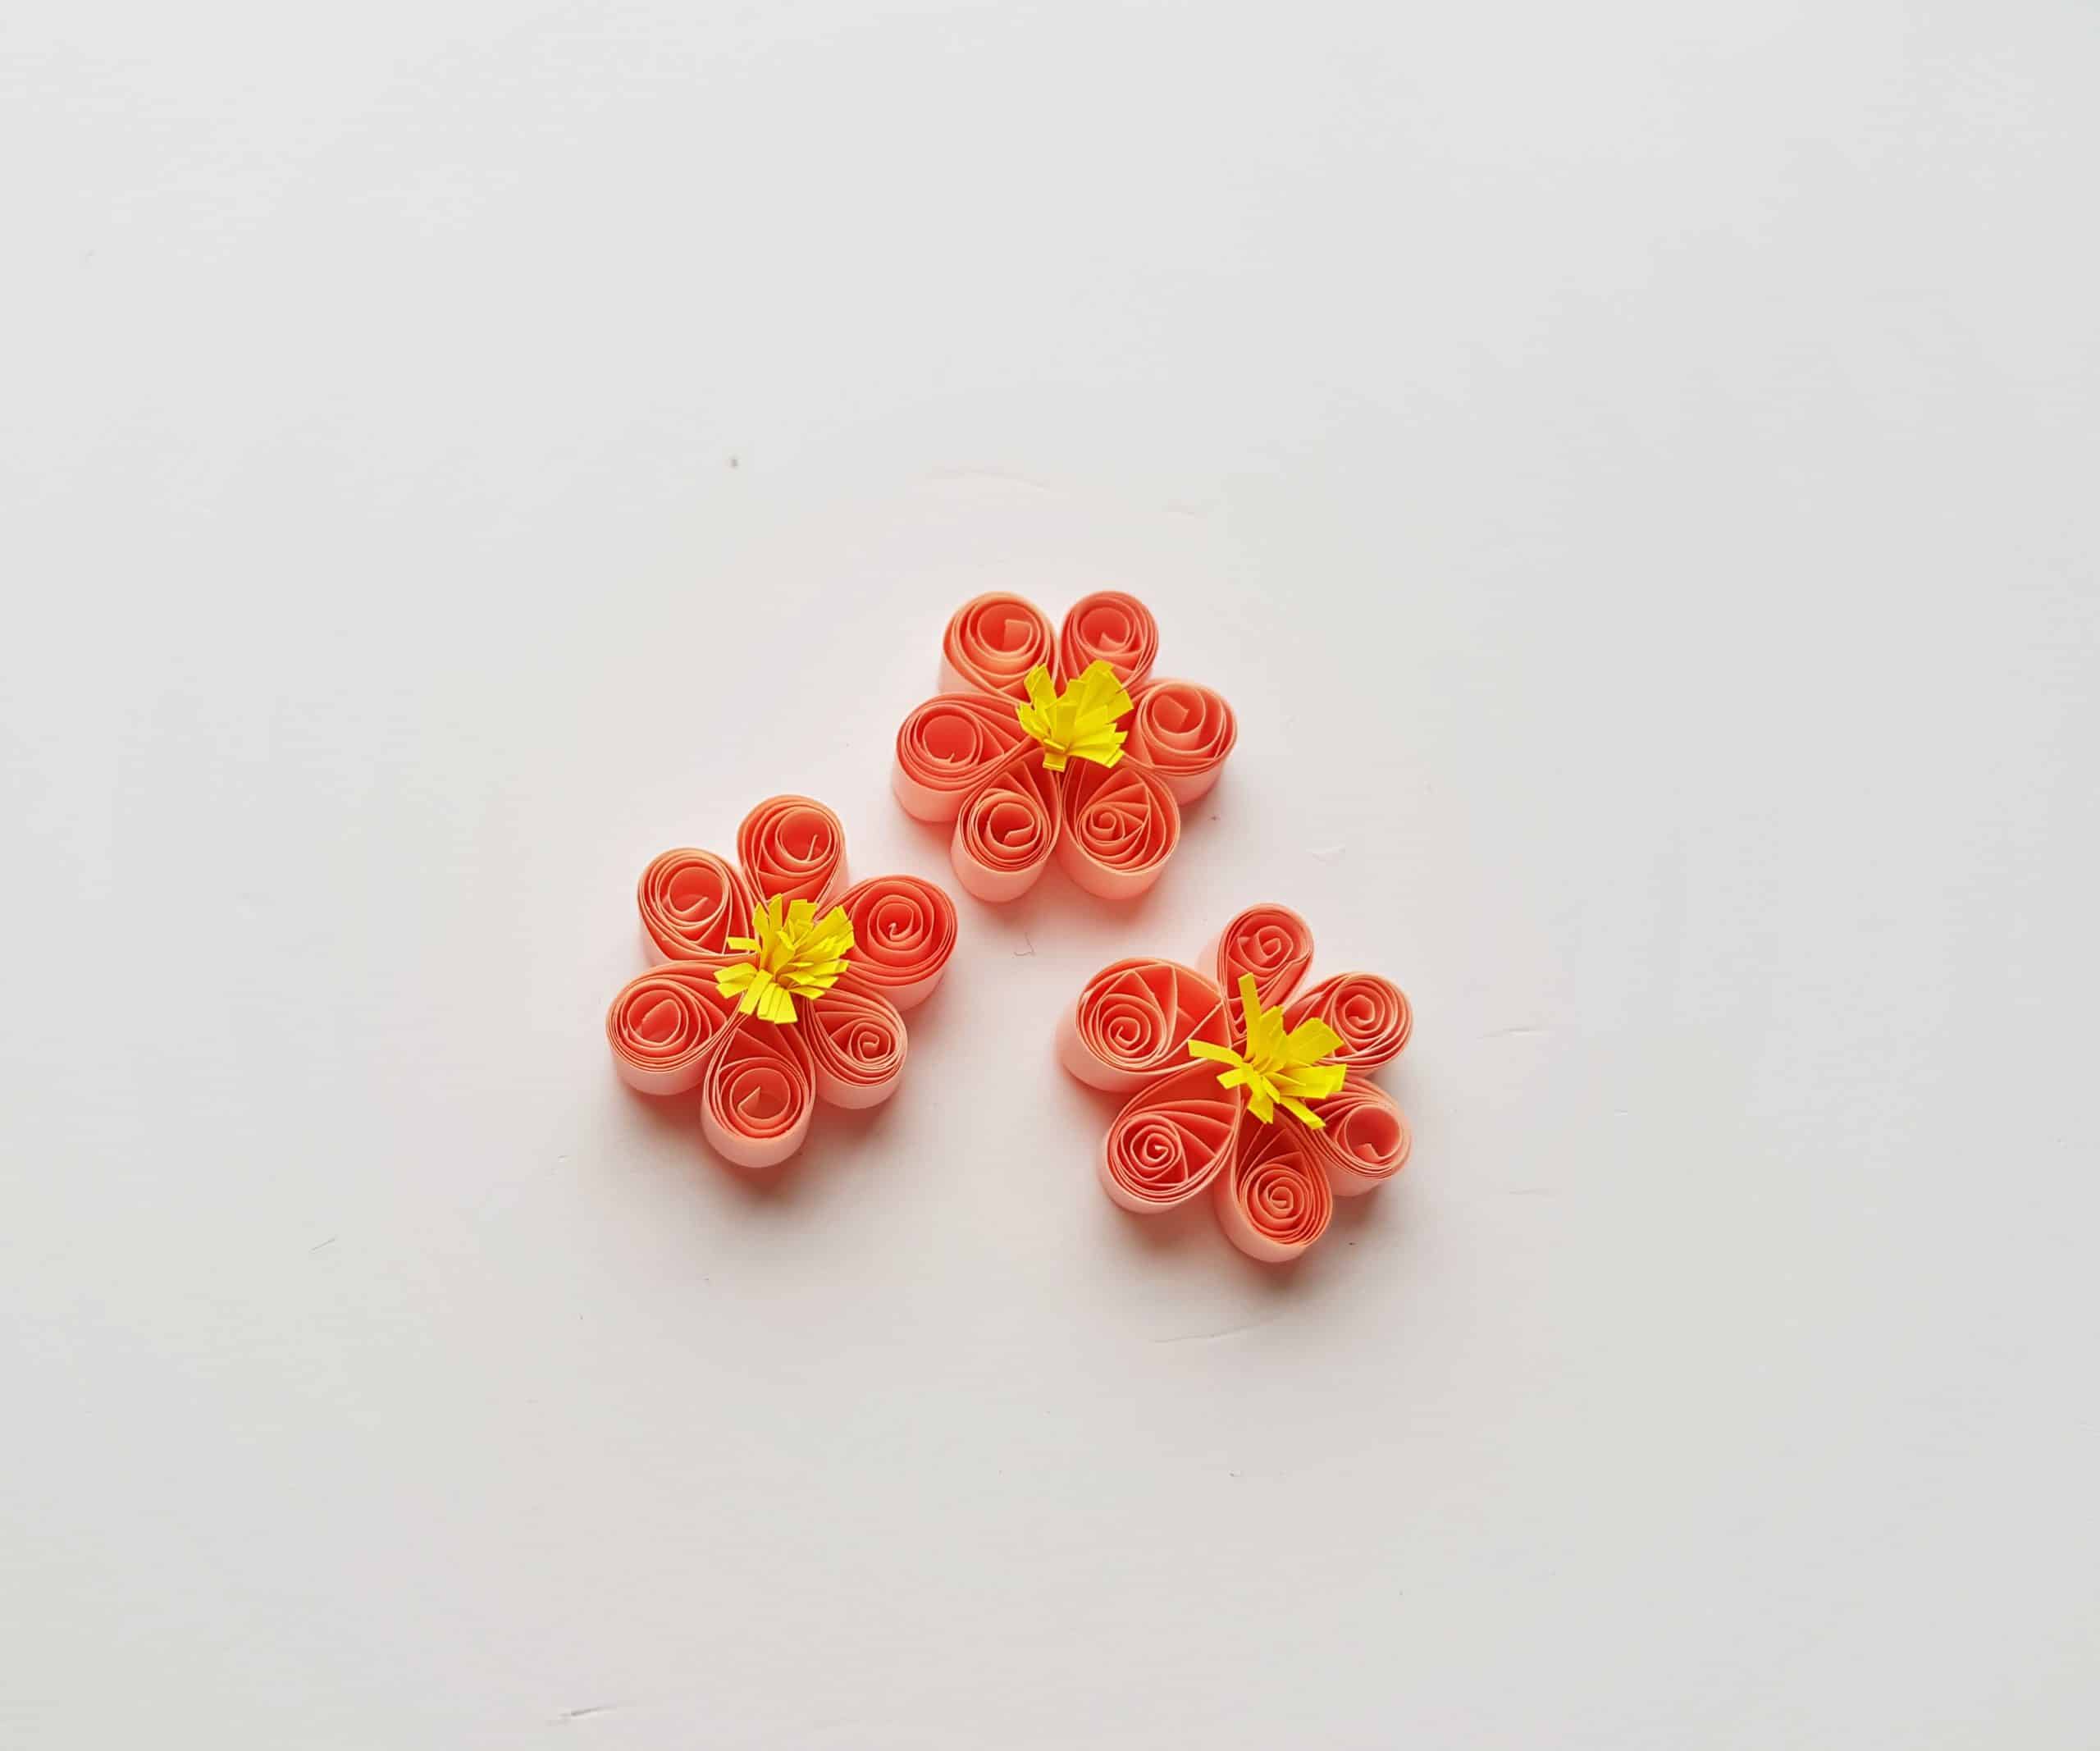
 Now that you’ve created one cherry blossom flower, go ahead and use the same process to create several more (however many you like!) If you want to, you can also get creative and use different shades of pink, as well as white.
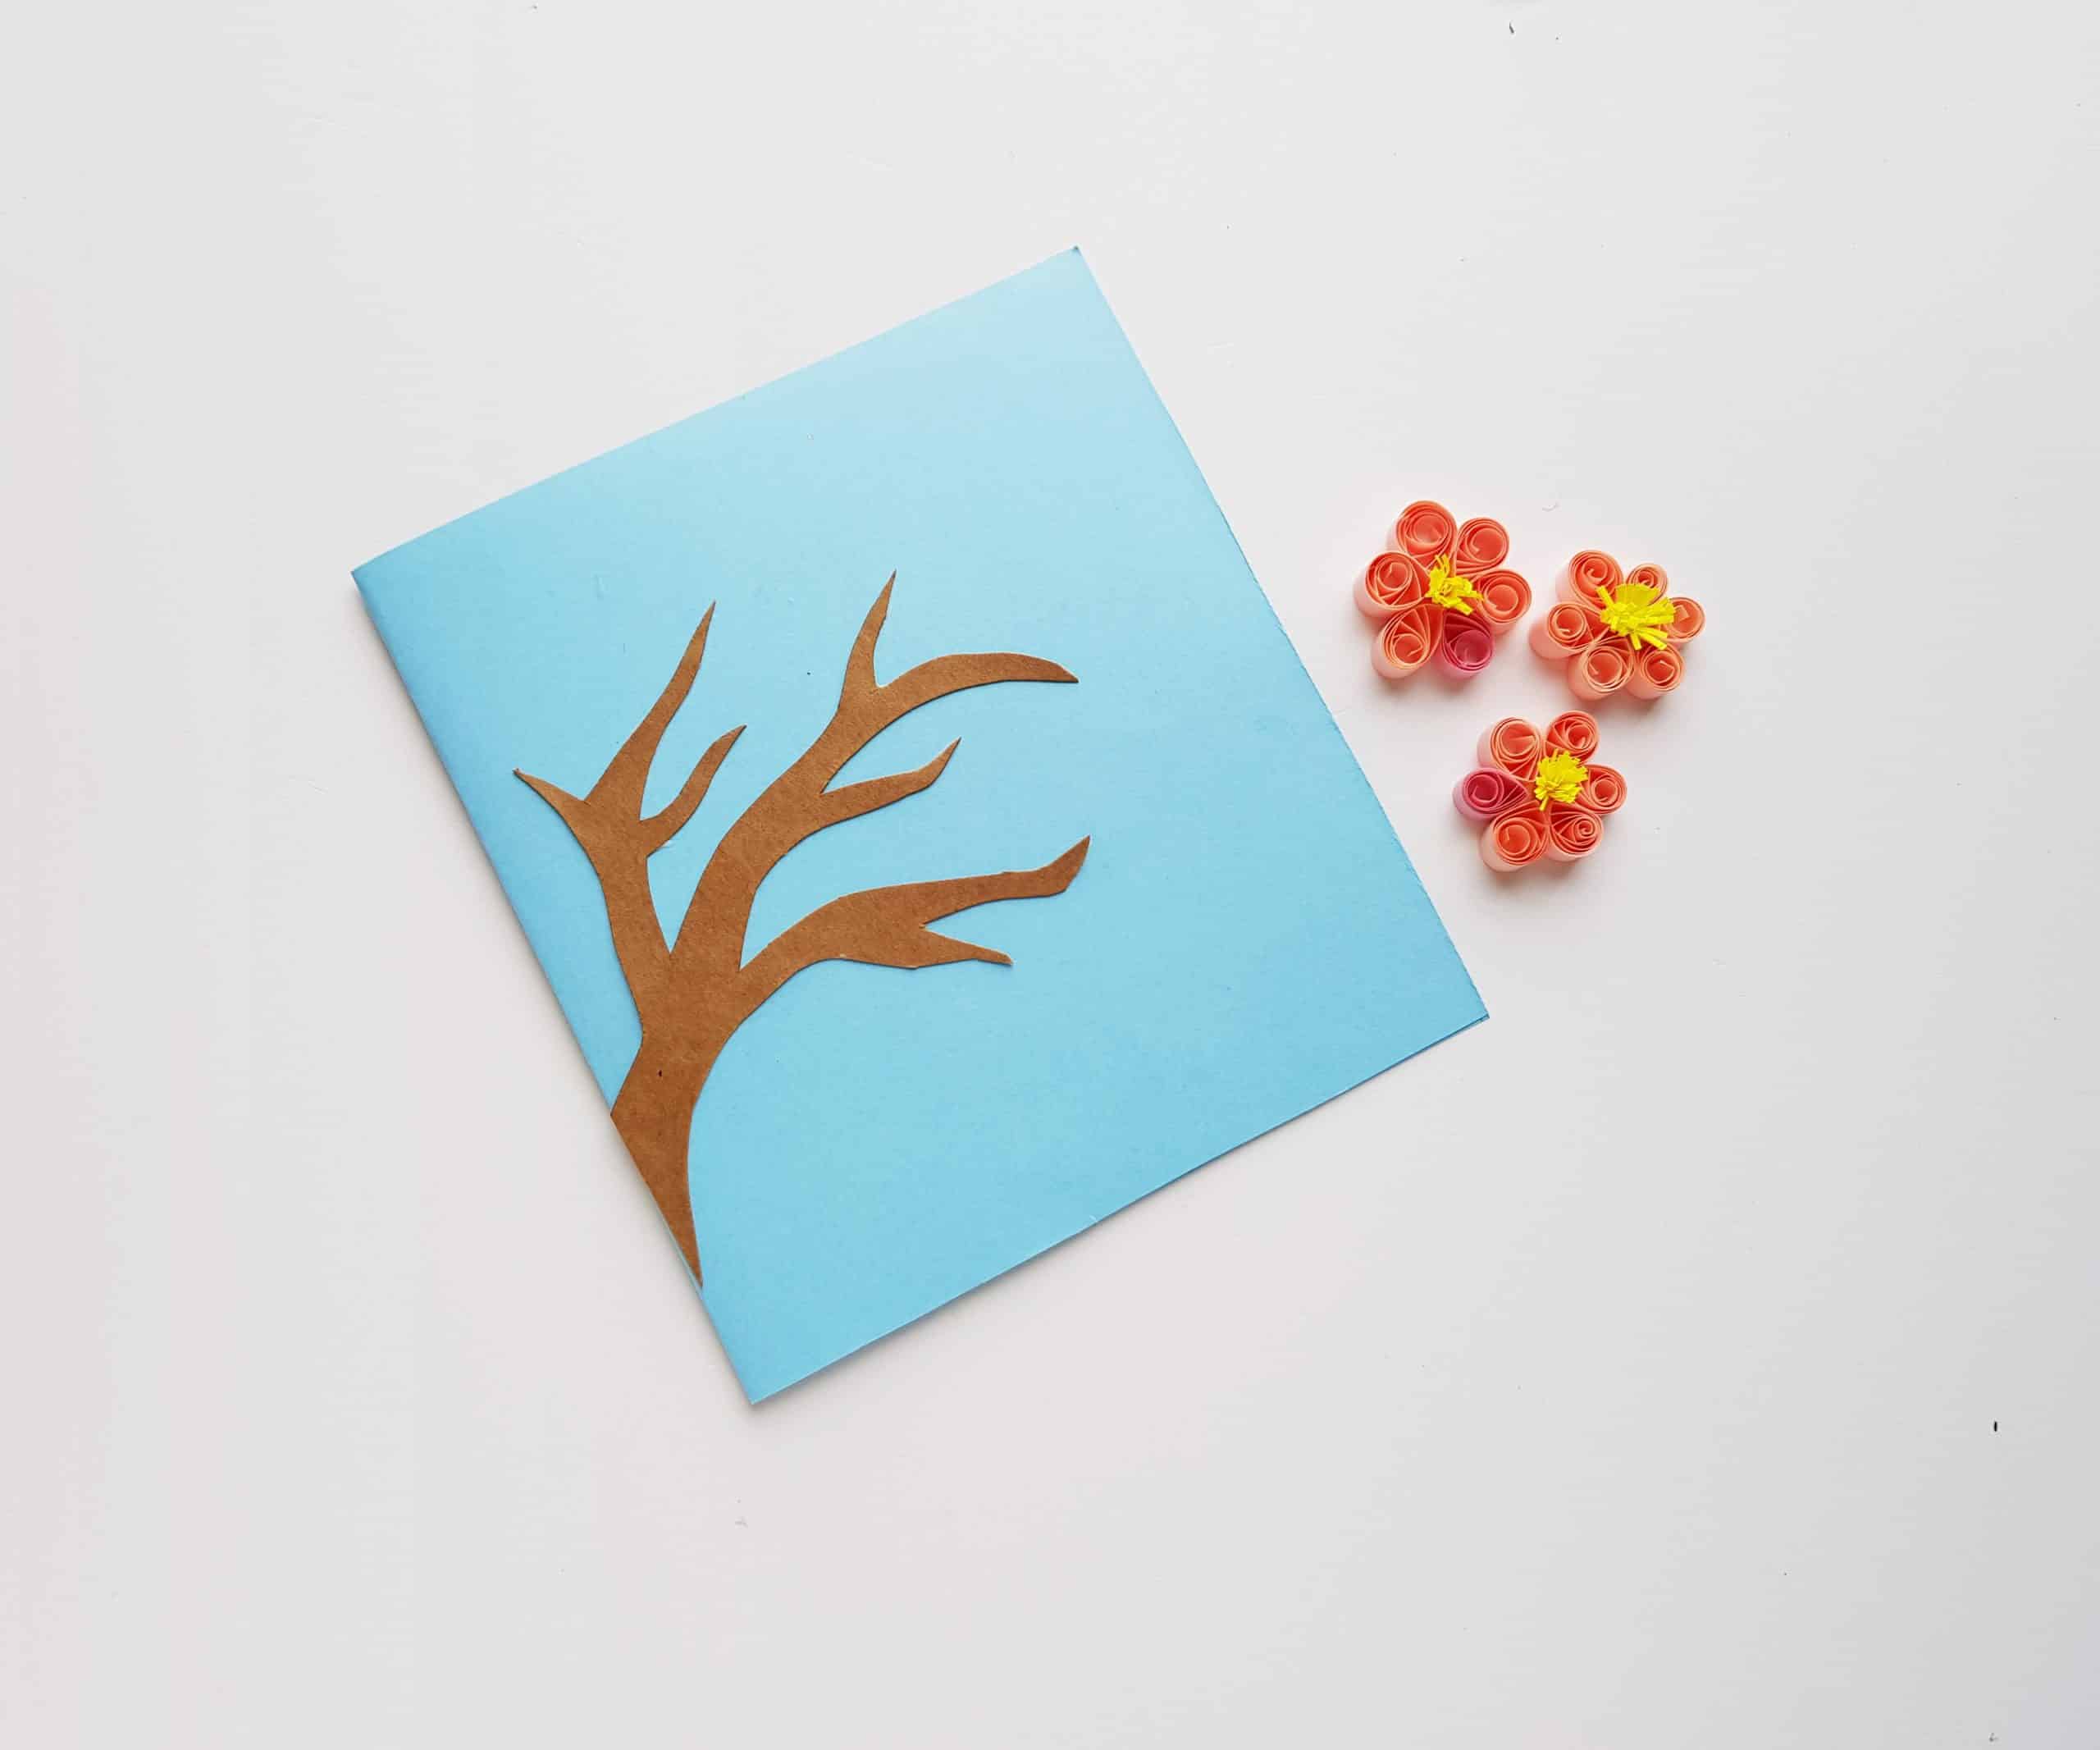
 When you’re happy with the number of flowers you’ve made, take the brown craft paper and cut out a silhouette tree branch pattern. You can use ours below to get some inspiration! If you don’t have brown craft paper, black construction paper works just as well.
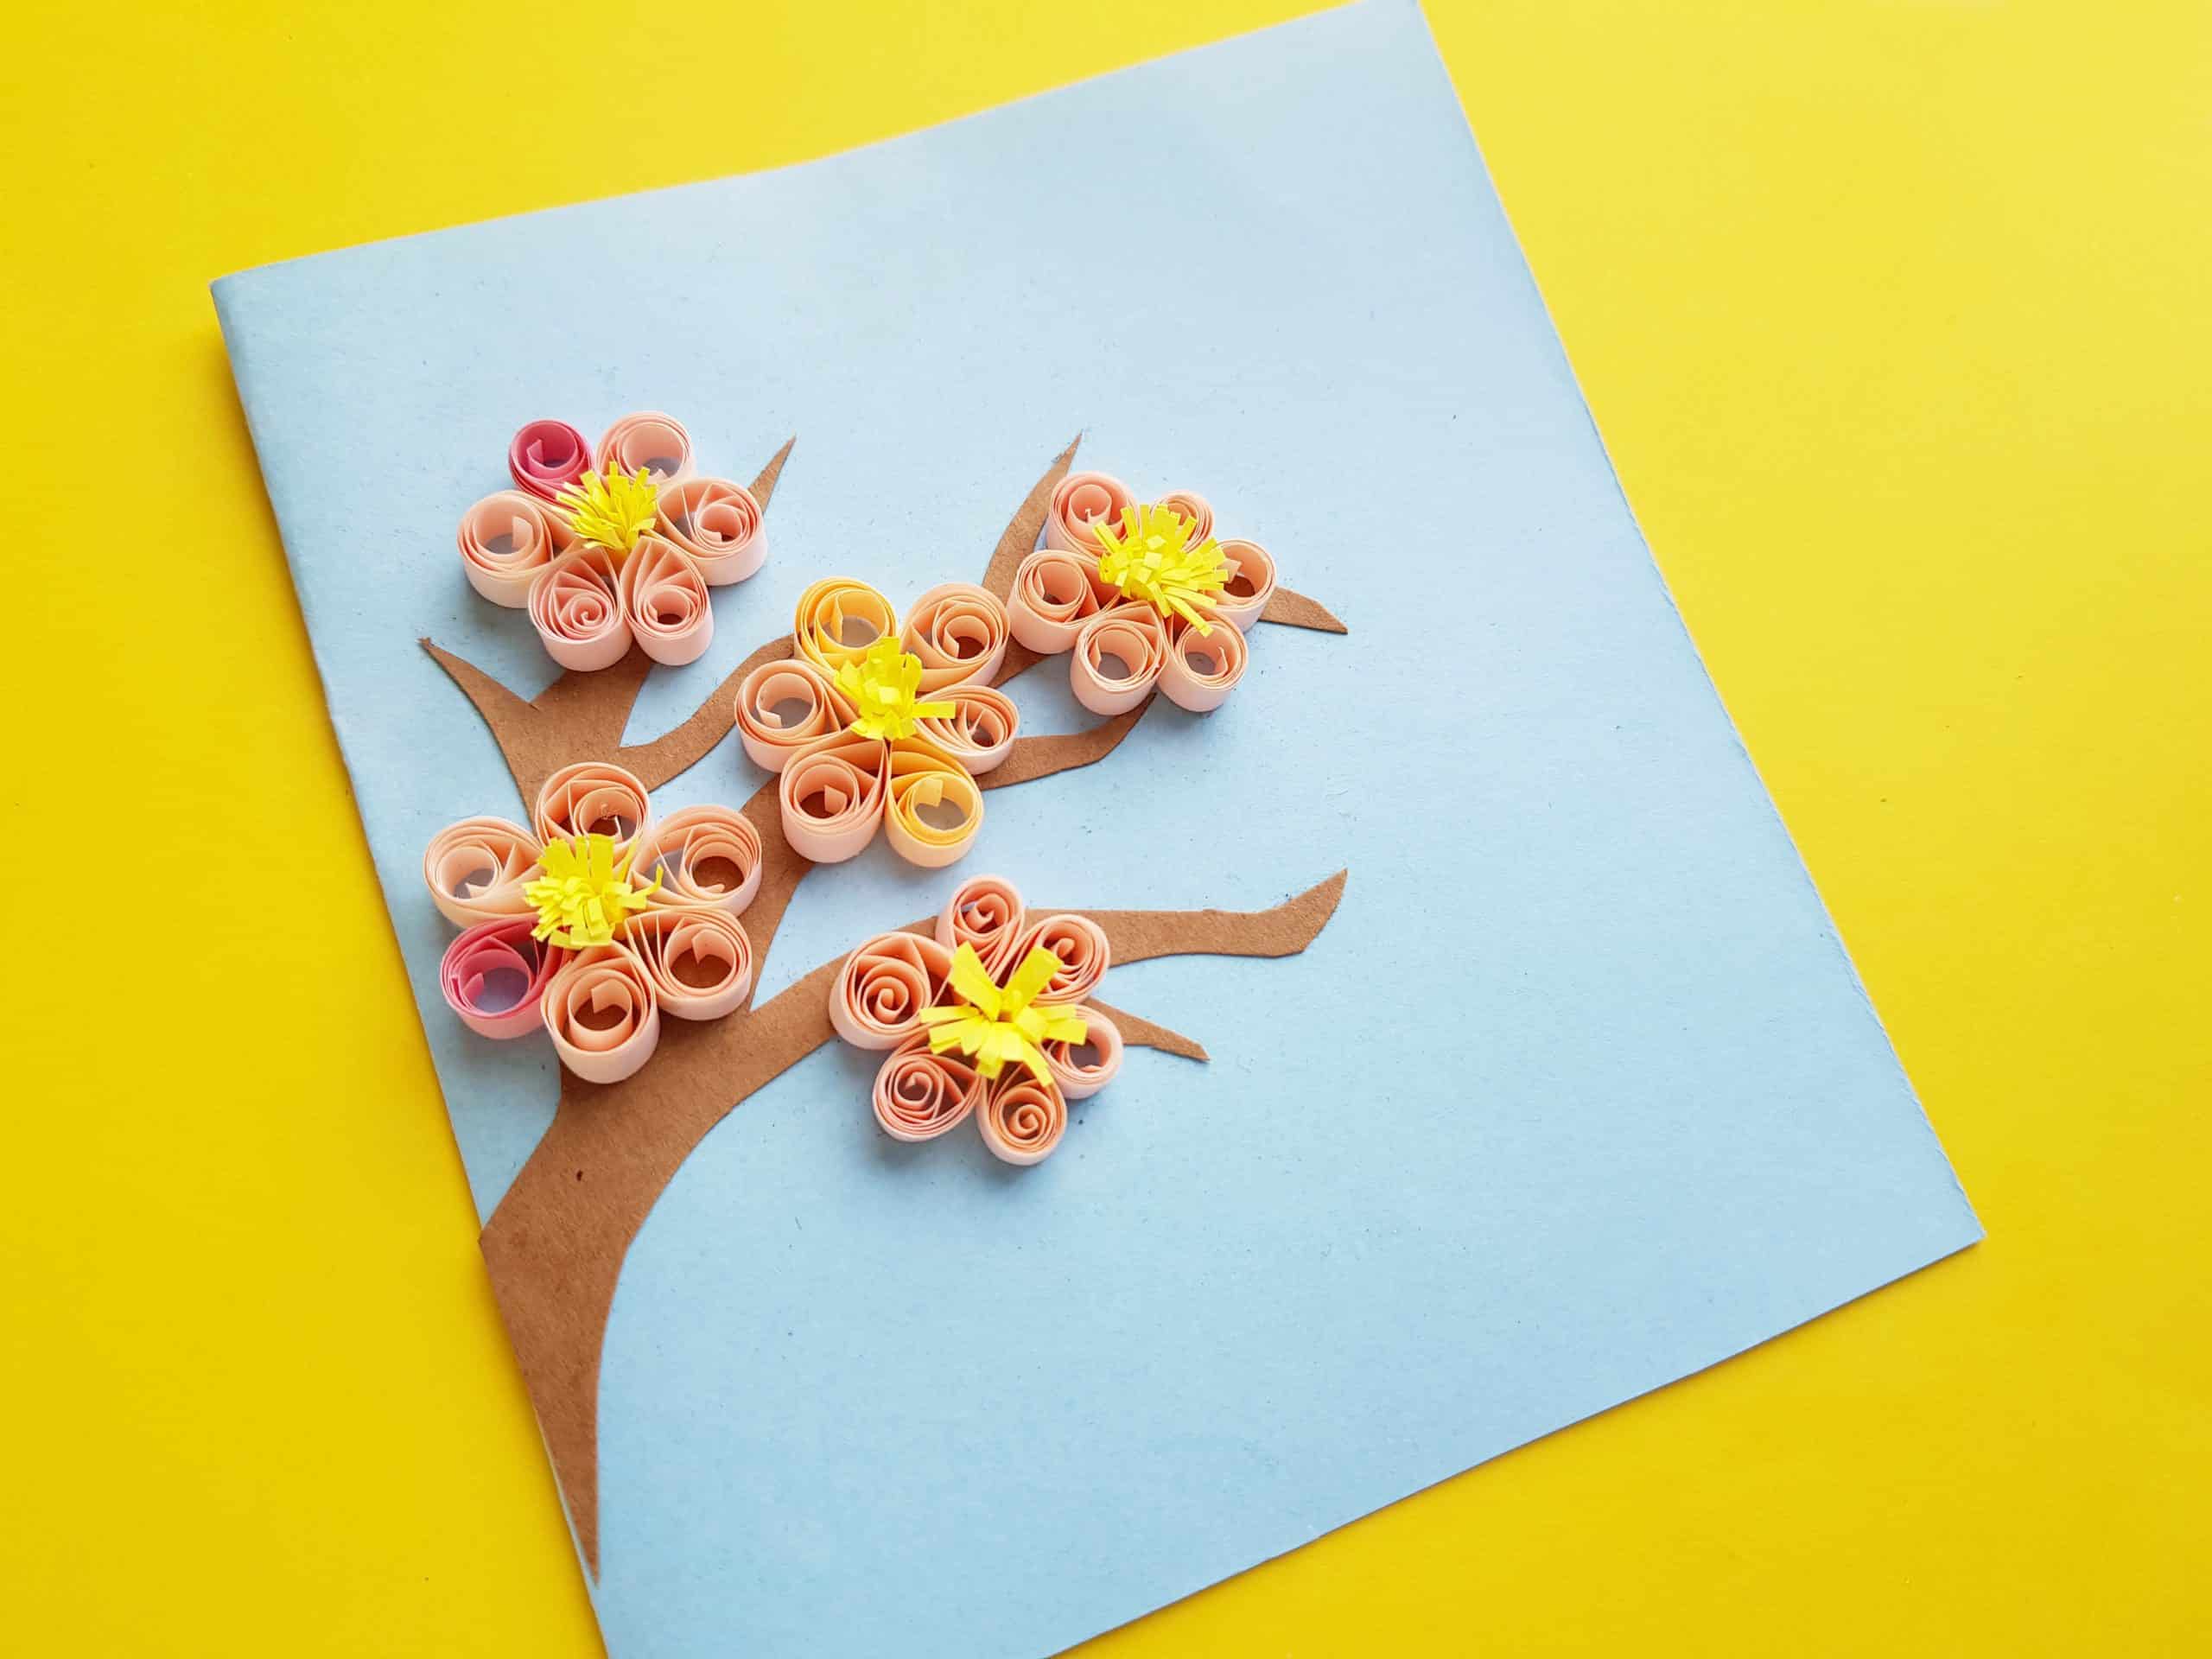
 Choose piece of construction paper in your choice of background color, and glue the silhouette of the tree branch onto it. I love the way that the bright blue background looks with the pink flowers.
 Lastly, take your time arranging and gluing your quilled cherry blossom flowers onto the tree branches. Once you’re happy with the arrangement, and everything is dry, your project is complete!
Do you plan to try out this Beautiful Quilled Cherry Blossom Craft at home? Let us know!