Backyard Art using the Sun {Sunpaper Art}
This summer has been a sizzler so far! At least here in the Sunshine state, anyway. And coming from a native Floridian, that’s sayin’ somethin’.
So this summer we’ve been playing a lot in the water – natural springs, homemade slip ‘n slides, sprinklers. And not to mentions all the popsicles and ice cream cones! But I wanted to shake things up a bit this summer and put that sunshine to work!
Enter Sun Paper Art.
I remember doing these as a kid and just loving it – did you do these at all? My husband hadn’t, and I was so sad for the child version of him. Because this stuff is cool. And it’s the perfect little nature craft/science project for the summertime.
It only takes about 10 minutes start to finish, so you can get back to your regularly scheduled sprinklers and popsicles in no time 😉
What is Sun Paper Art?
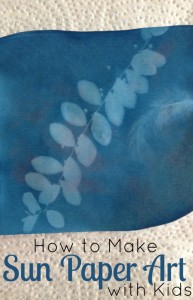
Sun Paper Art is a fun way for kids to get out into nature, and watch the magic of the sun. The basic process is placing the sun paper out in the sun, putting a flat object on top, and waiting for the sun to “bleach” the paper that is exposed, leaving a silhouette of the object behind. And then it get’s even more exciting when you place the paper in water and the white area turns dark blue and the blue silhouette turns white!
Cool, right?
So how does it work??
My kids are a little young to get into the nitty gritty science of this process, so I skipped that with them and just explained that the Sun was making the paper turn white – true, but why? Older kids will love this project just as much, so here’s the science behind how the Sun turns the paper white,
Two crucial molecules in the paper are interacting, forming a new molecule. Their interaction is initiated by specific wavelengths of ultra-violet light. The new molecule is colorless so that as the blue molecules are converted, the white of the paper base begins to show through. Areas of the paper covered by your objects still contain the original blue molecule, so they remain blue.
–Sunprints
And how does the paper change after being in the water?
There are two exciting things happening to the paper while it is underwater. First, the original blue compound is water soluble, so that when you immerse it in the bath, the water carries it away, leaving only the white paper base in those areas. Second, the colorless compound whose formation was caused by the sun’s energy is not water soluble, so it cannot wash away in the water bath. It is sensitive to the water in another way. Just as the Sun’s light stimulated a chemical change in the previous step, the water stimulates another chemical change in this one. The water causes an oxidation reaction that turns the colorless compound into the deep blue of a finished Sunprint.
–Sunprints
Okay, so you’ve got some of the science down, let’s get to the really fun part – making our Sun Art!
You’ll Need:
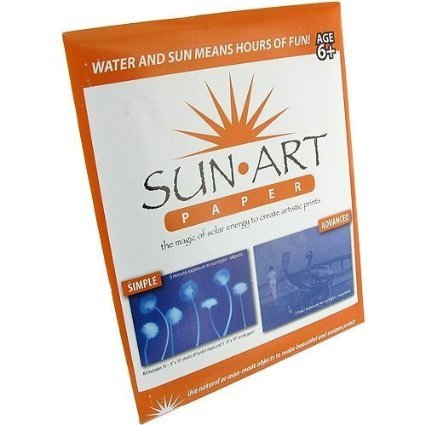
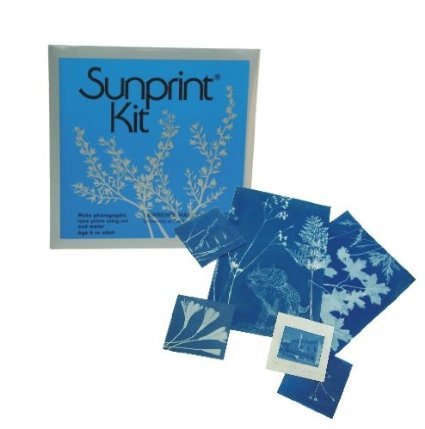
A Sun Art Kit (this is the one I used)
Piece of cardboard
Sunshine
Objects you want to take prints of (I had the girls find things around our backyard)
Timer (optional)
Shallow dish with water
Instructions:
- Gather all your supplies, and prep your work space outside. We used a small bench – a table or any flat surface outside will work.
- Layer your art!
- Start with a piece of cardboard
- Place your sun paper (blue side up)
- Arrange your selected items
- Place the acrylic window on top
- Set the timer for 5 minutes and watch the reaction take place! If it’s a bit cloudy, it may take more then 5 minutes. Just watch for the paper to turn white.
- Remove the acrylic window and the selected objects, and quickly place the Sun Paper back into the black coated sleeve to protect it from the sun until you’re ready for the next step. You can repeat steps 2-4 now with other objects.
- Bring the printed sun paper inside.
- Place the sun paper art into the shallow dish of water and let it sit for 1 minute.
- Shake off the sun paper and lay out to dry, watch it get darker as it dries!
- Admire your beautiful Sun Paper Art!
Isn’t that fun?! I just love it. The possibilities are endless, get creative with it! My girls thought this was really fun, and I’m sure you’re kids will too. Be sure to share in the comments if you try this fun, quick, summertime project with your kids! I’d love to hear how it goes.
More Sunshine Resources:

![]()
Catch the Wind Harness the Sun : If you liked this project, you may want to look into this book. It has some more projects that use the sun.

![]()
Sunshine: A Book About Sunlight : Great for younger kids

![]()
Sunshine (Weather) : I’ve been really liking Gail Sanders-Smith books. She gets some science in there without it being too overwhelming for little ones.
 Lindsey is a modern homesteader and homeschooling Mama of two. Together with her family she lives in North Florida on 1/3 of an acre where they garden, raise chickens and turkeys, do lots of DIY, make a ton from scratch – and include natural learning experiences along the way. She’s passionate about simple, natural living, and shares those passions on her blog, Chickadee Homestead. Find her on Pinterest and Instagram.