Snowflake Crystal Solutions: A STEAM Project

Beautiful snowflakes are made up of many tiny ice crystals that form in symmetric patterns. Ice isn’t the only thing that forms crystals, believe it or not, many common household substances are made of lovely crystals too. In this STEAM project (Science, Technology, Engineering, Art and Math) you can combine some chemistry, Earth science and math to make some beautiful snowflake crystal art.
Snowflake Crystals in Chemistry
Some substances (solutes) dissolve in water and then come out of the solution, or are left behind, when the water evaporates. This project depends on this concept. You’ll dissolve various household supplies, such as salt, sugar, baking soda, etc. in warm water. Older kids may also want to try to create a super-saturated solution. Directions for all options can be found below.
Snowflake Crystals in Earth Science
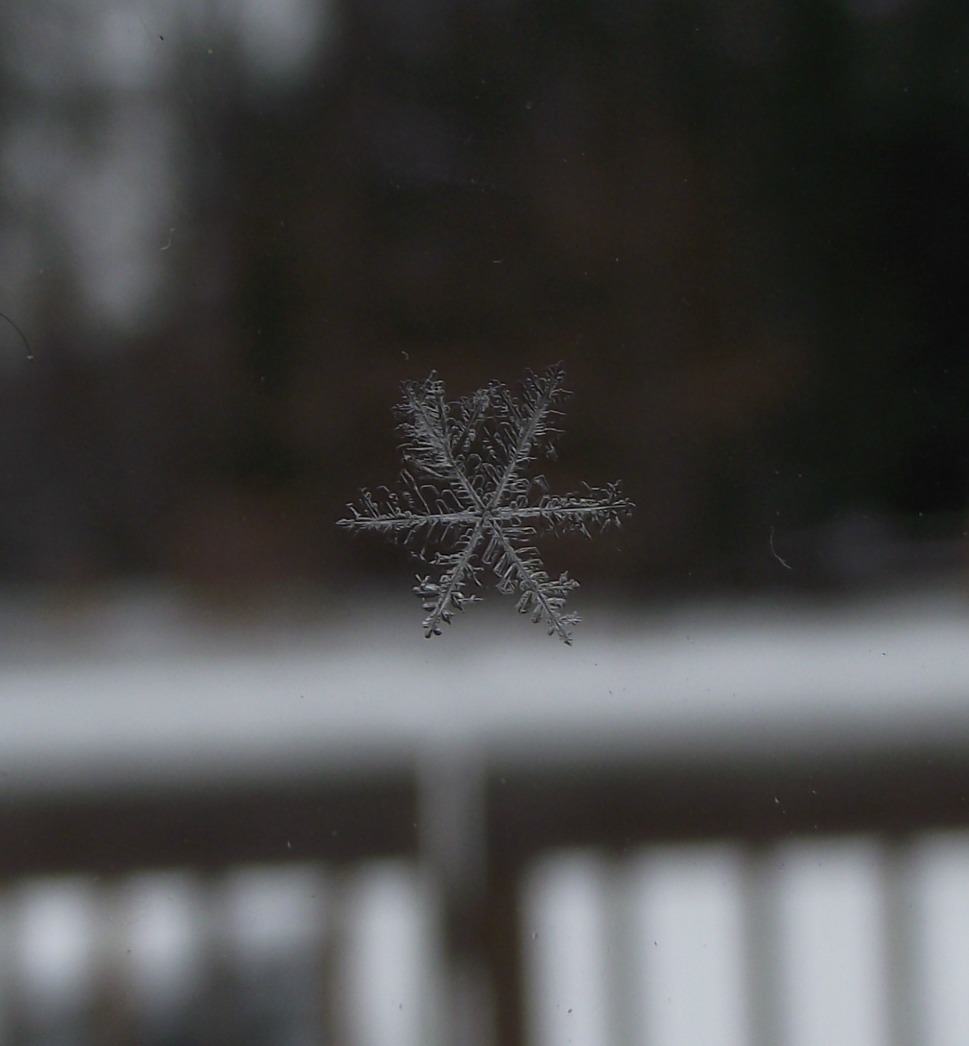
Snowflakes are part of the water cycle. When very cold water freezes around a small particle of dust or pollen in a cloud, it forms an ice crystal. More ice crystals form as the first crystal is exposed to water vapor. Eventually, the lacy crystalline structure falls to Earth. If you’re lucky you can observe the beauty of this snowflake crystal before it breaks or melts.
Math
Snowflakes are symmetrical. In other words, if you cut a snowflake in half, each side is identical. Snowflakes have 6 points unless they have been damaged in transit. In your artistic renderings of snowflakes try to practice drawing them as symmetrical shapes with 6 sides or points. This will show a true rendering of the snowflake crystal form.
Materials:
- Dark paper
- Small paintbrush or cotton swabs
- Variety of household items to dissolve such as: iodized salt, Kosher salt, sugar, Epsom salt, baking soda, or borax. Do not use harsh cleaning powders that might get into eyes!
- Water
- Measuring spoons
- Glass or jar
- Saucepan and spoon (optional)
- Clear glue (optional)
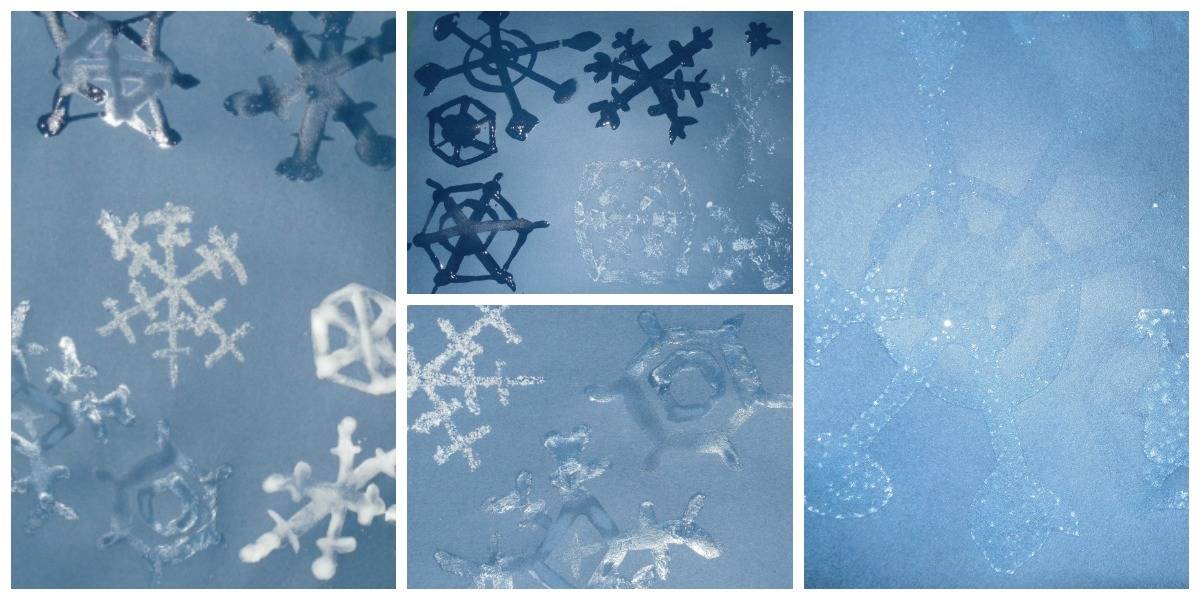
Crystal Snowflake Activity
Experiment by combining water and one solute at a time. Measure out a small amount of warm water (2 Tablespoons is a good place to start) into a glass or jar. Add a smaller amount of the substance, or solute (for example, if you’ve used 2 Tablespoons of water, start with 1-2 teaspoons of salt) Stir as you go.
There is no wrong way to do this, so you can add the salt, sugar or whatever you’ve chosen until it will no longer dissolves, or if you want you can keep adding until you’ve made a paste.
You can even make a super-saturated solution if you are careful. Heat some water in a saucepan. The water molecules become more excited as you add heat, allowing more of the solute to dissolve than normally would. Continue to stir in the solute (i.e. salt) until it no longer dissolves. Let the solution cool slightly and then experiment with it.
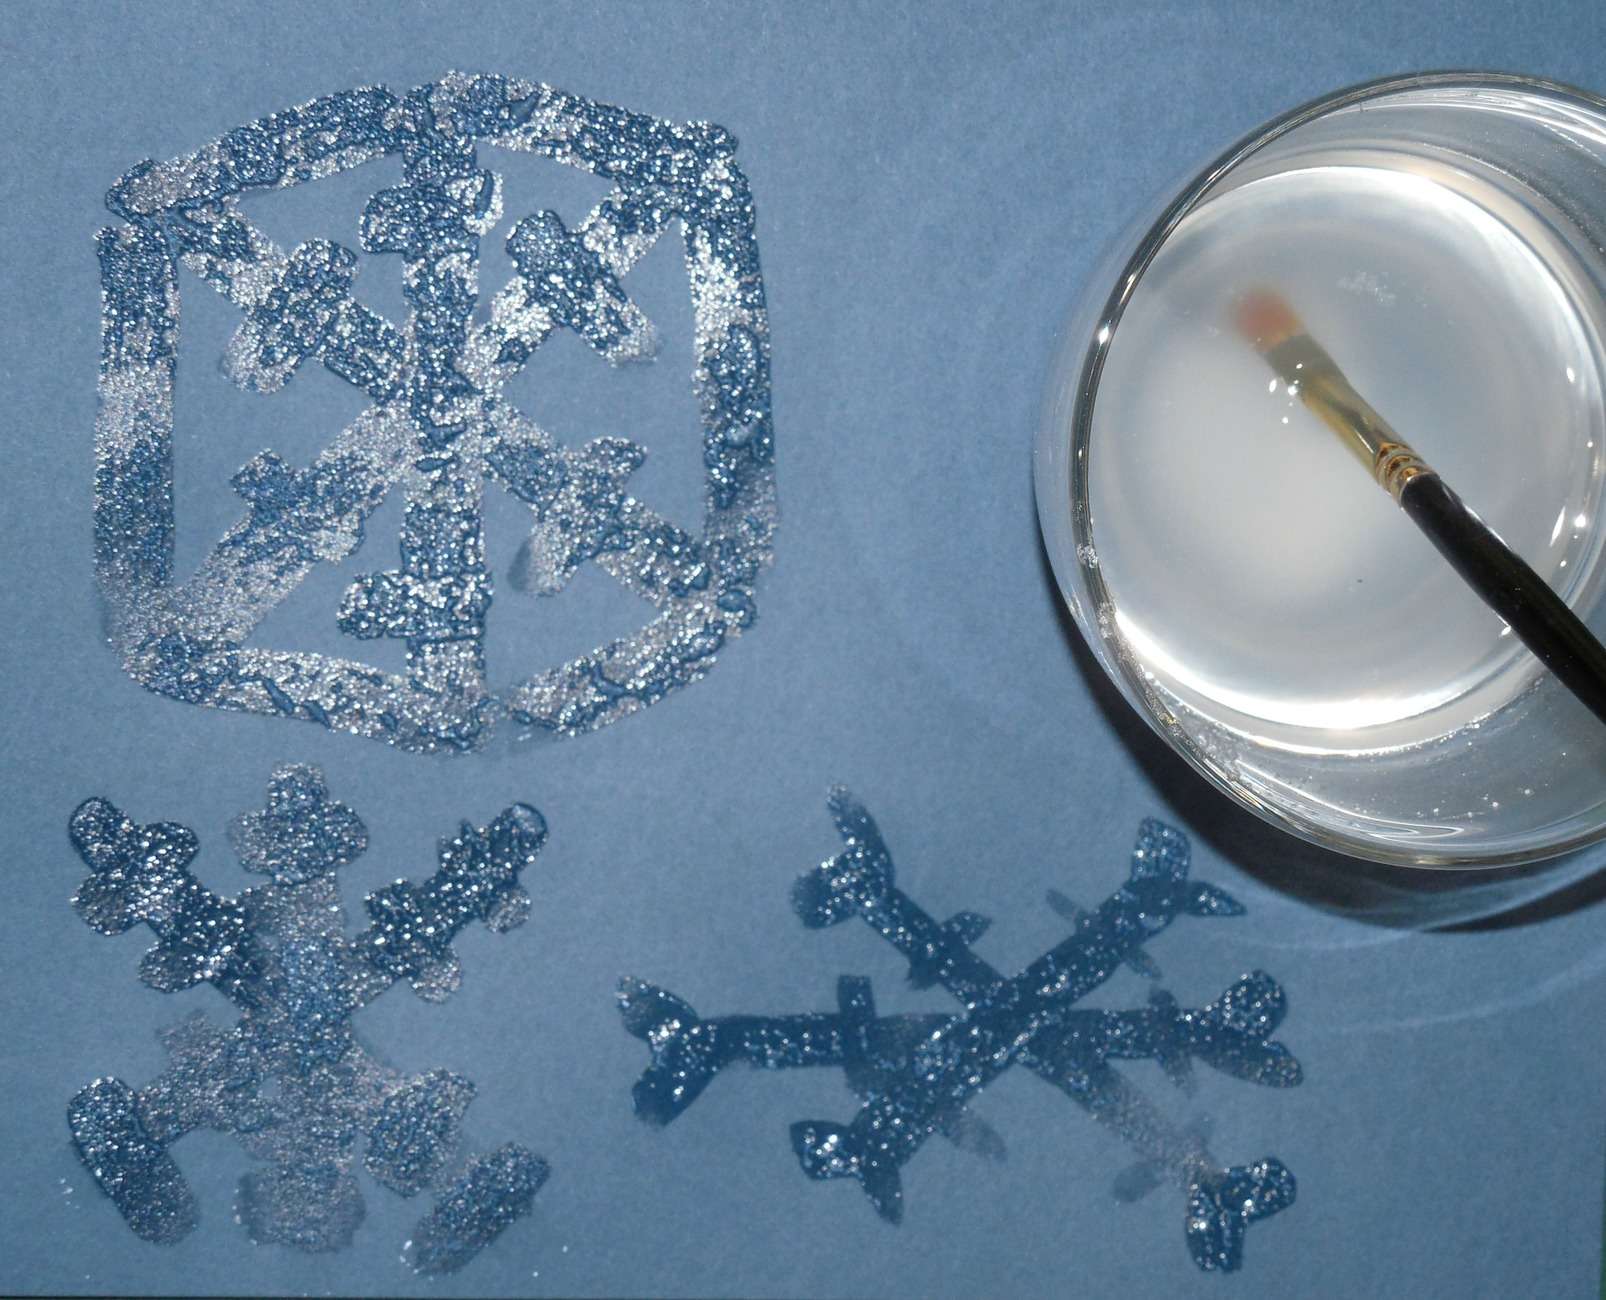
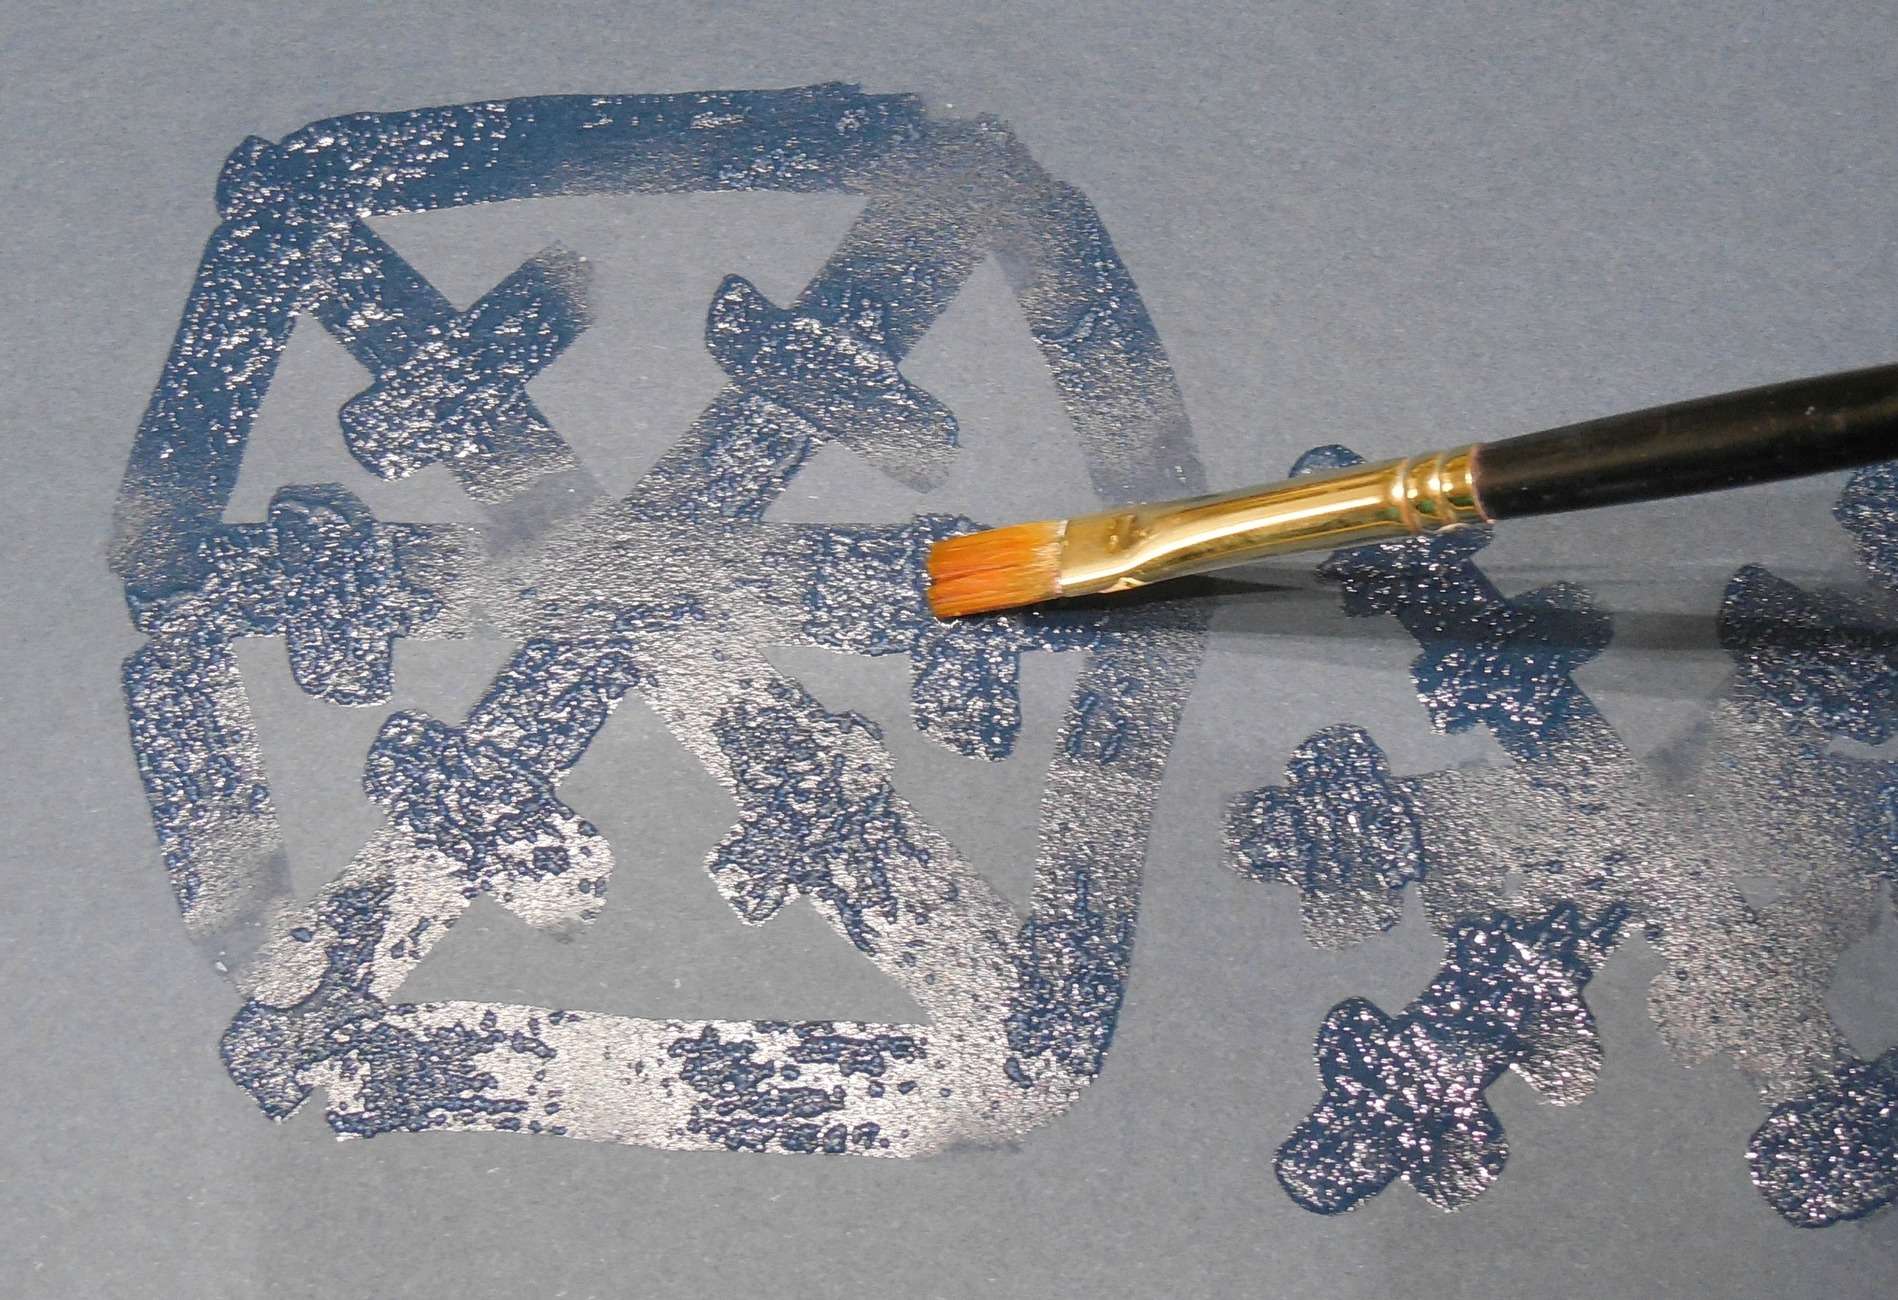
Use the paintbrush or cotton swab to draw a symmetrical snowflake on the dark colored paper with the solution you’ve made. You may not see the results immediately, it may just look like you’ve painted with water and this is okay!
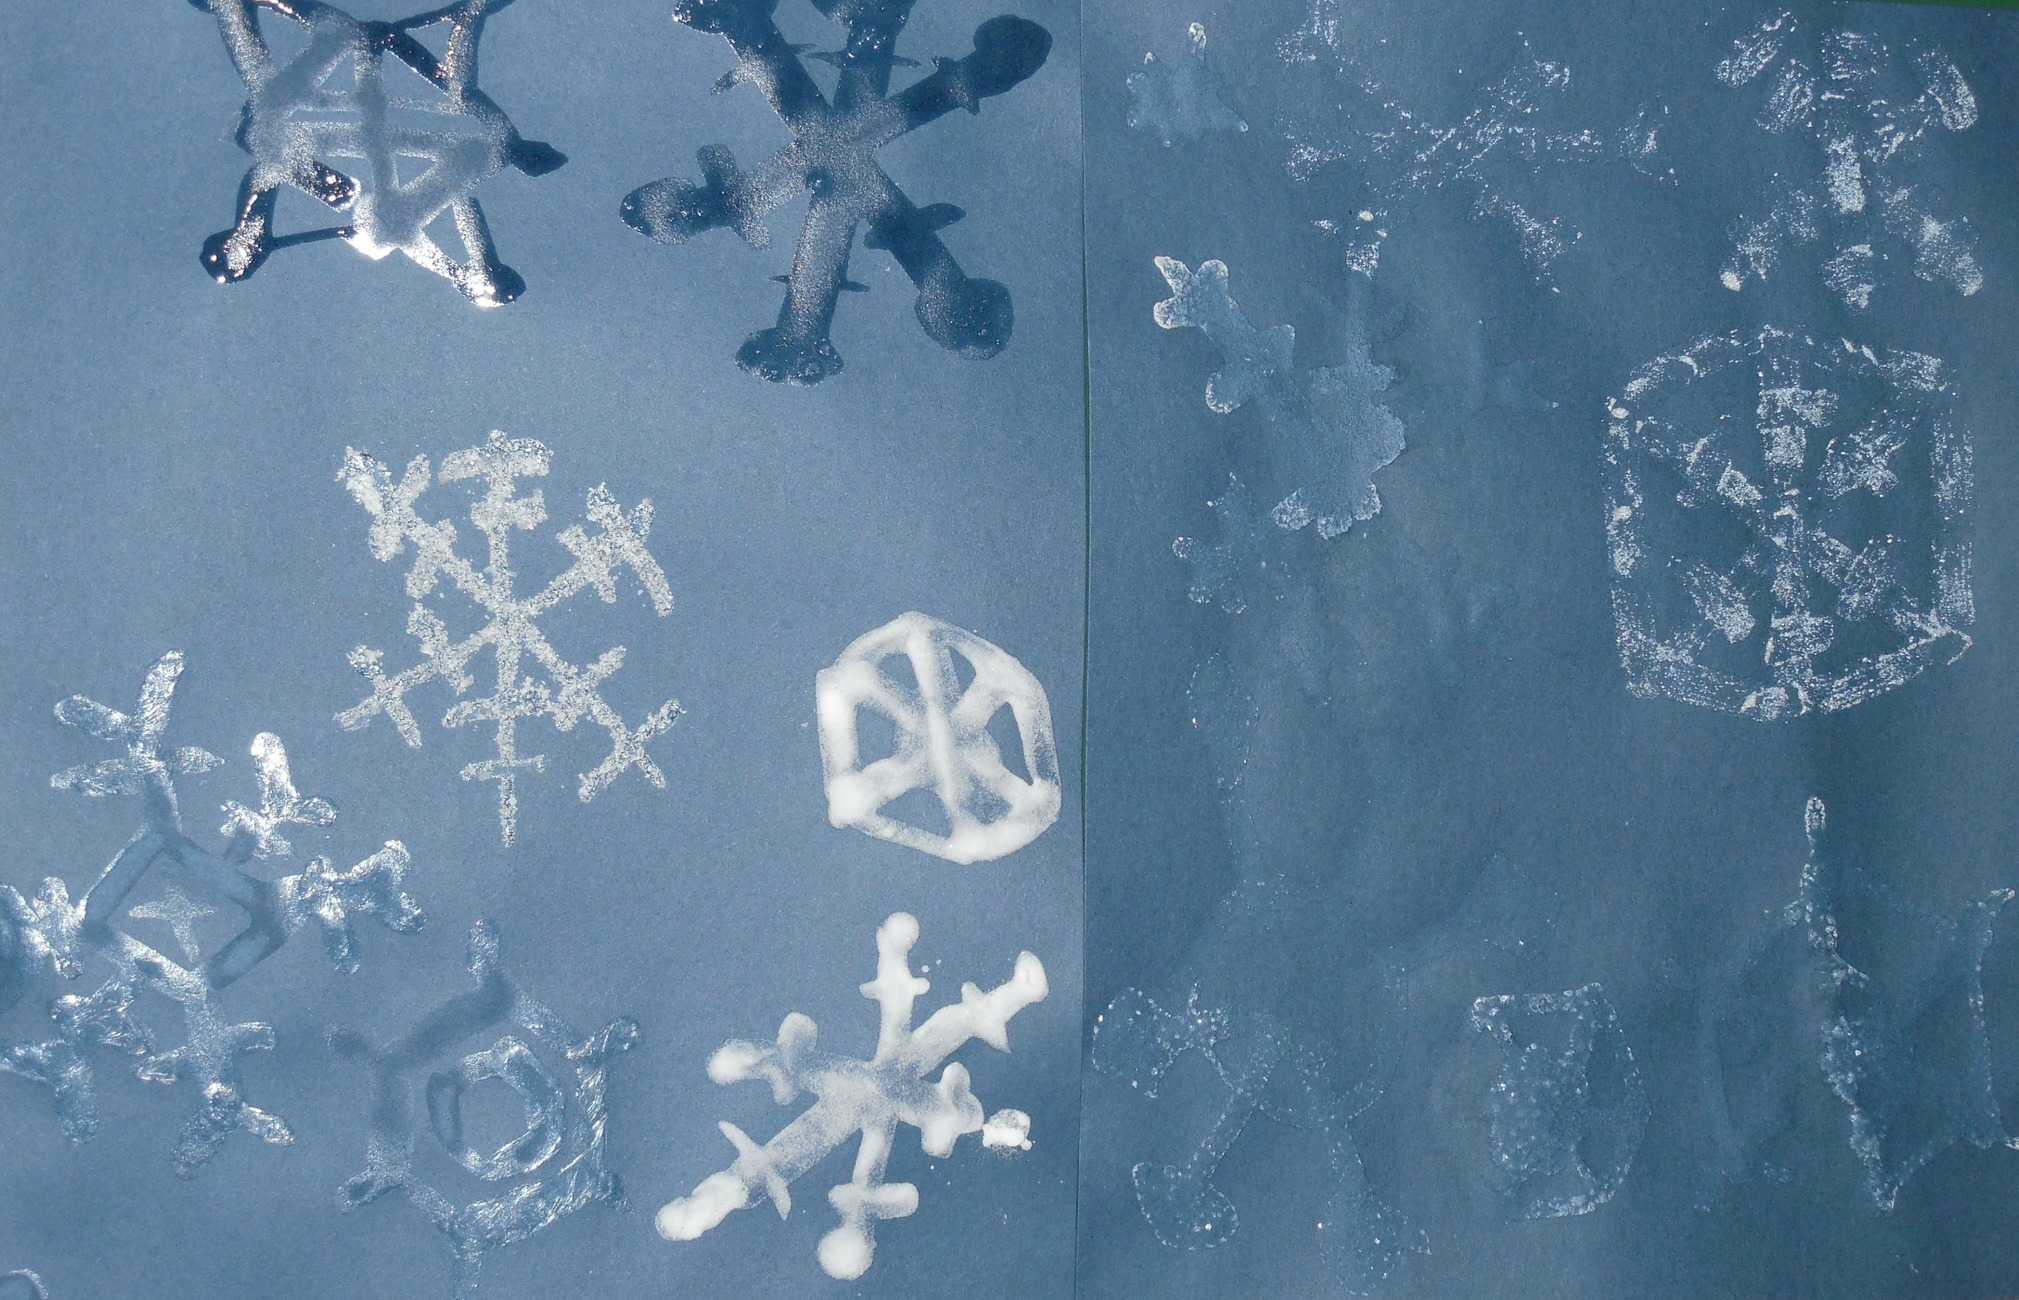
As the water evaporates off of your brushstrokes you should begin to see some crystals left behind. These crystals will change the longer you wait. They may look different one or even two days later as the solute begins to crystallize again. Experiment with different solutions, or different amounts of solute to create the artistic effect you’d like.
It is really interesting to look at the different crystals up close. Each solute will form a different, beautiful crystal shape. If you have a chance, look at them under a large magnifier or a kid-friendly microscope.
Extend the Activity
Here are some questions to think about and further activity ideas.
- What combination of water and solute left behind the most crystals? Why do you think this was?
- What are the different crystal shapes? Which one is your favorite?
- How are these crystals like ice crystals? How are they different?
You can cut out your favorite crystal snowflakes and use them to decorate. You can also choose the substance you think looks the prettiest and use it to make a snowflake by drawing the snowflake first with clear glue and then sprinkling the substance over the top. Let it dry and shake the excess off, and voila a sparkly snowflake!
More about Snow and Science:
- Learn about the Science of Snow.
- Grow Crystals with your kids!
- Explore Snow as a family.

Sarah Benton Feitlinger is a former Preschool-6th science teacher, blogger and science curriculum developer and mom. She is passionate about educating children, and loves anything and everything science! Check out her blog, Share it! Science News for science activities, lessons, science news and other resources for teachers, homeschoolers and parents. Follow her on social media: Facebook,Twitter, Google+ and Pinterest.