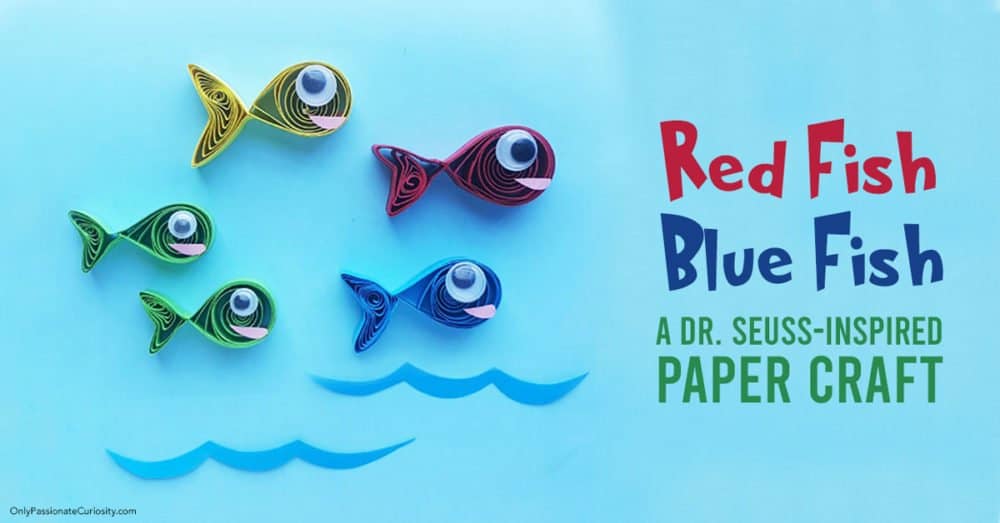
Red Fish, Blue Fish: A Dr. Seuss-Inspired Paper Craft
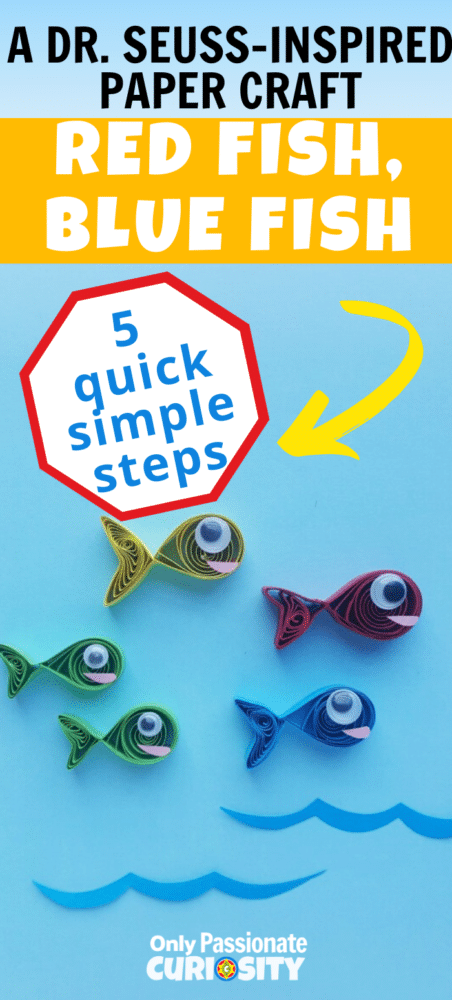
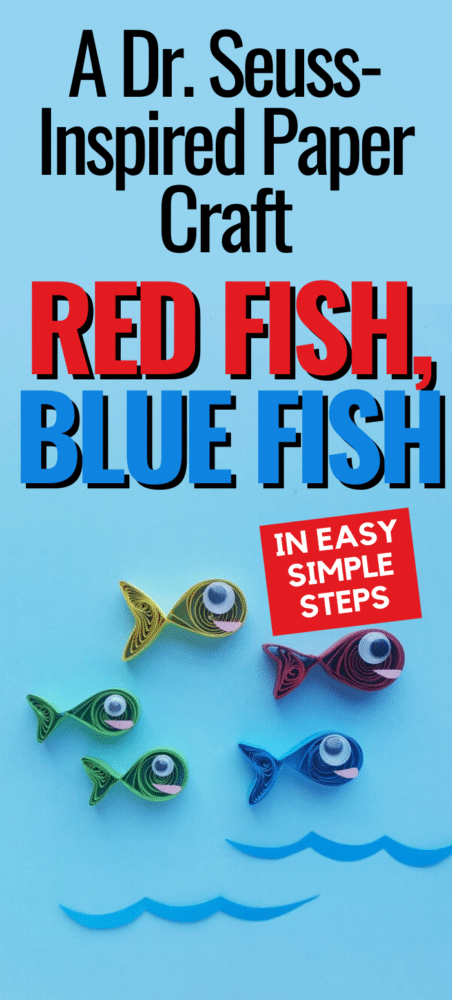
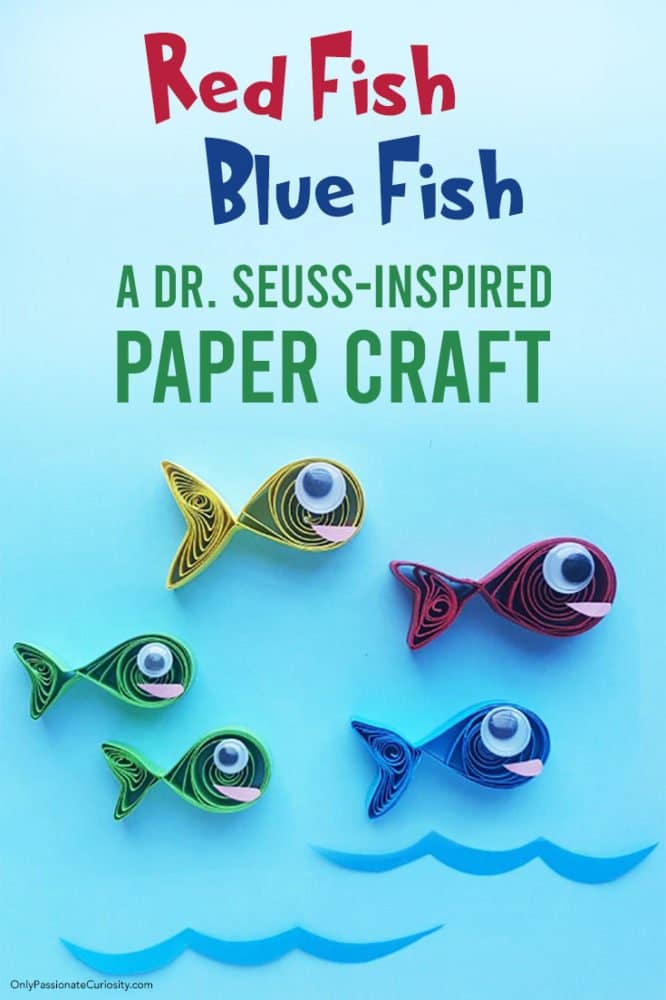
Did you know that March is Dr. Seuss month? Dr. Seuss’s rhymes and whimsical drawings are sure to engage the youngest of readers (and non-readers), but they make adults smile, too! If you are looking for a simple and playful Dr. Seuss-inspired craft, this paper fish craft is a fantastic choice! This craft is ideal for all ages, as it mostly involves folding and shaping paper. It would be perfect to create along with reading the Dr. Seuss book: One Fish, Two Fish, Red Fish Blue Fish!
What You’ll Need:
- Pre-made quilling strips of various colors OR craft/construction paper (to make your own strips)
- Slotted quilling tool
- Scissors
- Craft glue
- Googly eyes

Instructions:
Grab your pre-cut quilling strips (or make your own by cutting some even strips from construction paper or cardstock). Don’t forget to use red and blue if you are doing this as a Dr. Suess craft! For each fish, you will use your slotted quilling tool to curl the two strips into loose coils. This is a great fine motor skills activity, and most children should be able to do this part with a little guidance!
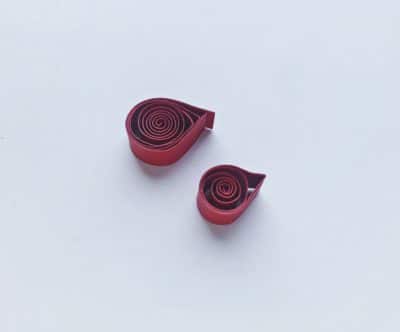
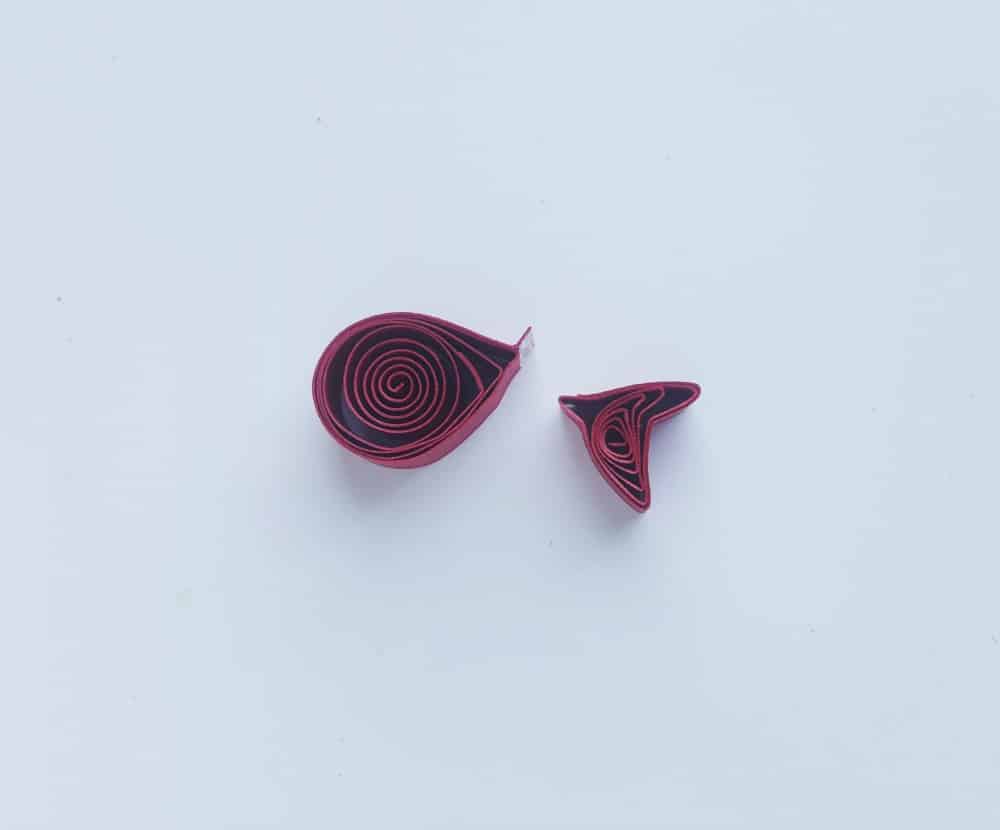
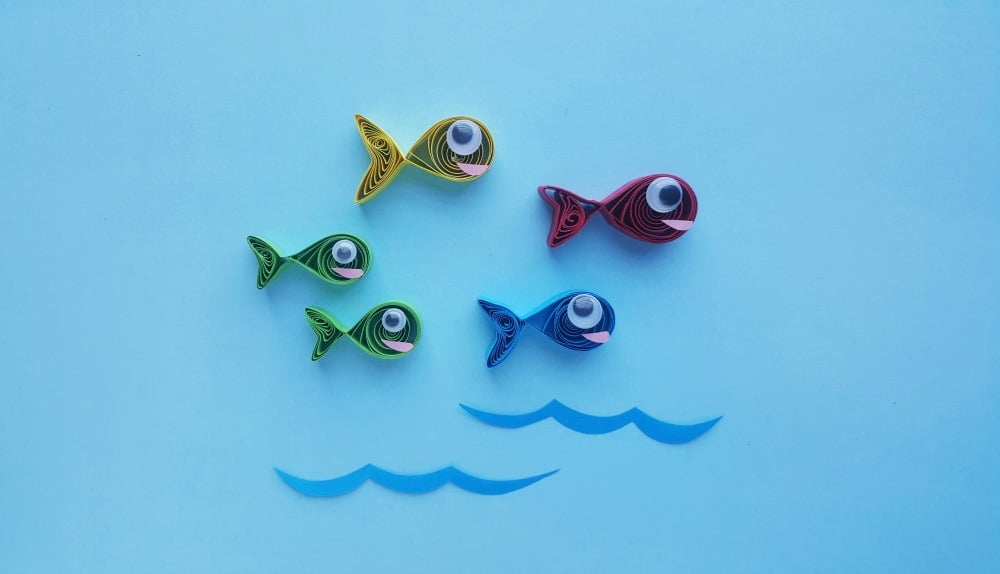
When both strips are curled, you will shape them into two tear-drop shapes with your fingers. One of the shapes should be smaller than the other (as shown in the picture below). To achieve this, you may need to trim one of the coils before making it into a tear-drop shape, or just curl it a little more tightly. I’ve found that the easiest way to create the “tear-drop” shape is just to pinch one side of each coil.
For the larger tear-drop coil, leave the end of the strip open and extending out over the edge of the shape (see picture). This will be important later. For the smaller tear-drop coil, go ahead and fold the edge over to close the shape.

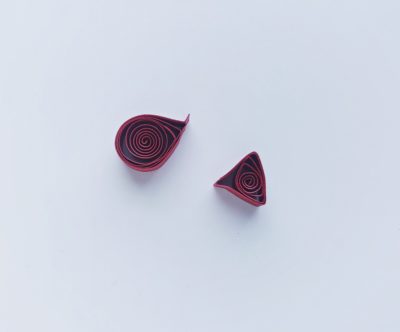
Next, take the small teardrop shape and pinch together its curved side, forming a triangle.
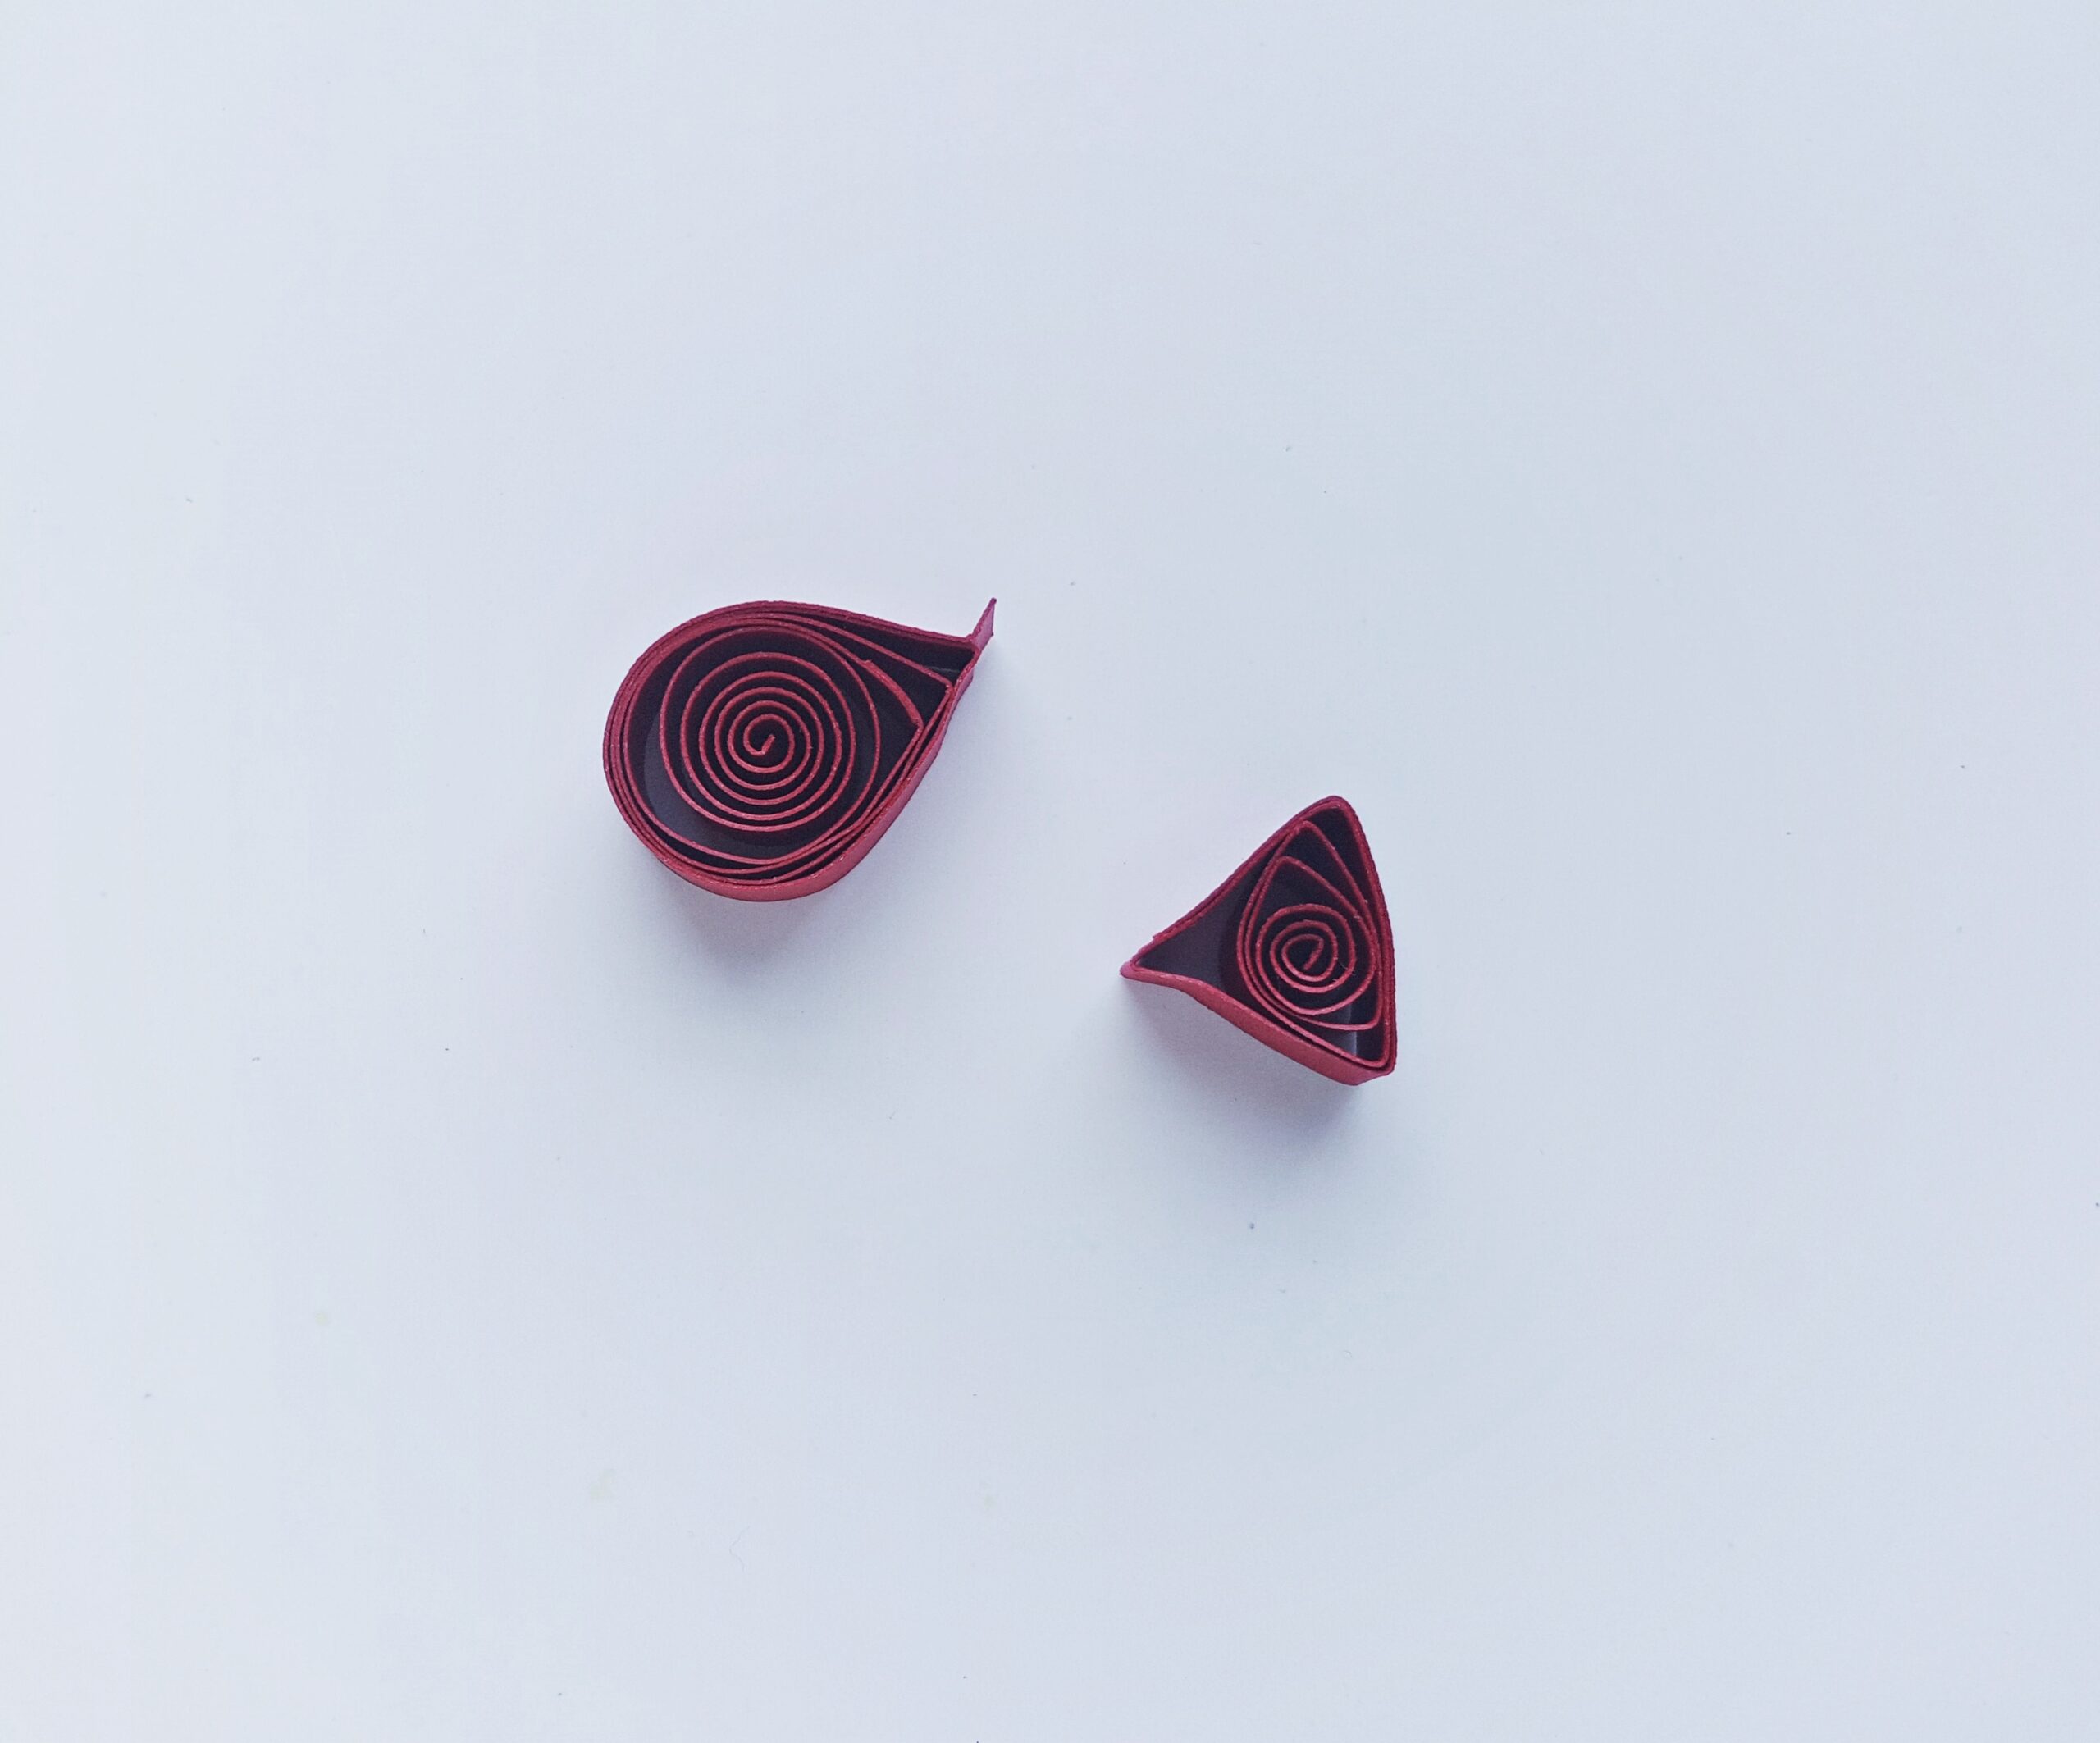
Now press one of the flat edges of the triangle shape towards the middle. This creates an “arrow head” shape that will become your fishy’s fin!

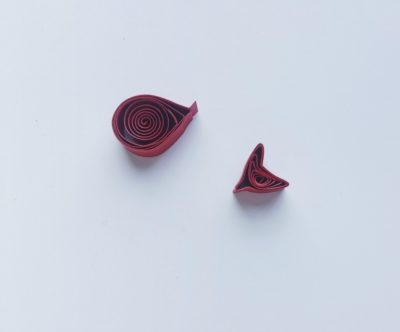
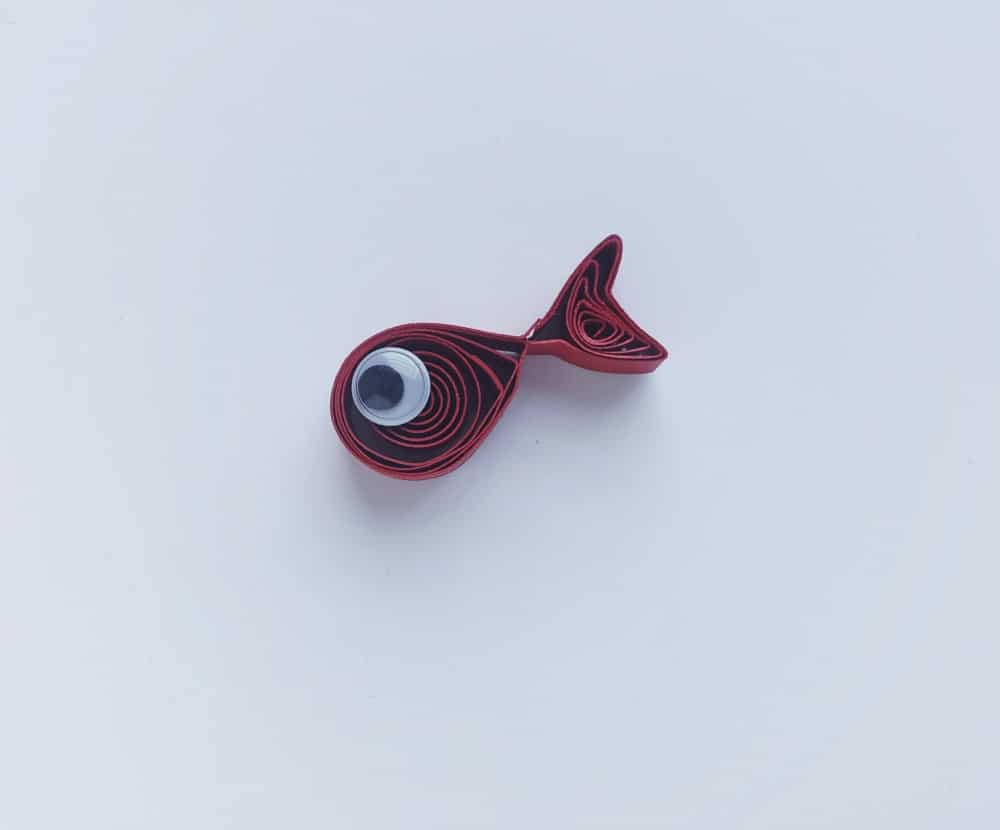
Apply glue on the big teardrop shape’s end that sticks out over the edge. Now you can connect the fish’s fin to its body! Aren’t you glad you left that end sticking out? Your fish’s shape is complete.
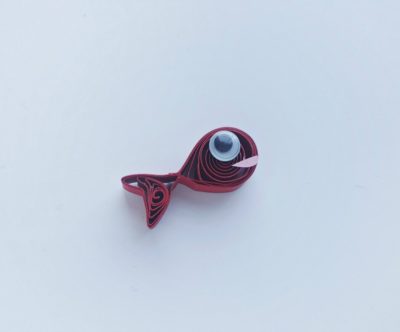
All that’s left is the fish’s face. Kids will love this part, which gives the fish design a playful flair. In other words: it’s time to apply the googly eye! Just put a little glue on the back of it and press the eye onto the front part of the body.
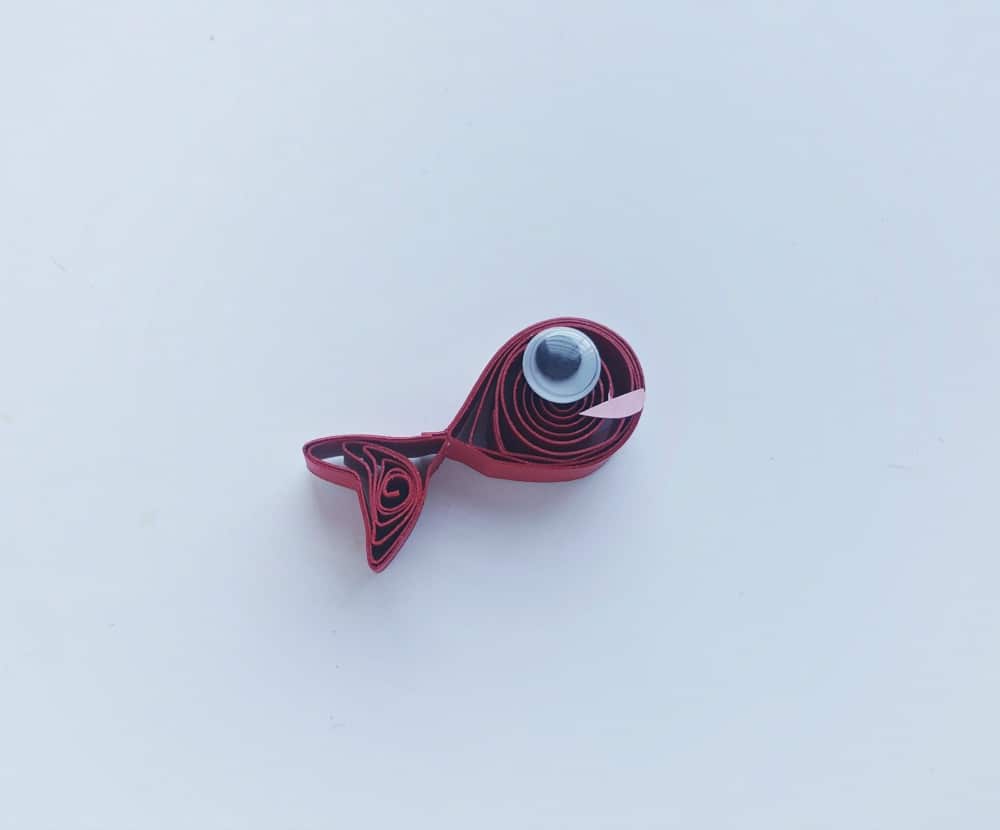
And lastly, your fish needs a playful mouth! Cut out a little half-moon shape from some pink construction paper and glue this small piece below the googly eye. Once the glue is dry on the eye and mouth, your first little fish is done!
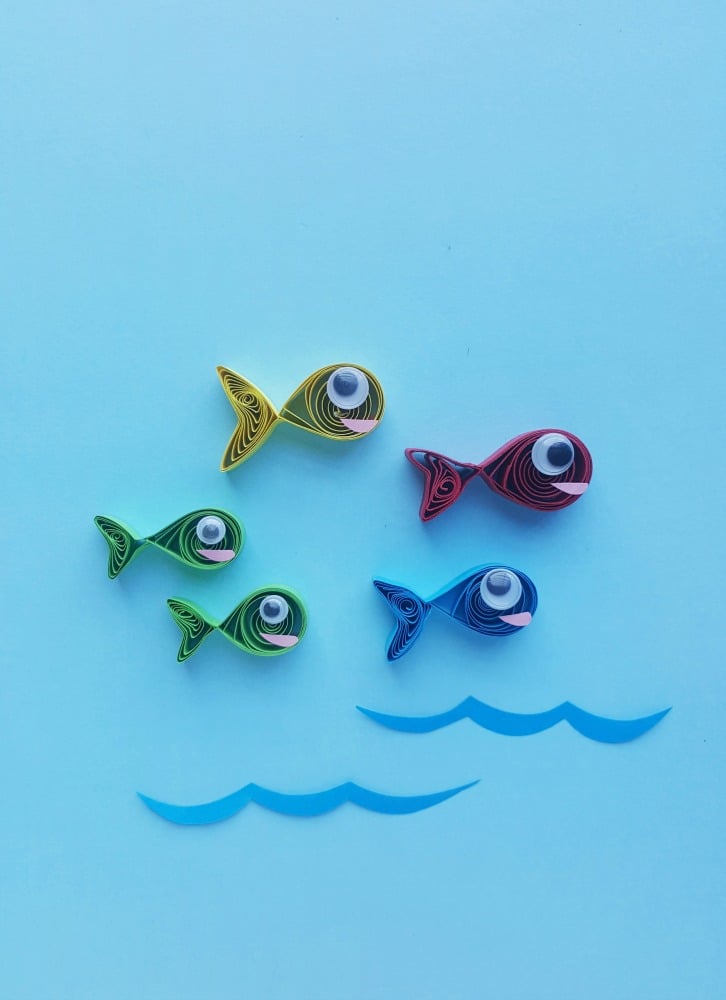
You can repeat this process as many times as you like in order to create a variety of colorful fish! Glue your fish to a piece of blue paper (AKA “ocean”), the way we’ve done below. After it’s finished, you could even incorporate this picture as part of a Dr. Seuss-themed diorama!
We hope that you and your children have a great time with this simple, whimsical paper craft! We also hope that you get to enjoy making it in conjunction with reading some Dr. Seuss stories!
Red Fish, Blue Fish: A Dr. Seuss-Inspired Paper Craft
Materials
Instructions
- Use pre-cut quilling strips (or make your own by cutting some even strips from construction paper or cardstock). Use red and blue if you're doing this as a Dr. Seuss craft. For each fish, use your slotted quilling tool to curl the two strips into loose coils.
- When both strips are curled, shape them into two tear-drop shapes with your fingers. One should be smaller than the other (as shown in the photo). If necessary, you can trim one of the coils before making it into a tear-drop shape--or just curl it more tightly.

- For the larger tear-drop coil, leave the end of the strip open and extending out over the edge of the shape. This will be important later. For the smaller coil, go ahead and fold the edge over to close the shape.
- Next, take the small teardrop shape and pinch together its curved side to form a triangle.
- Now press one of the flat edges of the triangle shape towards the middle. This creates an “arrow head” shape that will become your fishy’s fin!
- Apply glue on the big teardrop shape’s end that sticks out over the edge. Now you can connect the fish’s fin to its body!
- Apply the fish's eye (a googly eye) to the front part of the fish.
- Cut a tiny half-moon shape from pink construction paper and glue below the googly eye to make the fish's mouth. Once the glue is dry, your fish is done!