Exploring Flowers! Activities from Preschool to High School
With the abundance of flowers blooming in the spring and summer, I just can’t help but want to do some “exploring flowers” activities with my children! With a few simple tools and flowers right from the yard (or the store) kids of any age can explore and learn the different parts of a flower.
Exploring the Parts of a Flower : Science Investigations for Preschool Through High School
Exploring Flowers with Preschoolers
Preschool: Sensory and Sorting Investigation
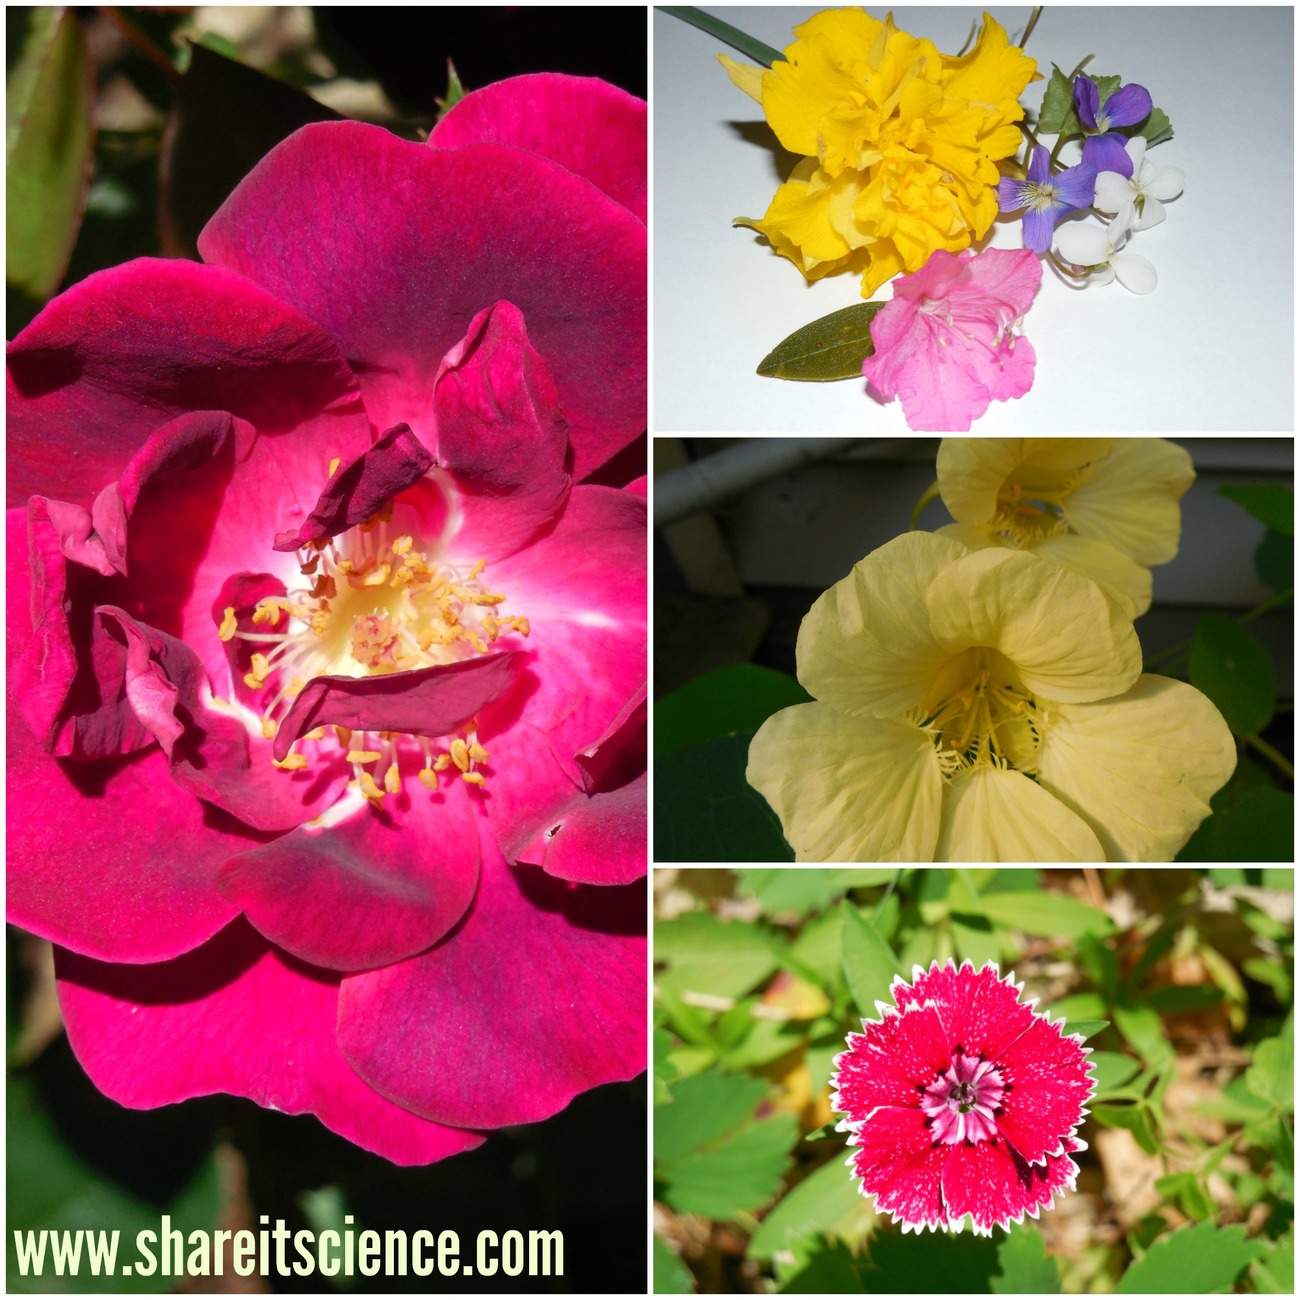
Flowers come in all shapes, colors, and sizes. Despite their diversity, each flower has some sort of stem, leaves, and petals. You can pick just about any flower for this investigation. For very young children, though, I would avoid dandelions or other flowers that have milky sap.
Provide students with safety scissors and a popsicle stick “probe.” Then set them to work deconstructing their flowers.
You can have them sort the pieces into the three main parts: stem, leaf, and petal. Take the sorting a step further by sorting colors or textures, i.e. fuzzy stems vs. smooth stems.

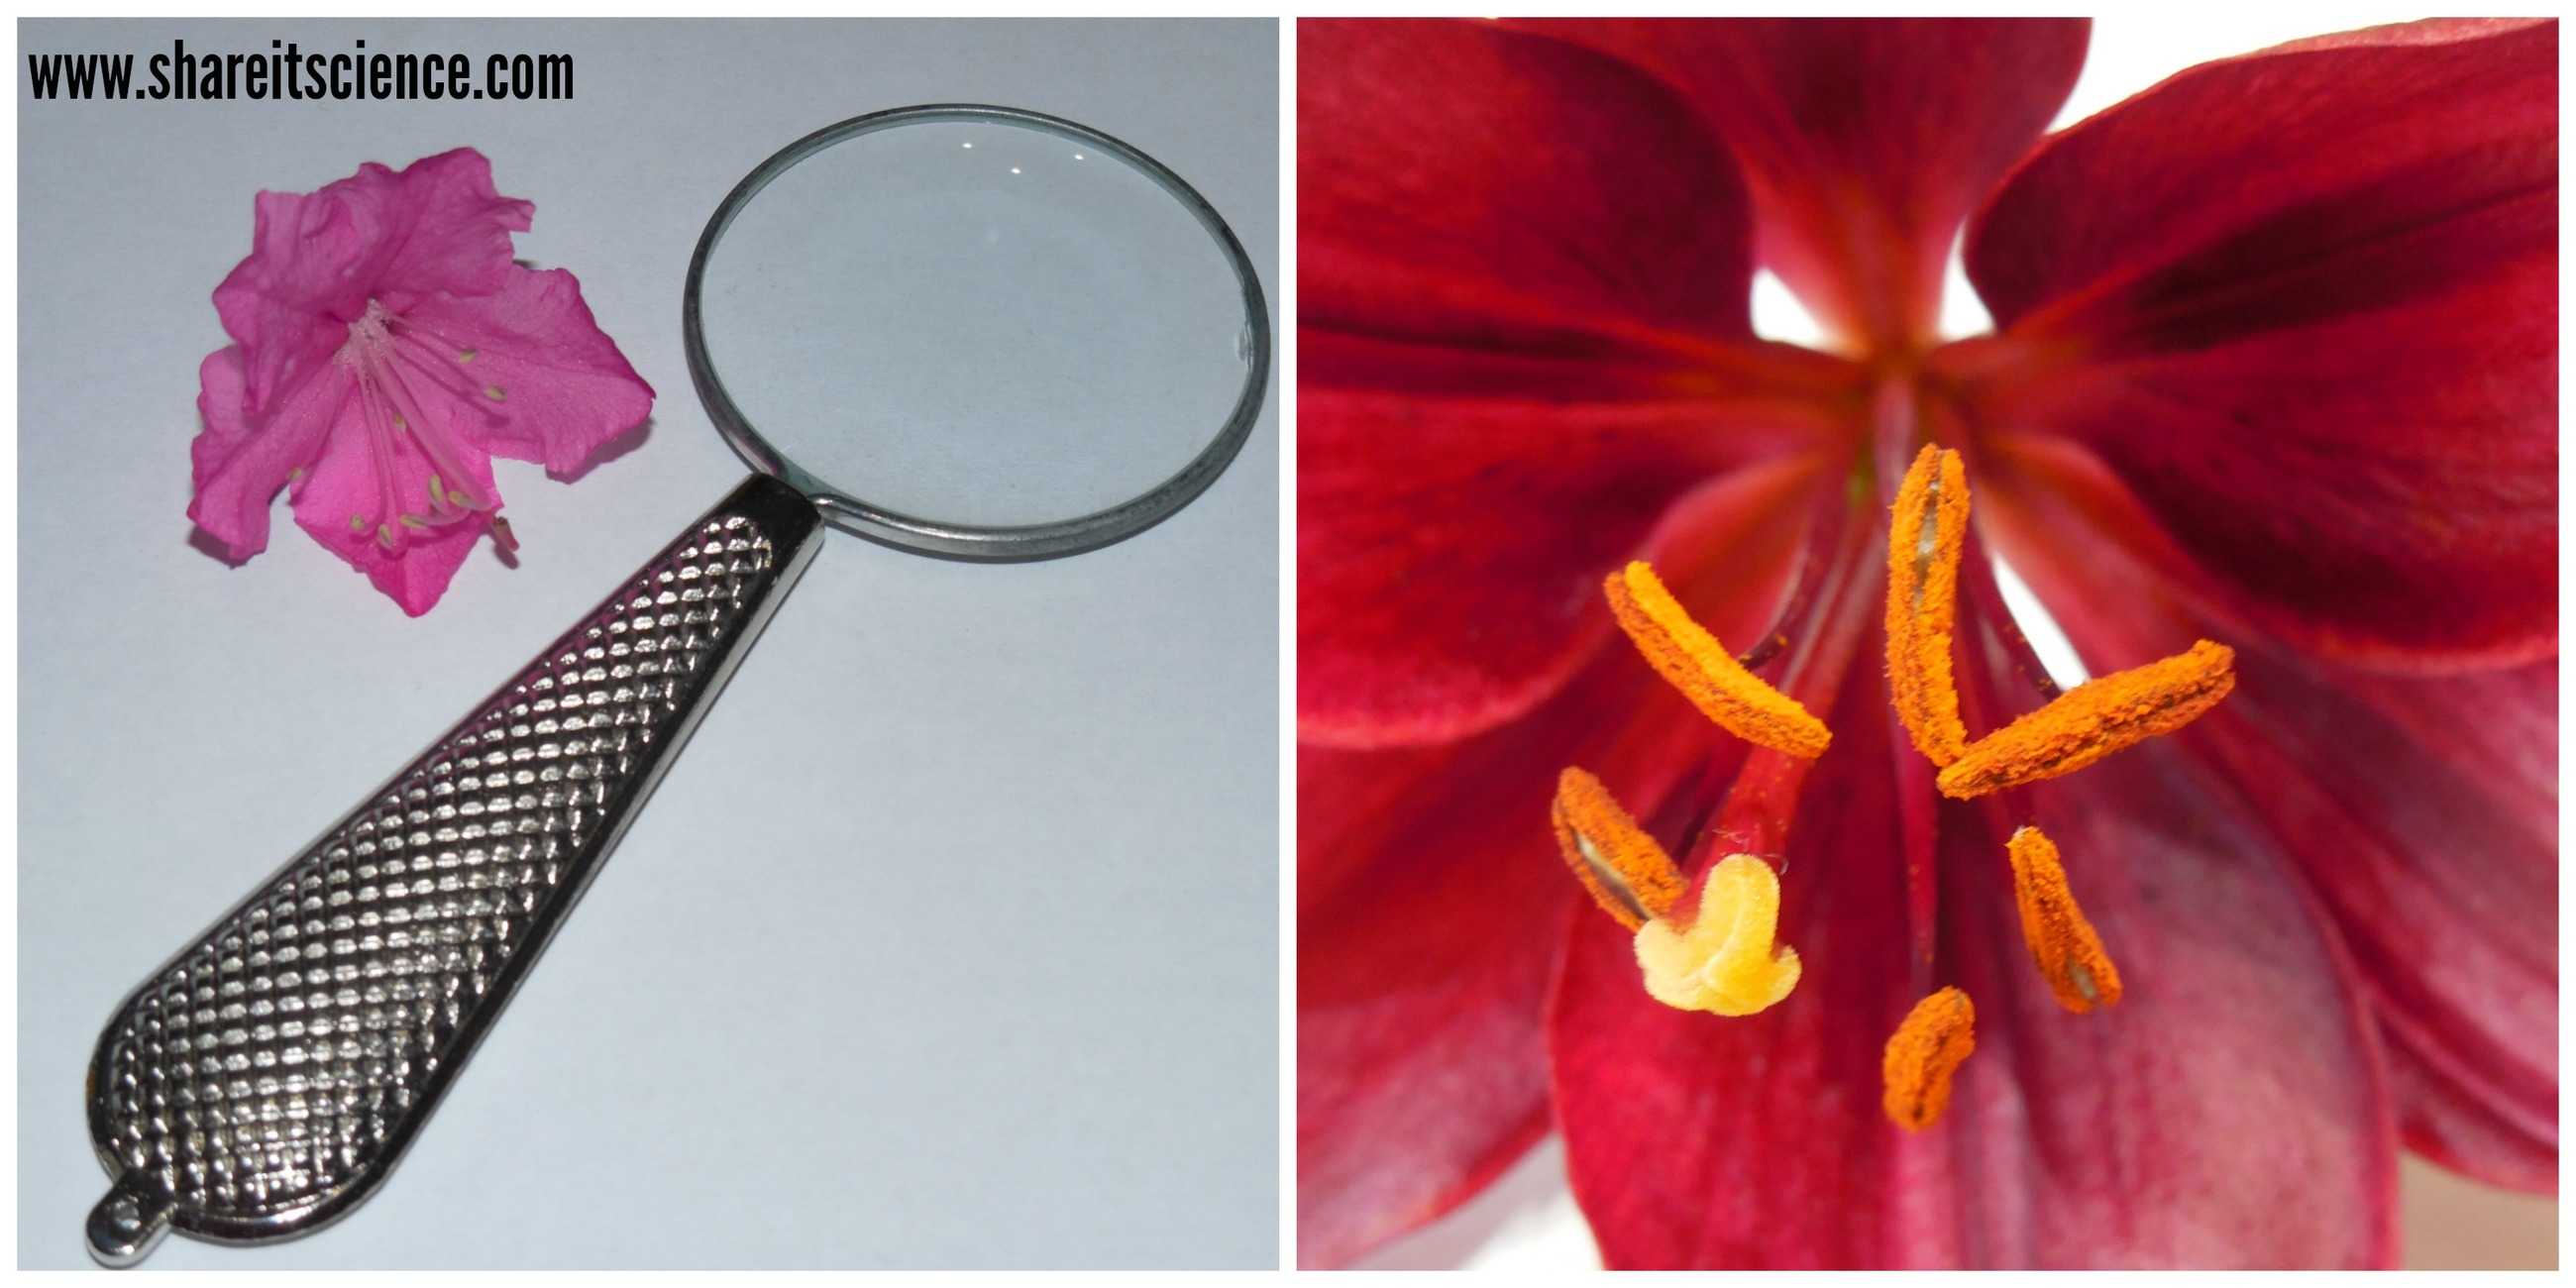
Giving the kids some other tools to use can enrich their investigation even further. You can find a sturdy, kid-friendly magnifying glass and tweezer set on Amazon.

Elementary: Flower Parts and Pollination
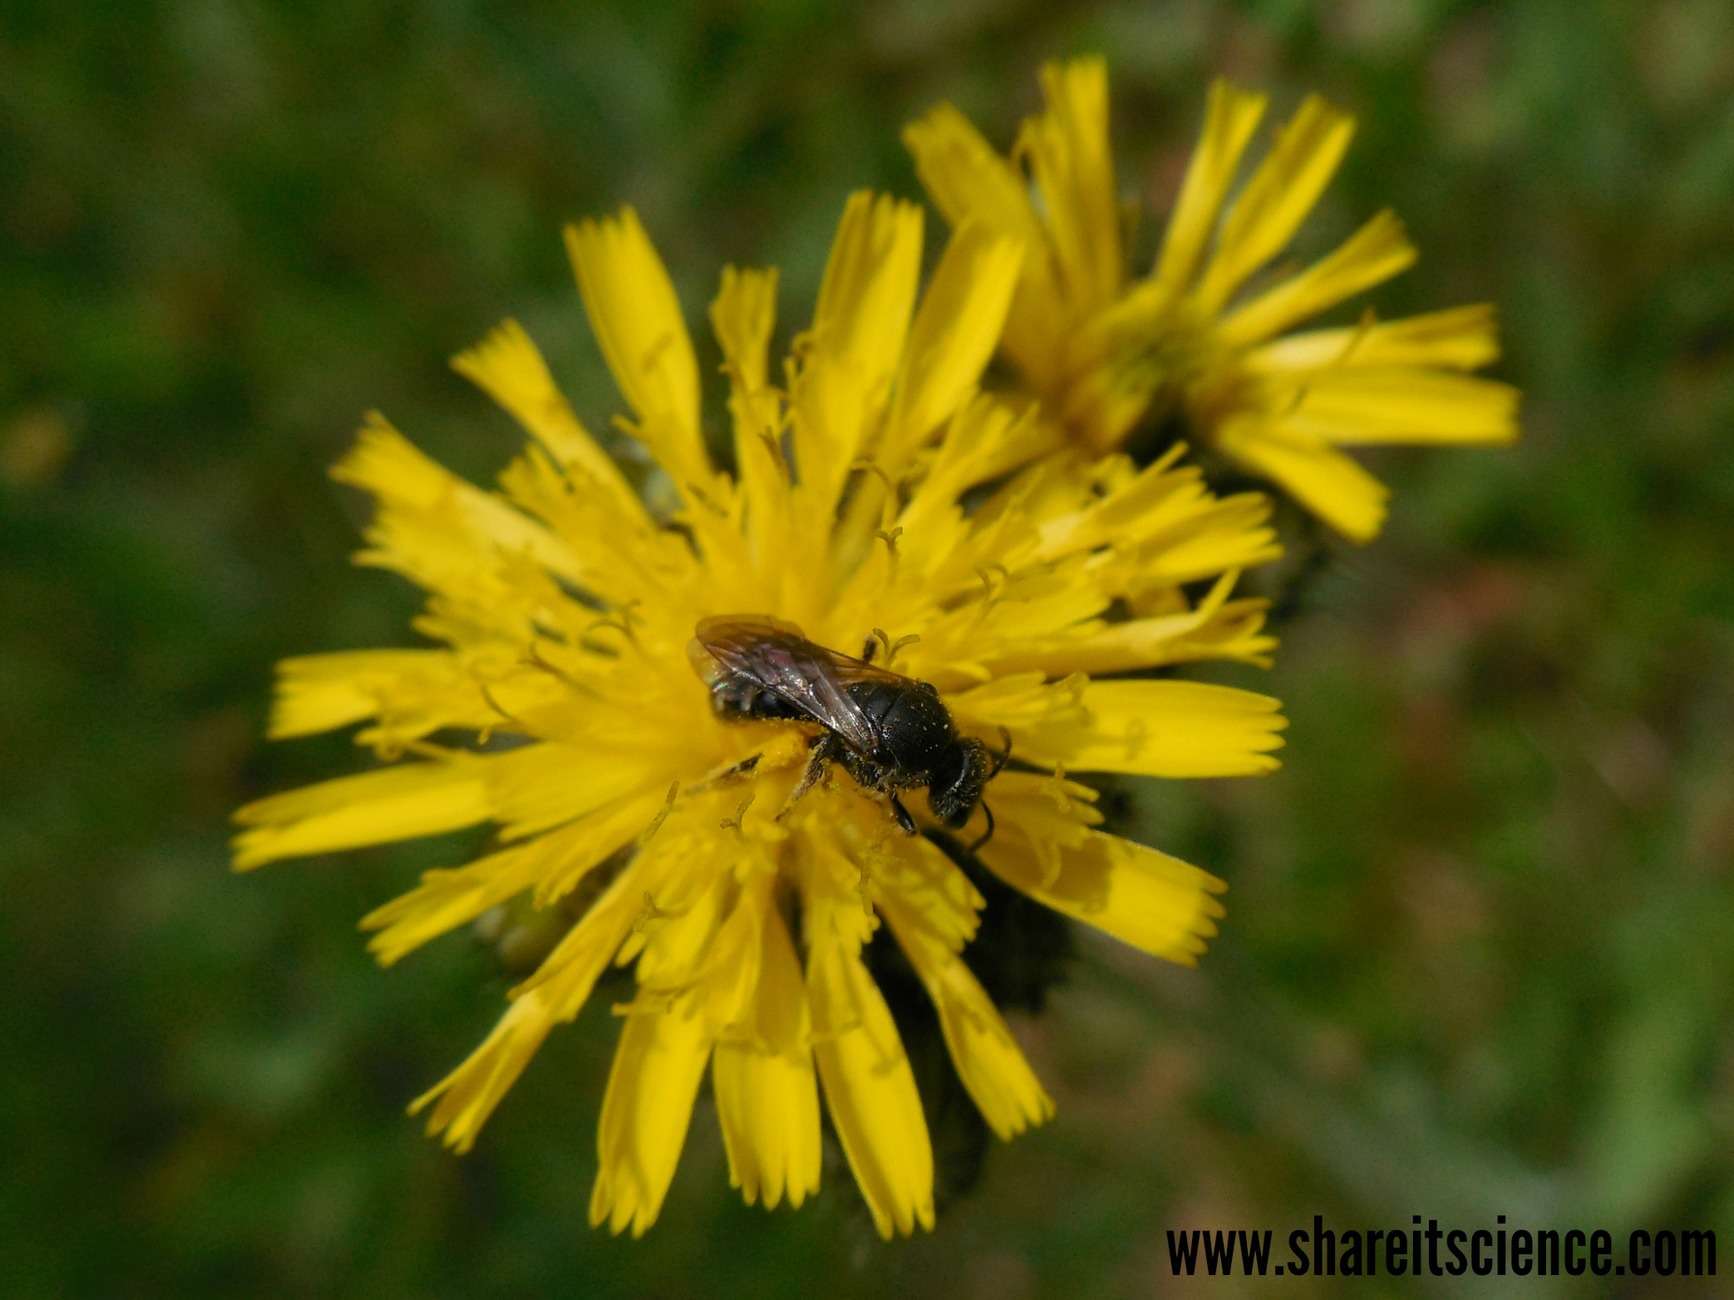
Elementary students enjoy dissecting flowers as well. This is a great time to look a little more closely and identify some of the flower’s parts. If you can, get outside and observe an area where flowers are growing. What sorts of insects do you see? What are the insects doing on the flowers?
Insects like ants, butterflies, and bees are not only getting their food from the flowers, but they are also helping the flowers to make seeds. The insects collect pollen as they visit the flowers. They drop off some of this pollen at the next flower.
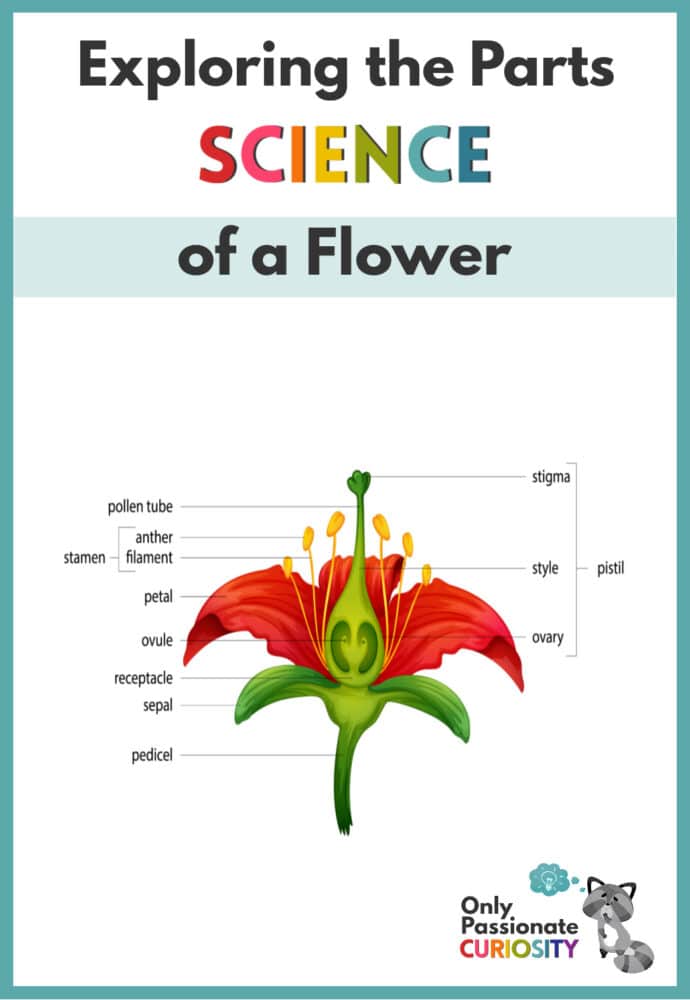
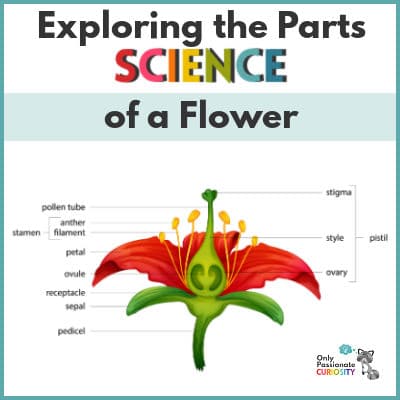
Provide a magnifying glass, scissors, and a popsicle stick probe. When kids are dissecting their flowers, see if they can spot some of these parts in addition to the most basic stem, leaf, and petal. The stamen is where the pollen is made. If you touch it or shake it over some paper, you may see the pollen fall off. When pollen is placed on the style, or the very top of the pistil, a pollen tube grows inside and the plant can begin to make a seed!

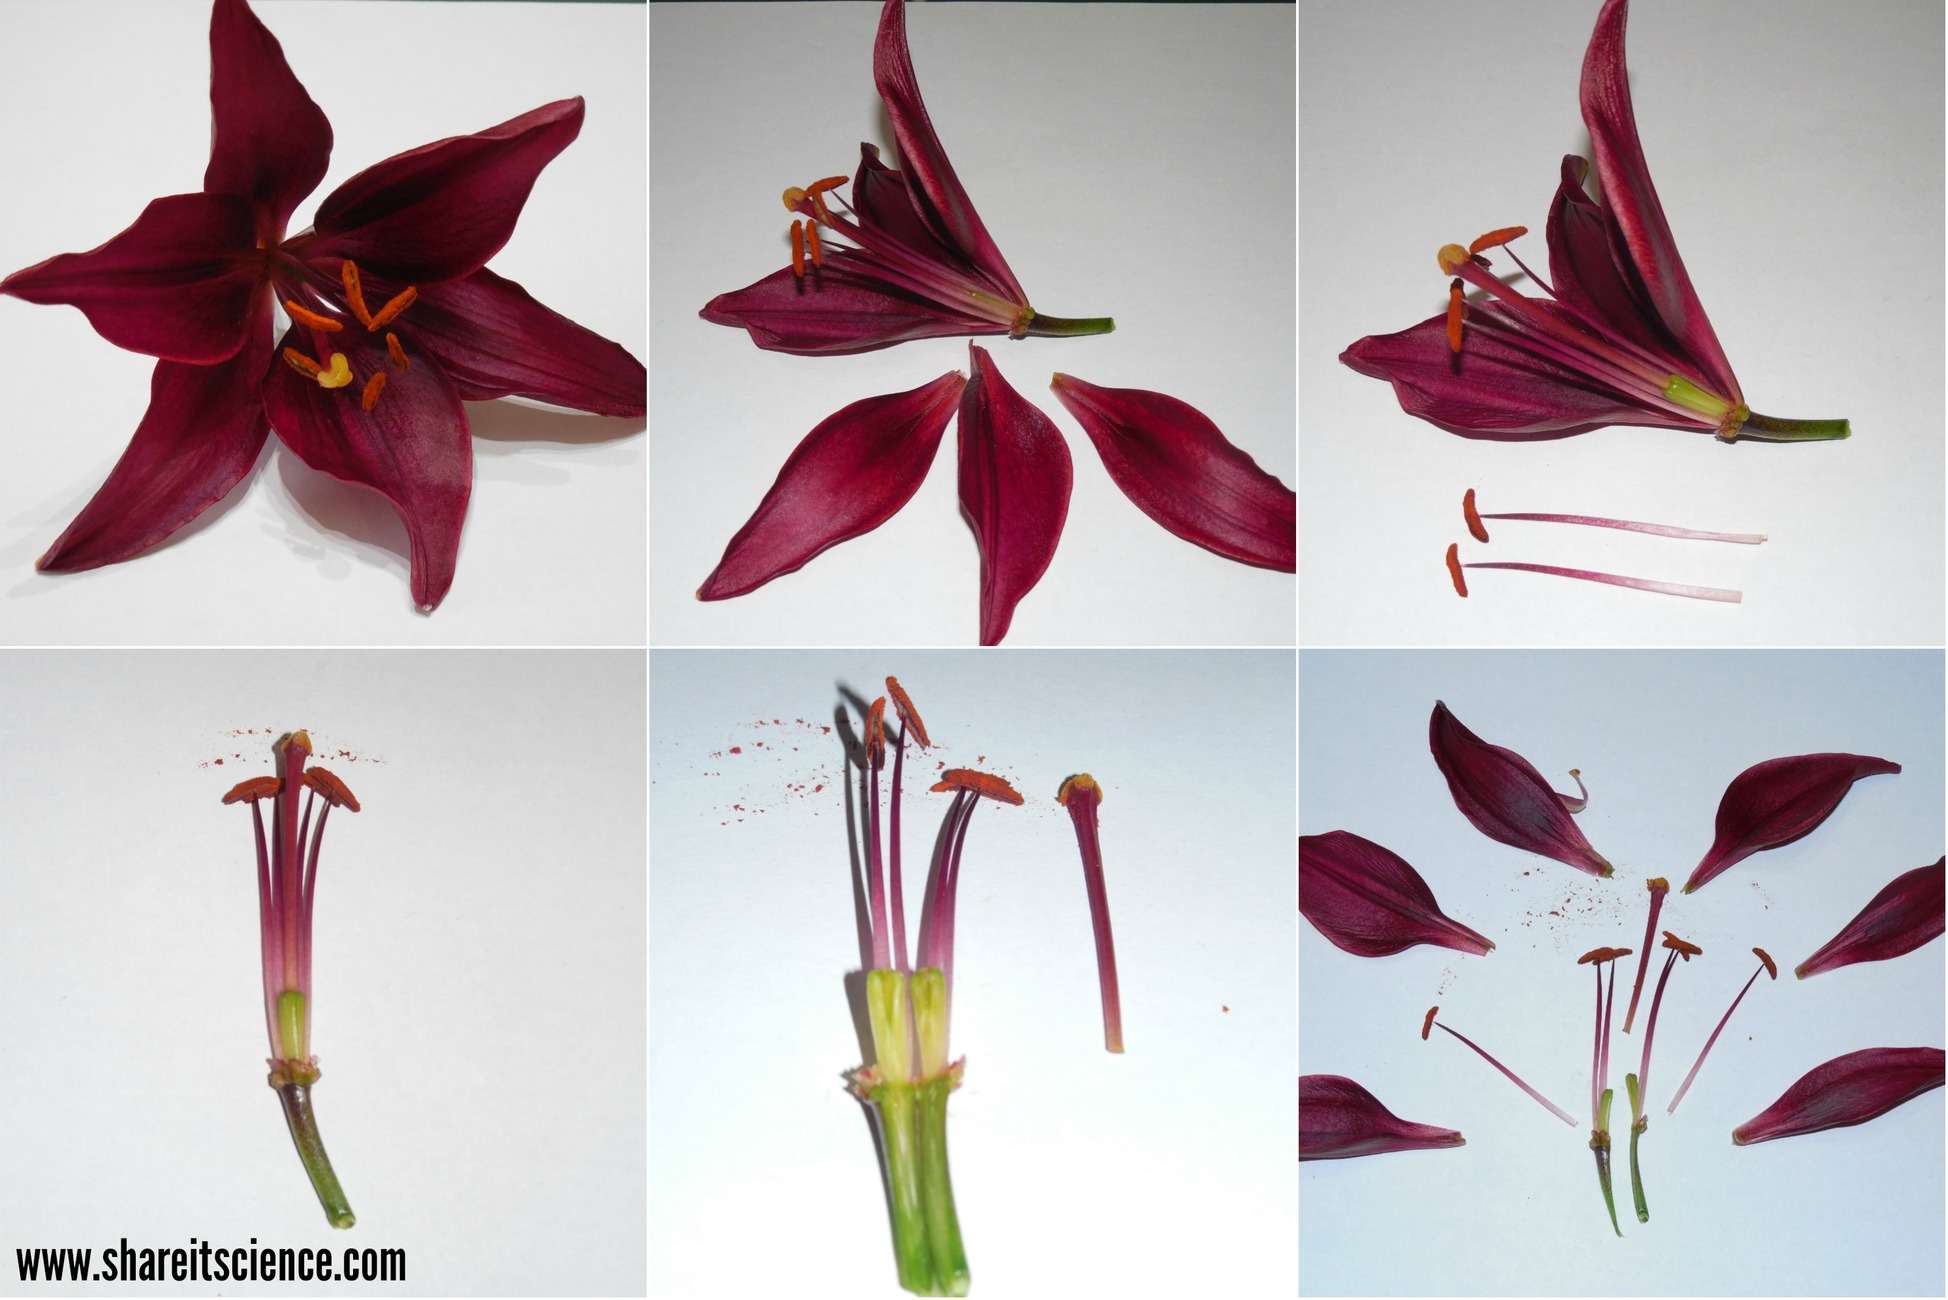
All flowers have these parts, but they can come in slightly different shapes or configurations. If you choose a lily or a tulip for your investigation, these parts are easy to find and identify!
Middle School and High School: Flower Anatomy and Life Cycles
For older students, you can take this activity a step further. Turn this into a full-blown flower dissection! Scissors and fingers can still be used, but more precision can be used with a basic dissection kit. You’ll want to be sure there is adult supervision and have a safety discussion before bringing out the scalpel.
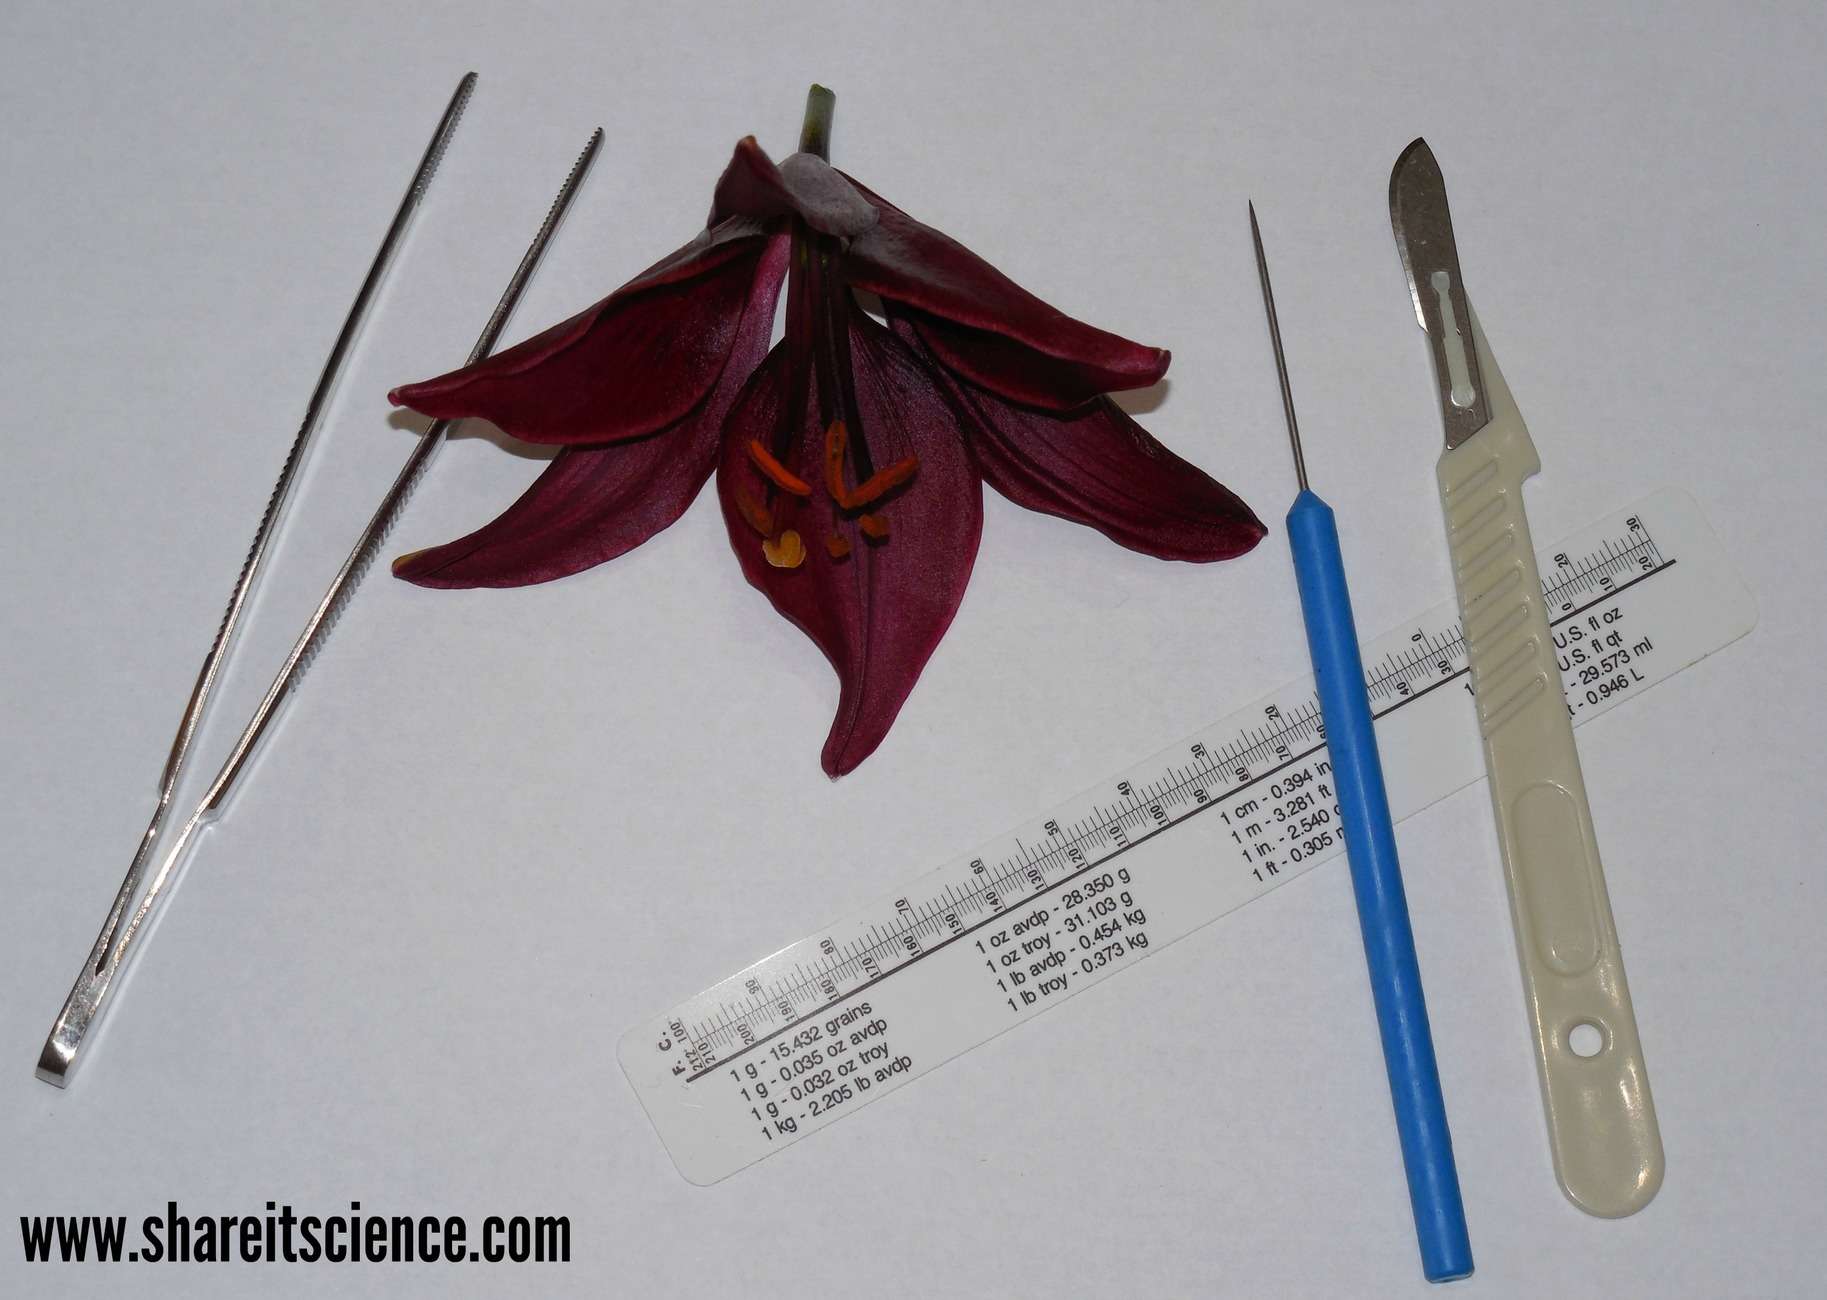
Using a large flower, like a lily or tulip, will help in identifying the specific flower parts. In addition to petals, stem, and leaves, they will look for:
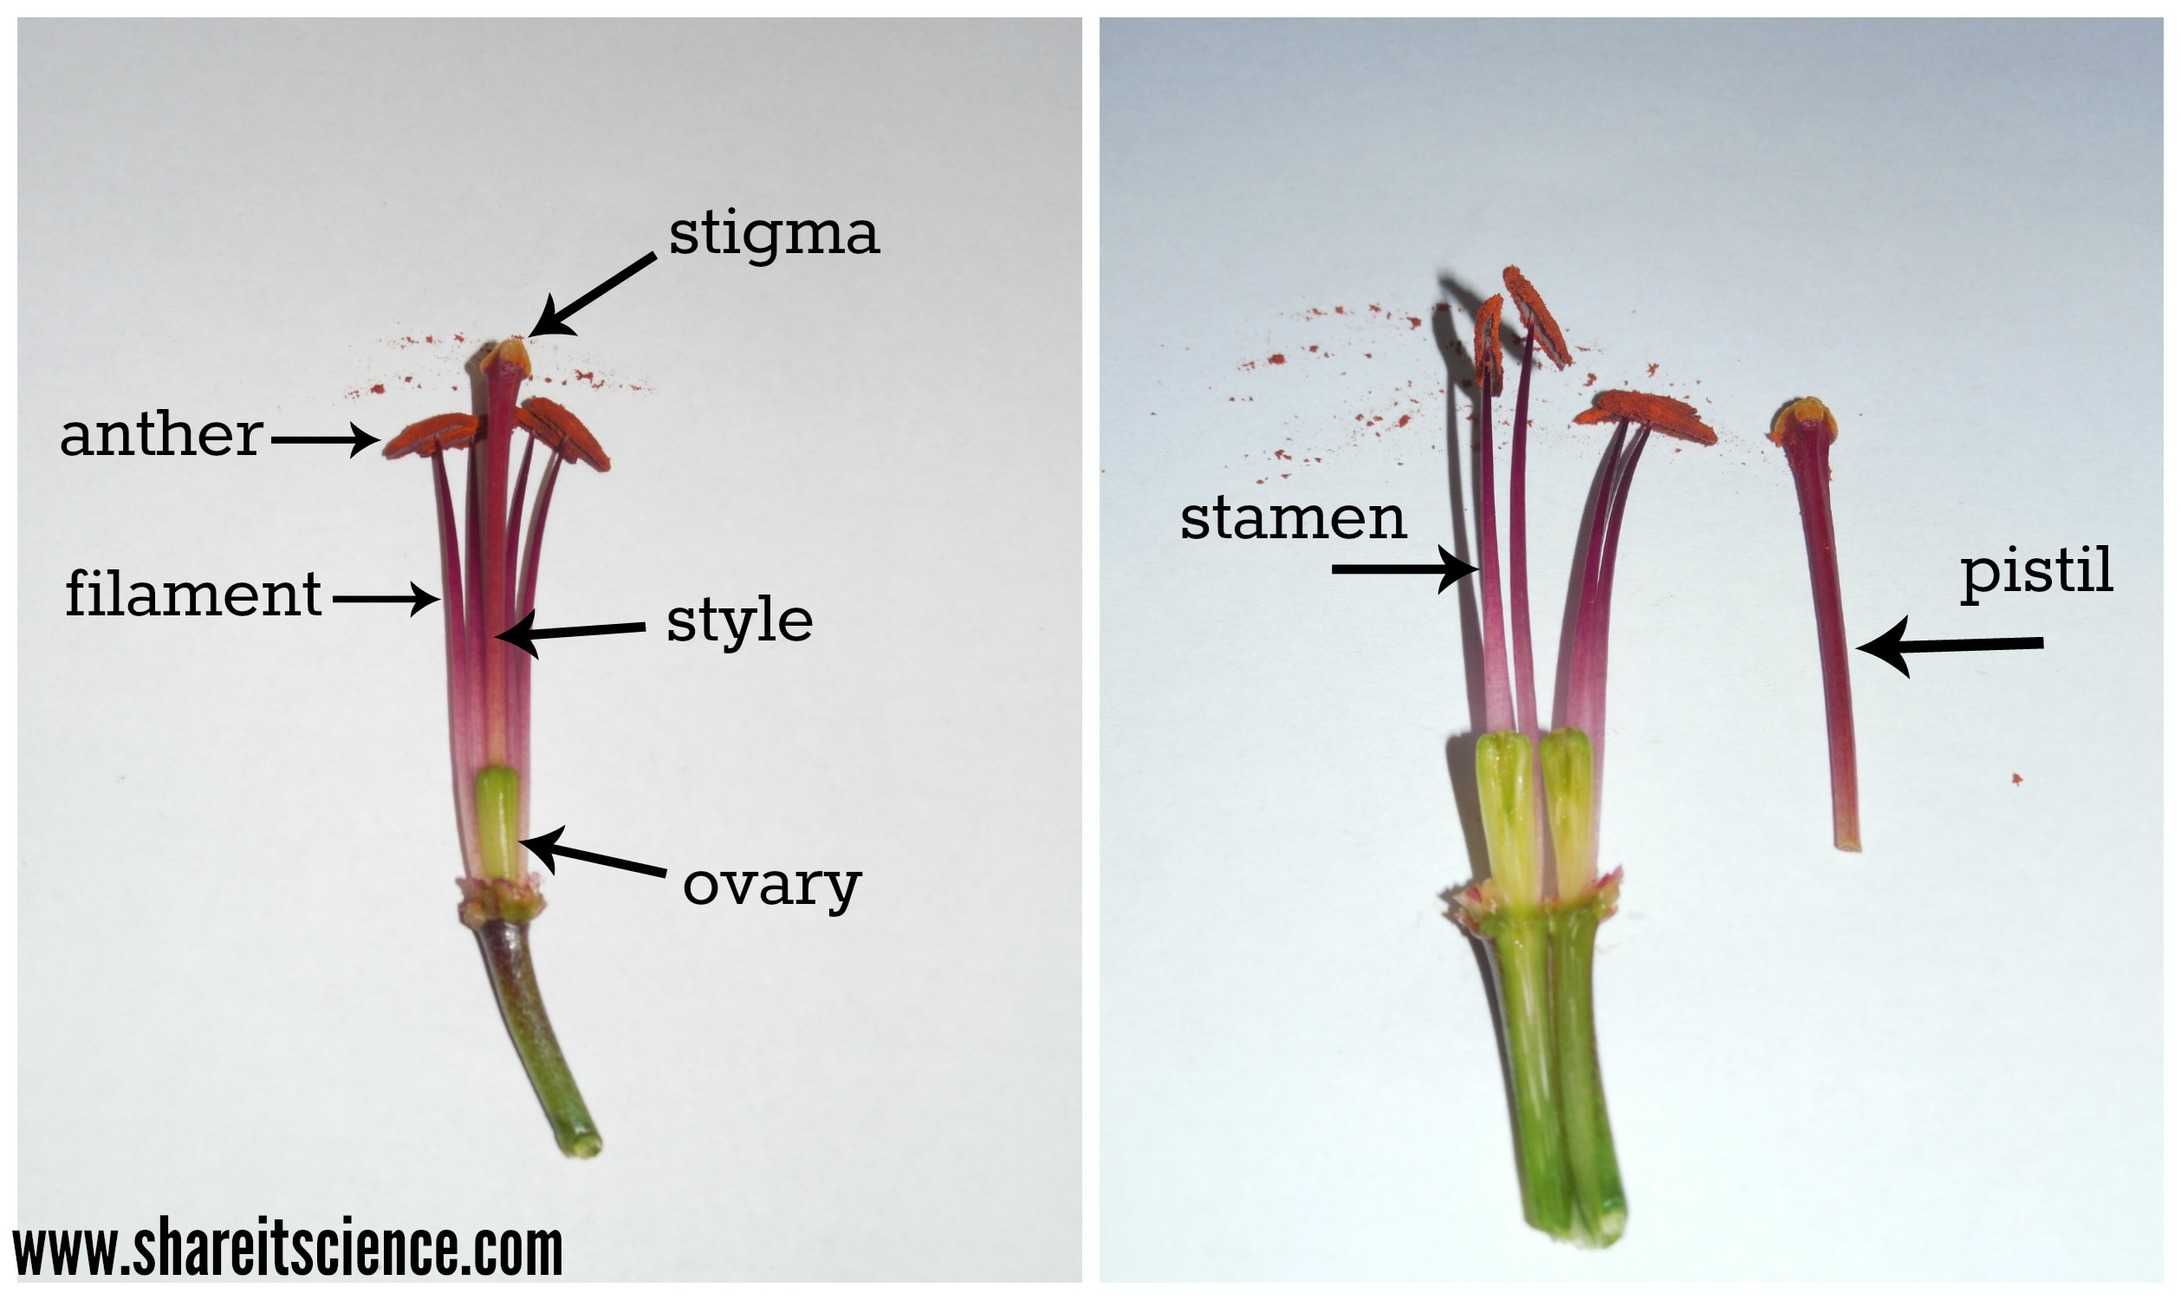
Stamen: this part of the flower is made of two parts, the filament and anther. The anther is where the pollen is produced. The stamen makes up the male part of the flower.
Pistil: the pistil includes several parts, the stigma, style, and ovary. The stigma is the part of the pistil where pollen germinates. When pollen reaches the stigma, the pollen tube grows down into the style and ovary.
The style connects the stigma and the ovary. The ovary is where the ovule, or seed develops. The ovary is what grows into the fruit around this seed. The pistil makes up the female part of the flower.
This investigation can easily be connected to other lessons on plant reproduction and life cycles. If you are looking for another wonderful resource for plant anatomy that will appeal to all ages, check out Paul Young’s “The Botany Coloring Book.”

 Sarah Benton Feitlinger is a former Preschool-6th science teacher, blogger and science curriculum developer. She is passionate about educating children, anything and everything science! Check out her blog, Share it! Science News for science activities, lessons, science news and other resources for teachers, homeschoolers and parents. Follow her on social media: Facebook, Twitter, Google+ and Pinterest.