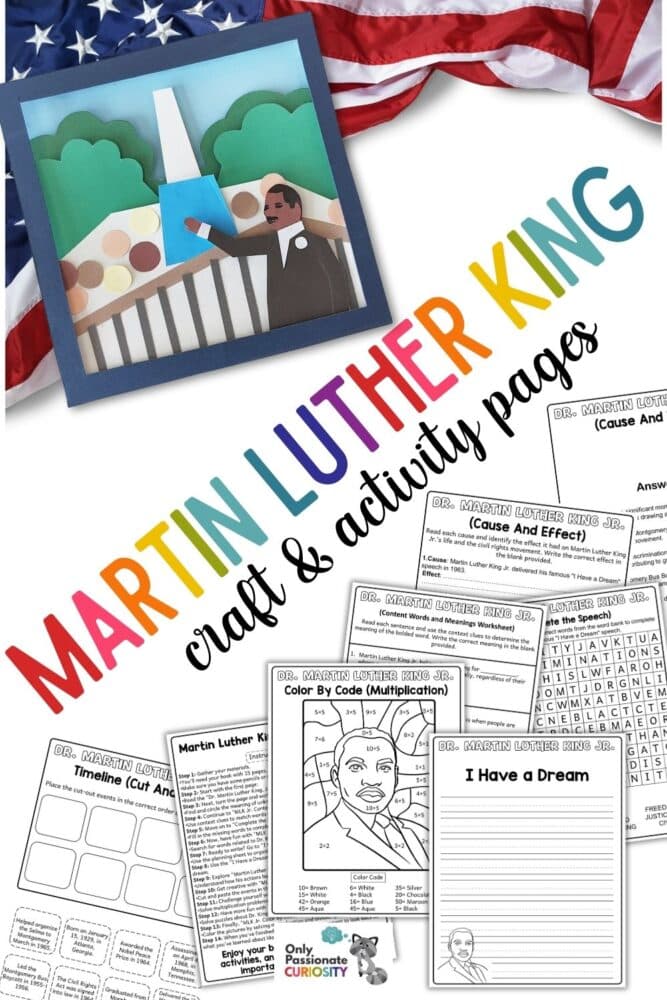
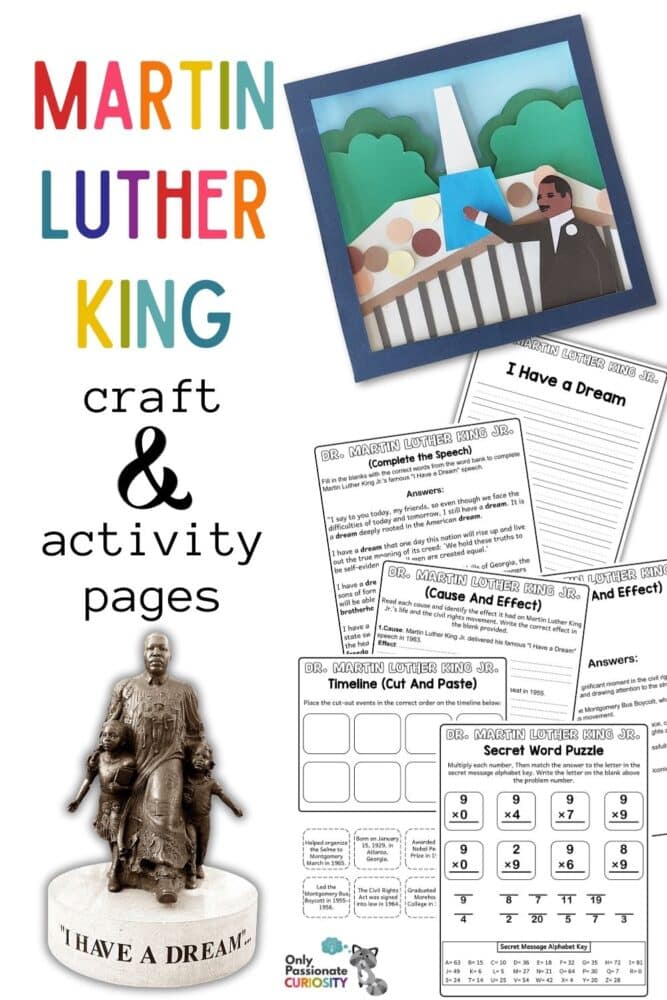
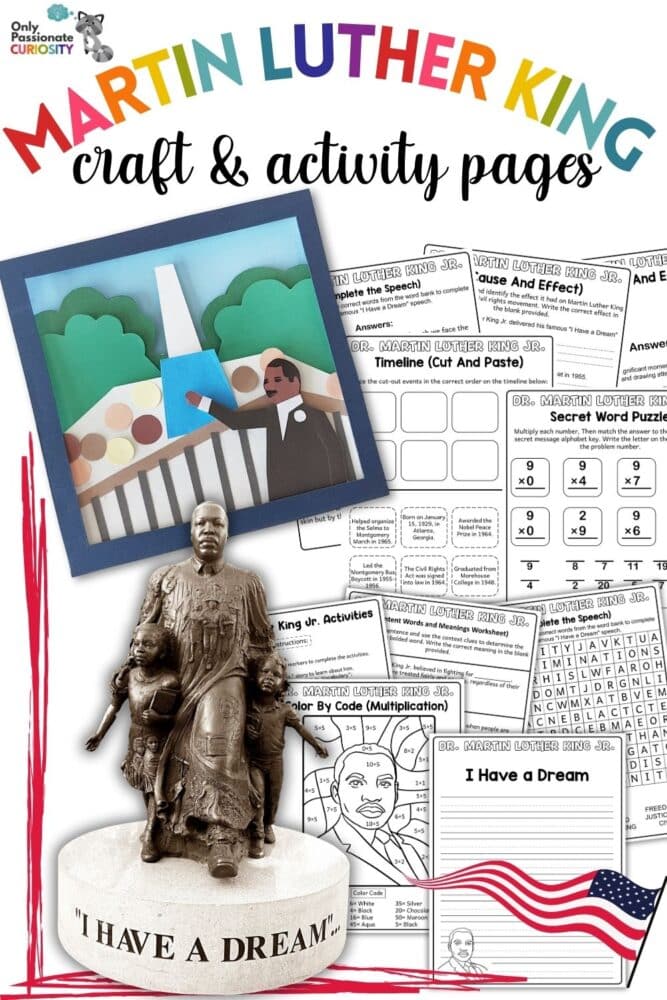
Dr. Martin Luther King Craft & Activity Pages
As we commemorate the life and legacy of Martin Luther King Jr., it’s important to engage children in meaningful activities that not only honor his contributions but also help them understand the values he stood for.
We have a 3D Martin Luther King craft, as well as an activity worksheet that you can use to teach children about the inspiring work of this influential civil rights leader. With this hands-on craft and thought-provoking exercises, children can gain a deeper appreciation for the principles of equality, justice, and compassion Dr. King advocated for.

List of Supplies for Martin Luther King Craft
- Colored craft papers
- Pencil – to trace the template
- Craft glue
- Sharpie or gel pen
- Craft foam sheet
- X-acto knife
- A pair of scissors
How to Make the Dr. Martin Luther King Craft
Step 1:
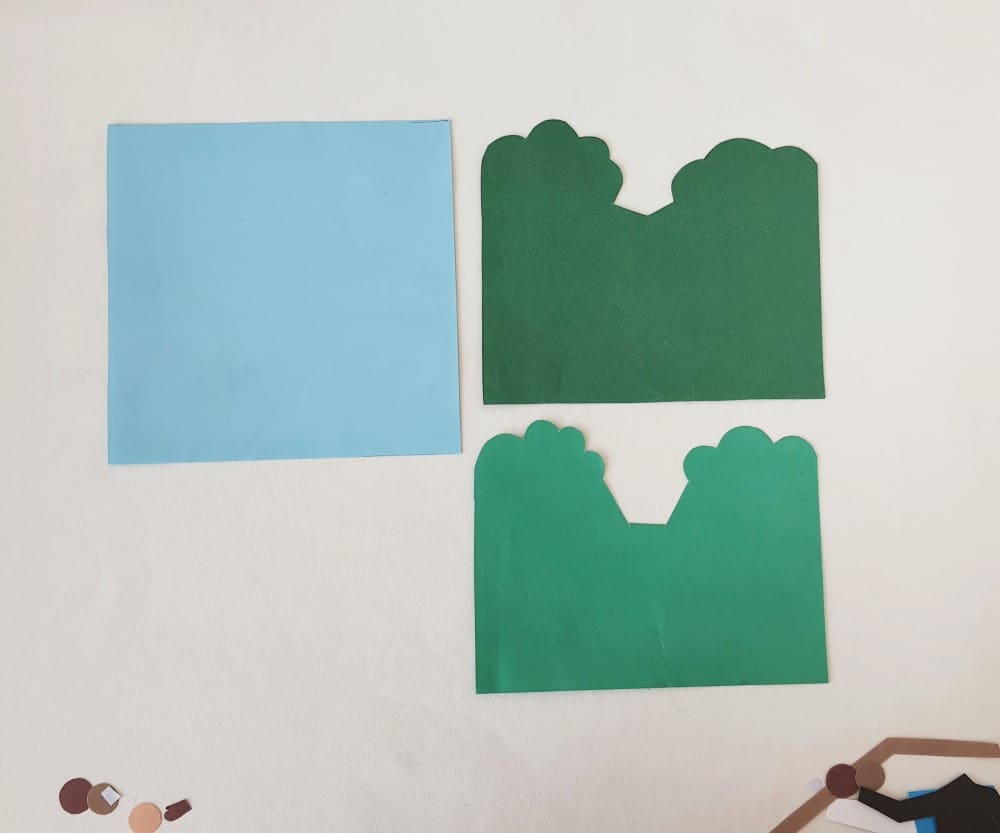
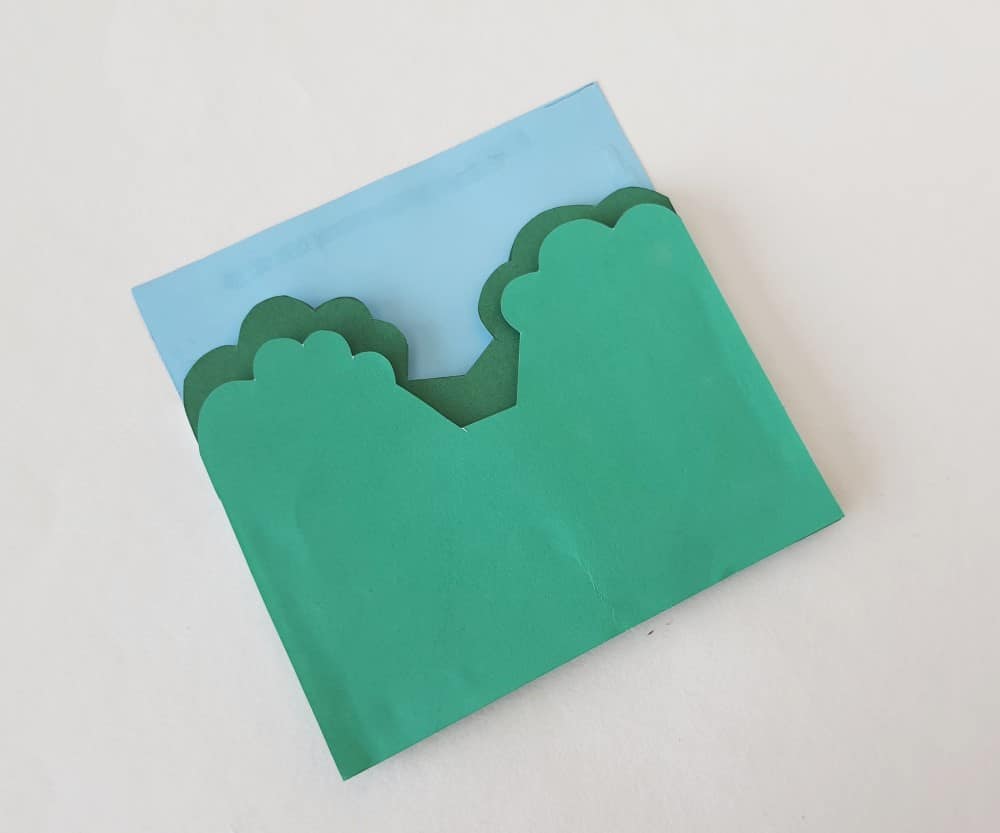
Select colored craft papers for each layer, item, and the Martin Luther King figure. Let’s start with the first three layers: the base (sky), and the trees (2nd and 3rd layers).
Step 2:
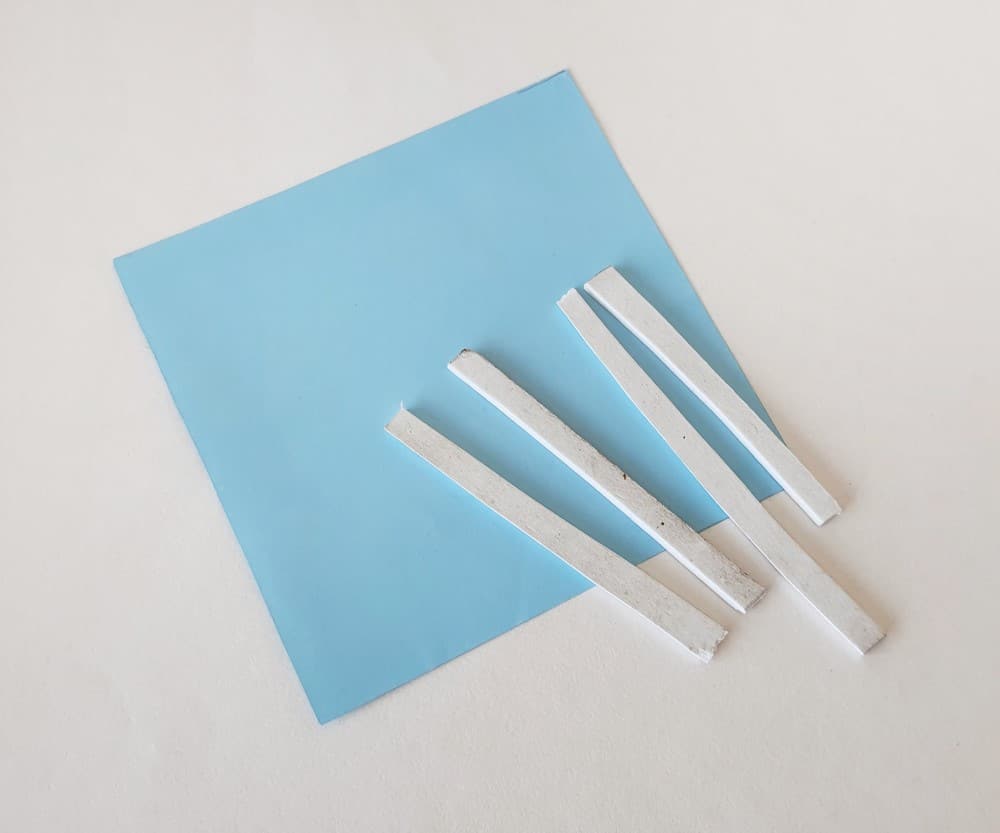
Take the base (blue paper to represent the sky) cutout and prepare 4 thin strips of craft foam.
Step 3:
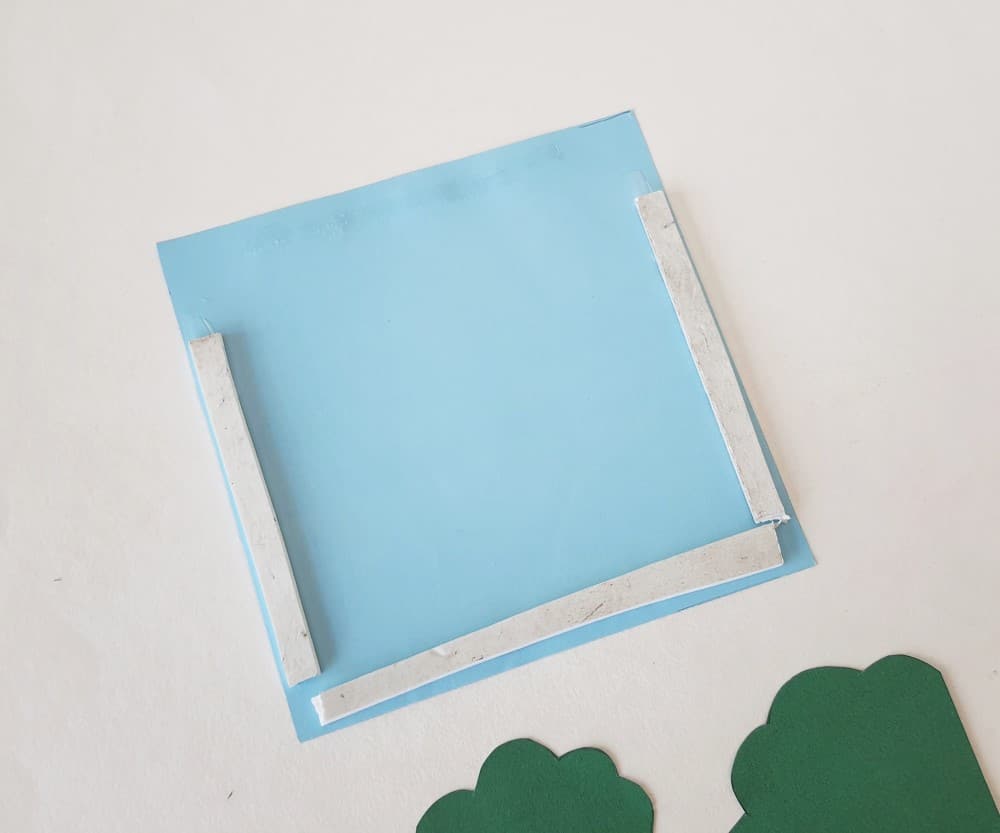
Attach the craft foam strips along the left, right, and bottom sides (adjacent to the border) of the base cutout. Set the fourth strip aside. You’ll use it in step 19.
Step 4:
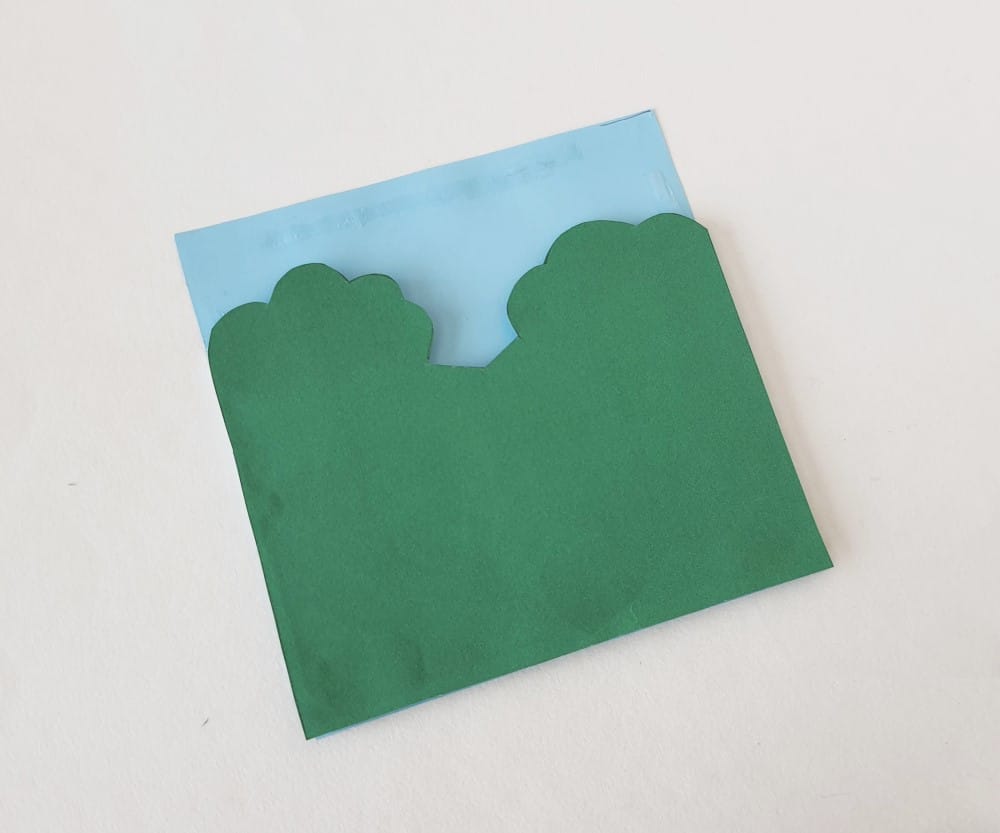
Apply glue along the top surface of the attached foam strips. Place the 2nd layer (trees) on the base (glued strips).
Step 5:
Cut four more foam strips and add a layer of foam strips on the left, right, and bottom sides of the 2nd layer. Then attach the 3rd layer (shorter trees) on the top of it. (Again, set the fourth strip aside. You’ll use it in step 19.)
Step 6:
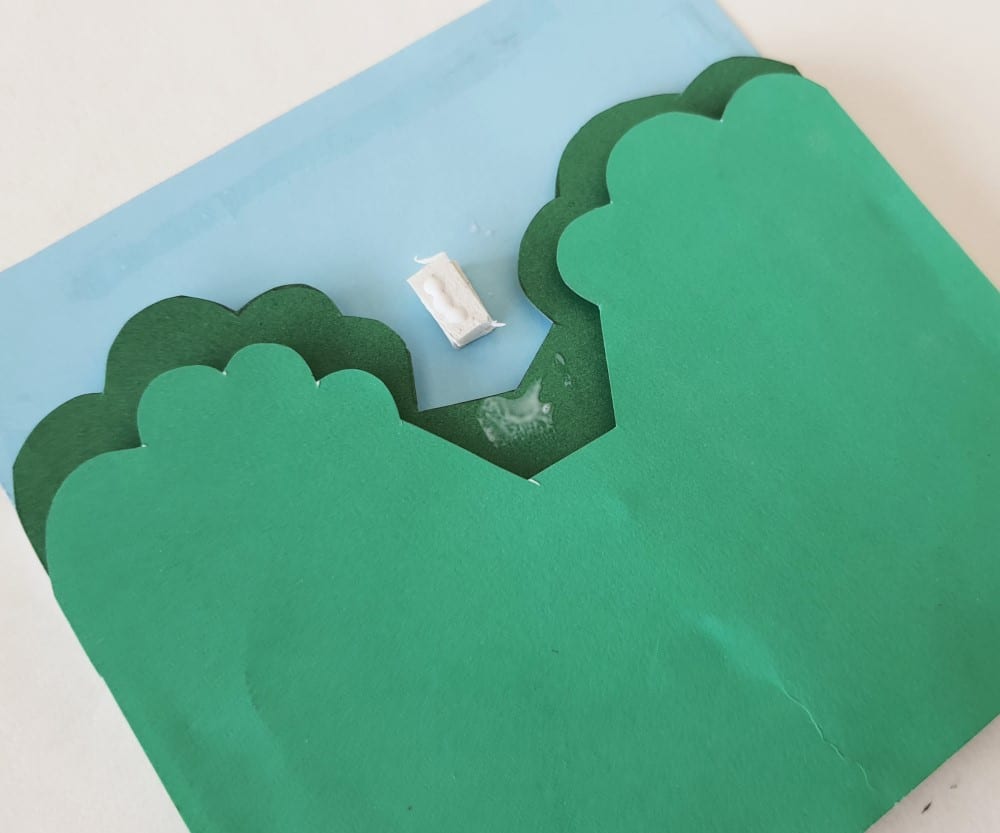
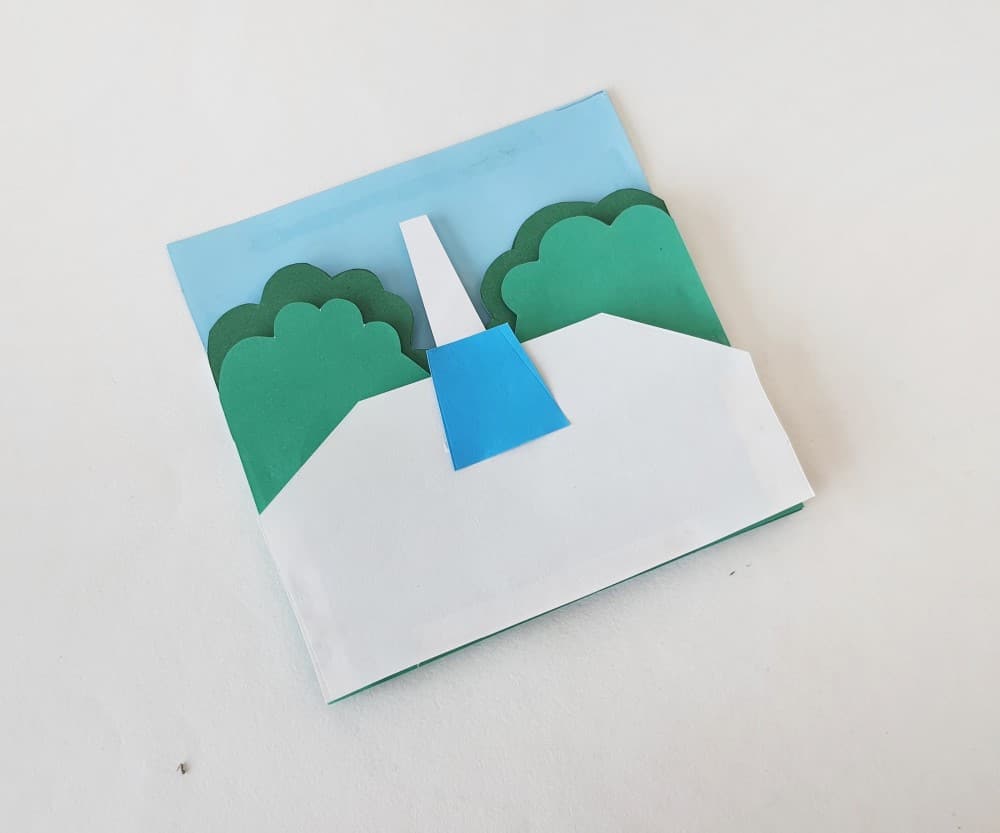
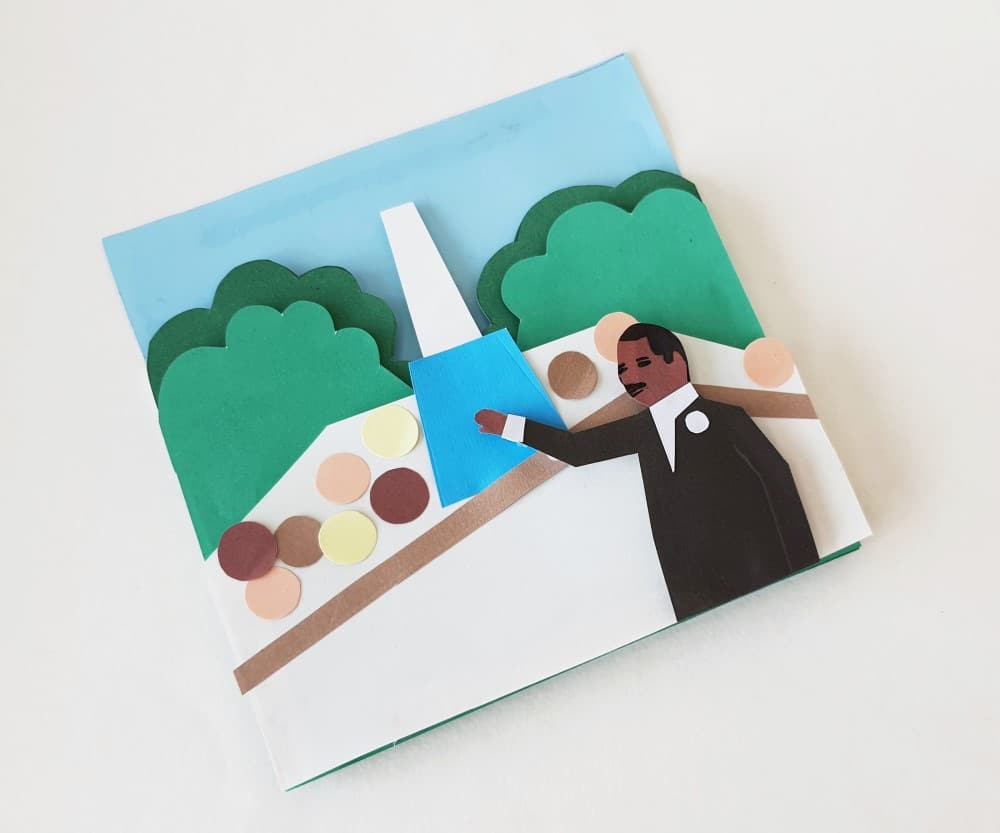
Cut out a small piece of craft foam and attach it to the base layer, right in the middle (1 cm above the 2nd layer). Apply glue to the top surface of the piece.
Step 7:
Glue the obelisk cutout on the 2nd layer and the attached small foam piece.

Step 8:
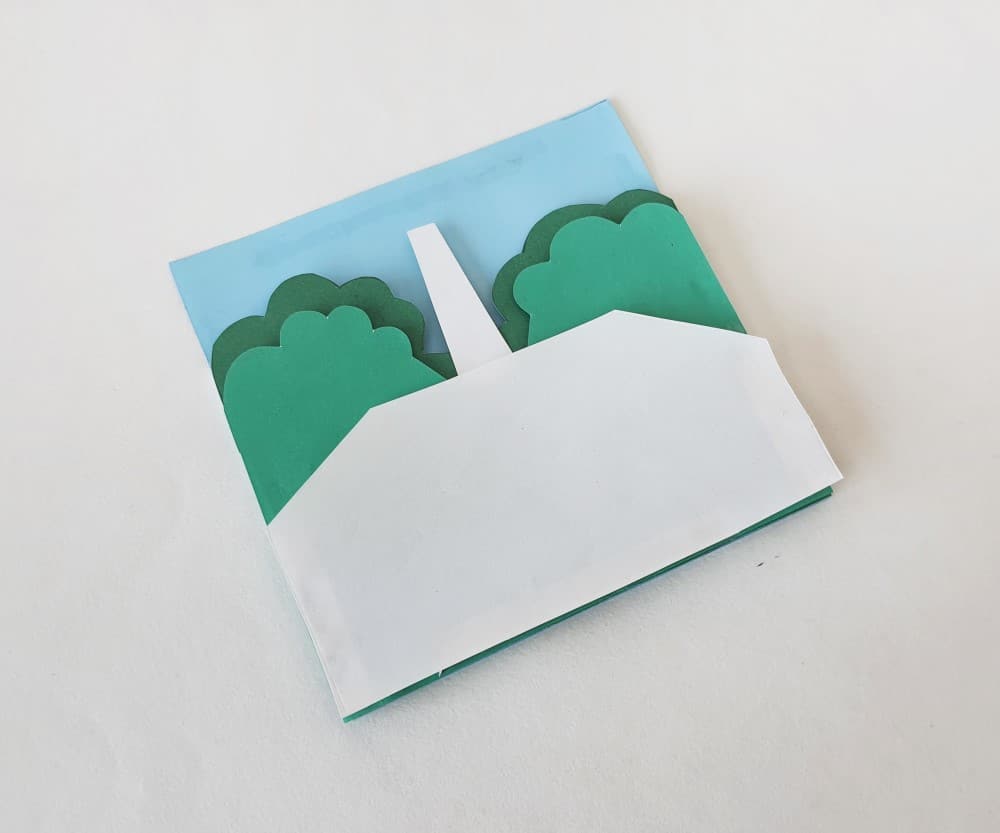
Cut four more craft foam strips and glue them on three sides of the 3rd layer, setting aside the fourth strip. Then attach the 4th layer on the three sides.
Step 9:
Glue a small piece of craft foam in the middle of the 3rd layer, slightly pointed out of the 4th layer (as seen in the photo below).
Step 10:
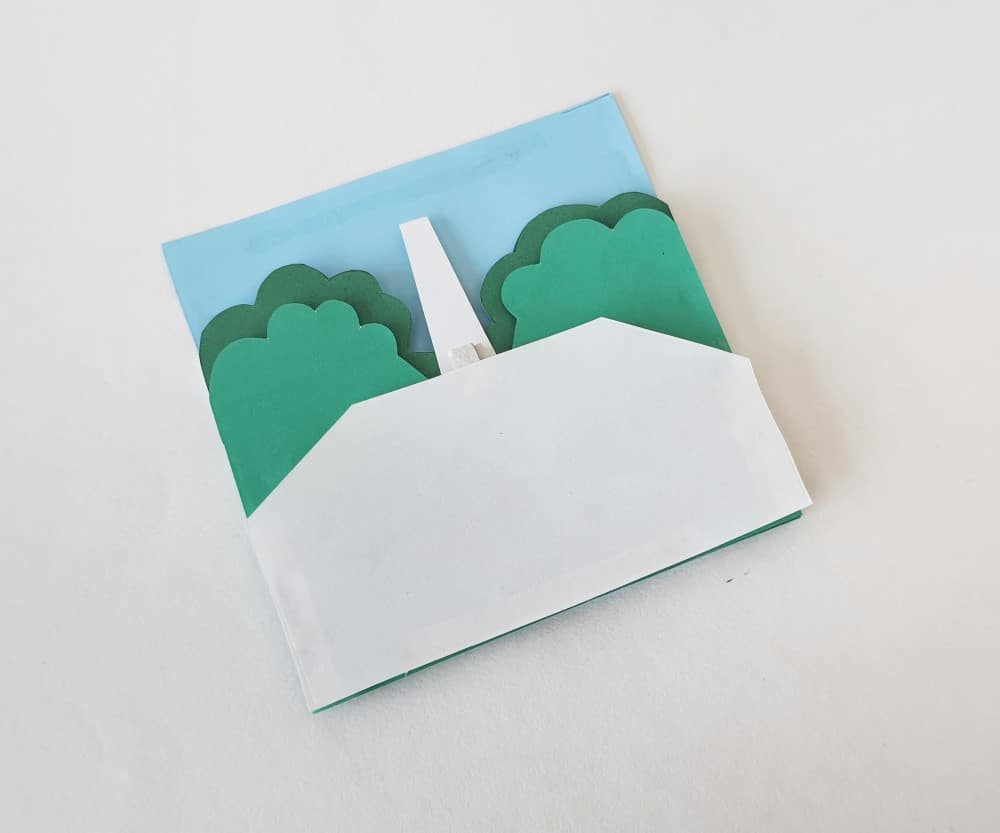
Attach the pool cutout on the 4th layer, right below the obelisk.
Step 11:
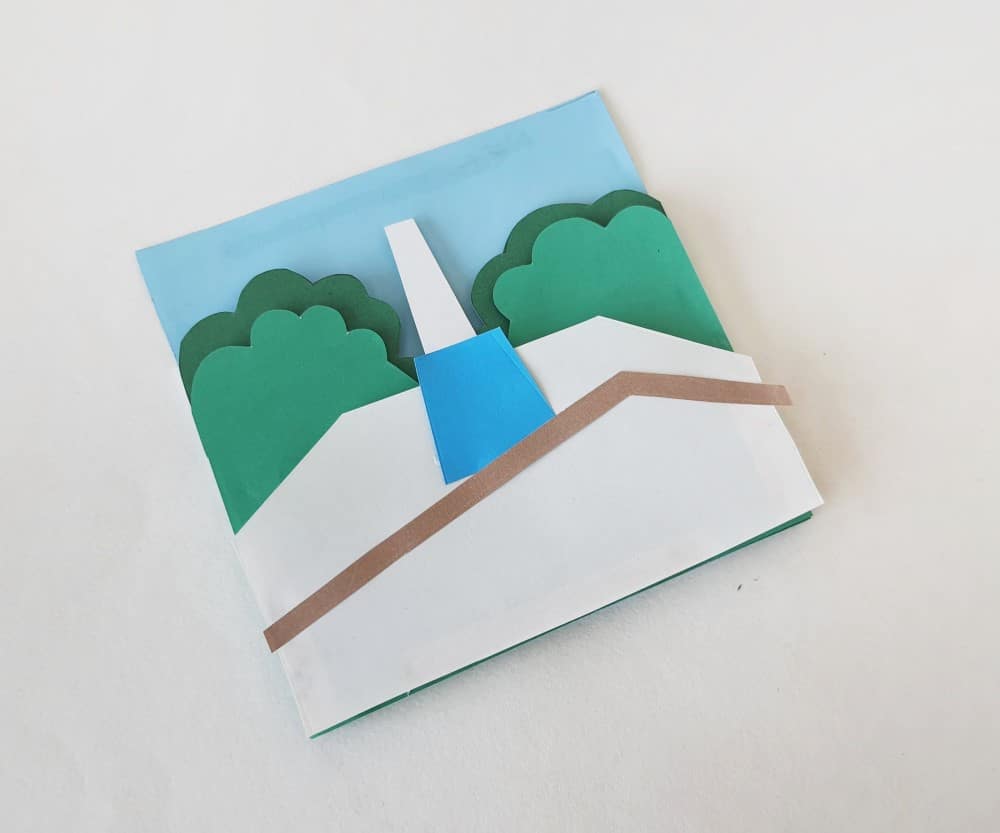
Attach the railing bar along the middle part of the 4th layer, below the pool cutout.
Step 12:
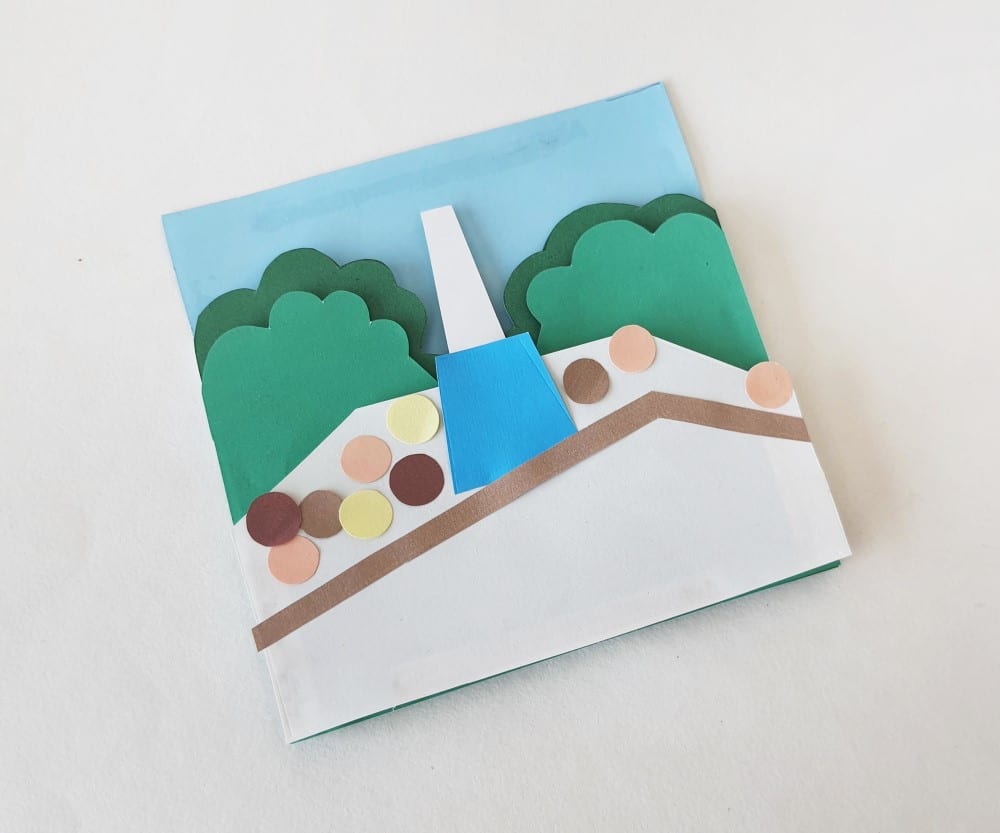
Attach the small round cutouts (they represent people) on the 4th layer, above the railing bar.
Step 13:
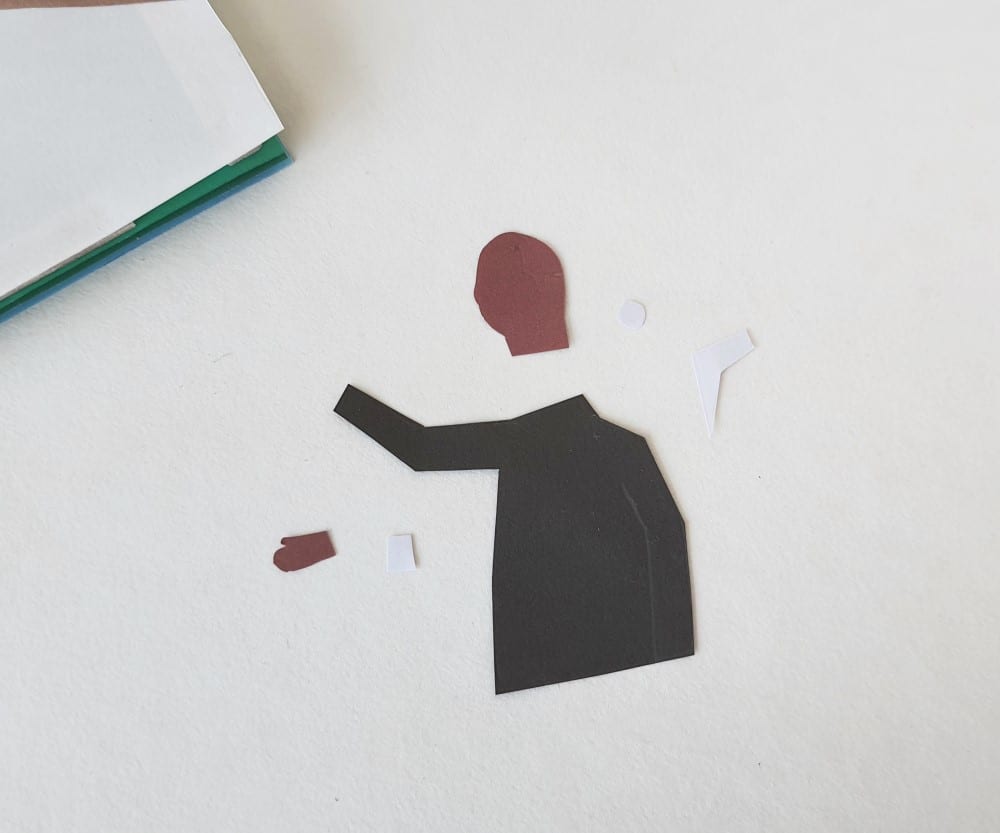
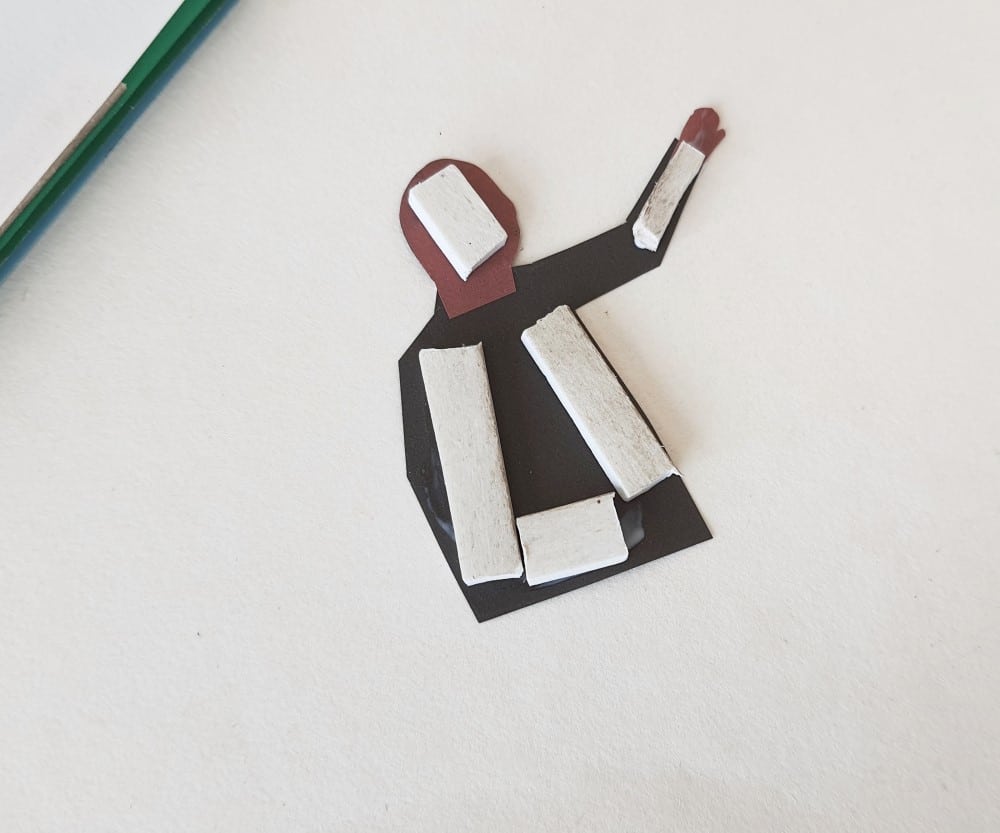
Trace and cut out the patterns for the Martin Luther King figure.
Step 14:
Attach the pattern cutouts with glue to make your Martin Luther King craft figure.

Step 15:
Use a sharpie to add small details to the face and hair. Cut out small pieces of craft foam to attach to the backside of the figure.
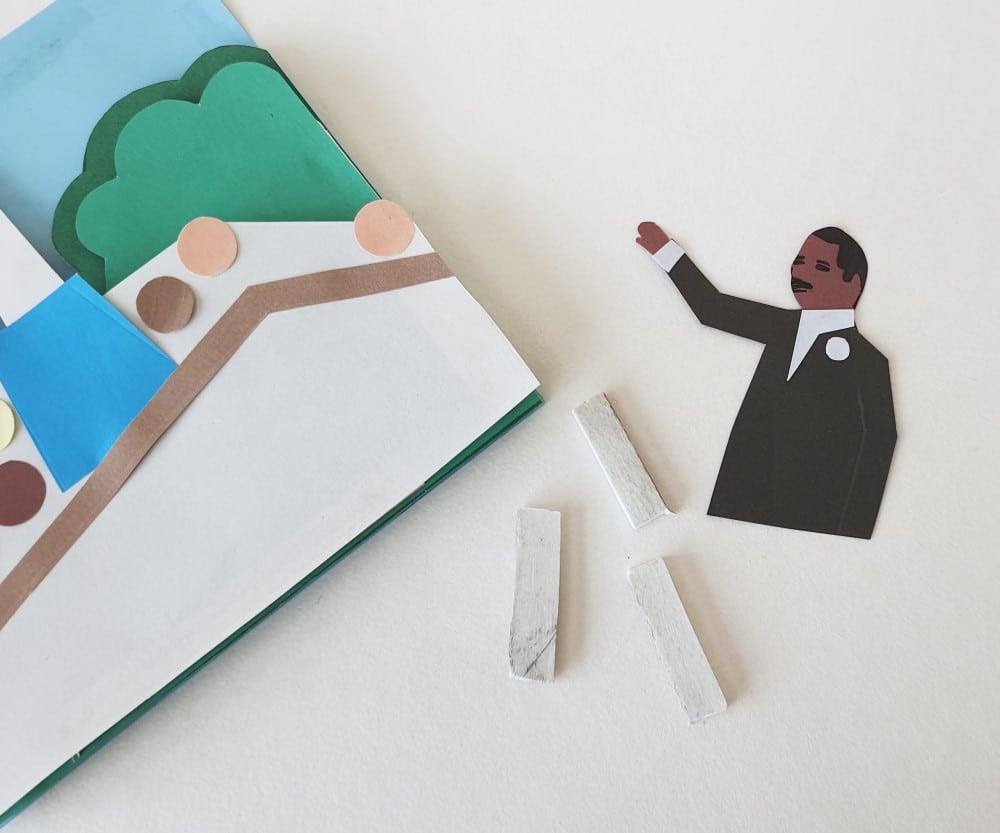
Step 16:
Attach the small foam pieces on the backside of the Martin Luther King craft figure, so that the figure is lifted up from the 4th layer.
Step 17:
Attach the figure onto the right side of the 4th layer, at the base.
Step 18:
Trace and cut out strips for the railing and border for the art piece.
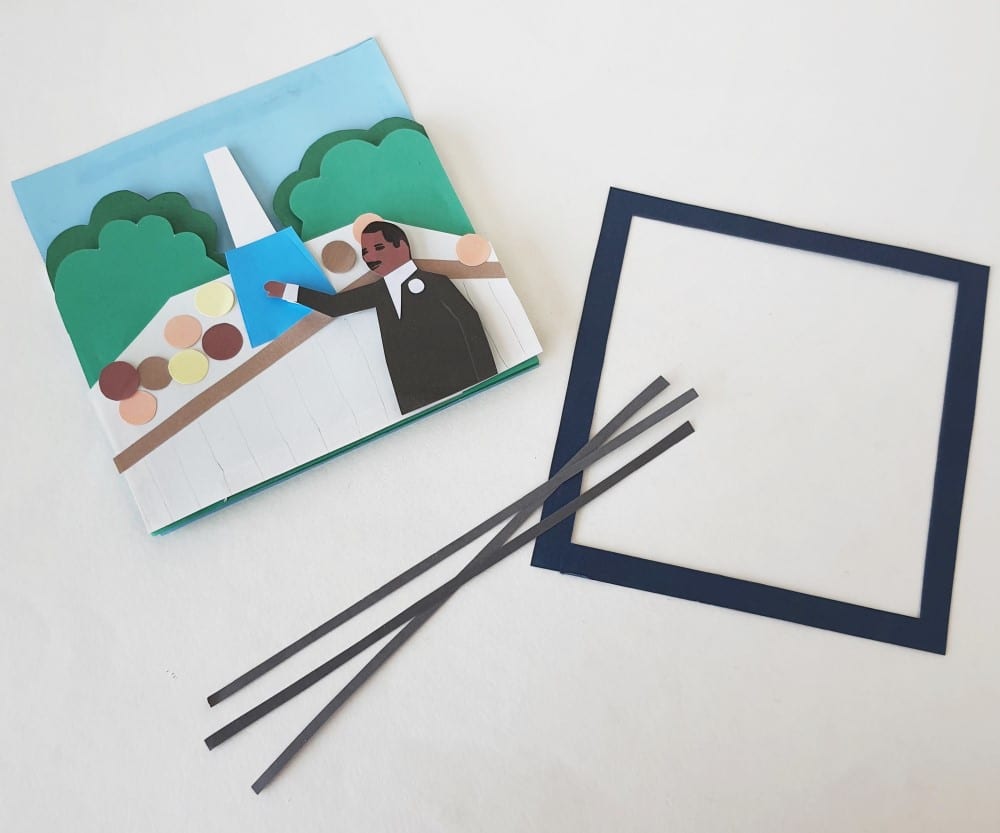
Step 19:
Attach another layer of foam strips on all sides of the 4th layer. (You will need to add 4 layers of strips along the top side of the base because the previous layers didn’t require the top strip.)
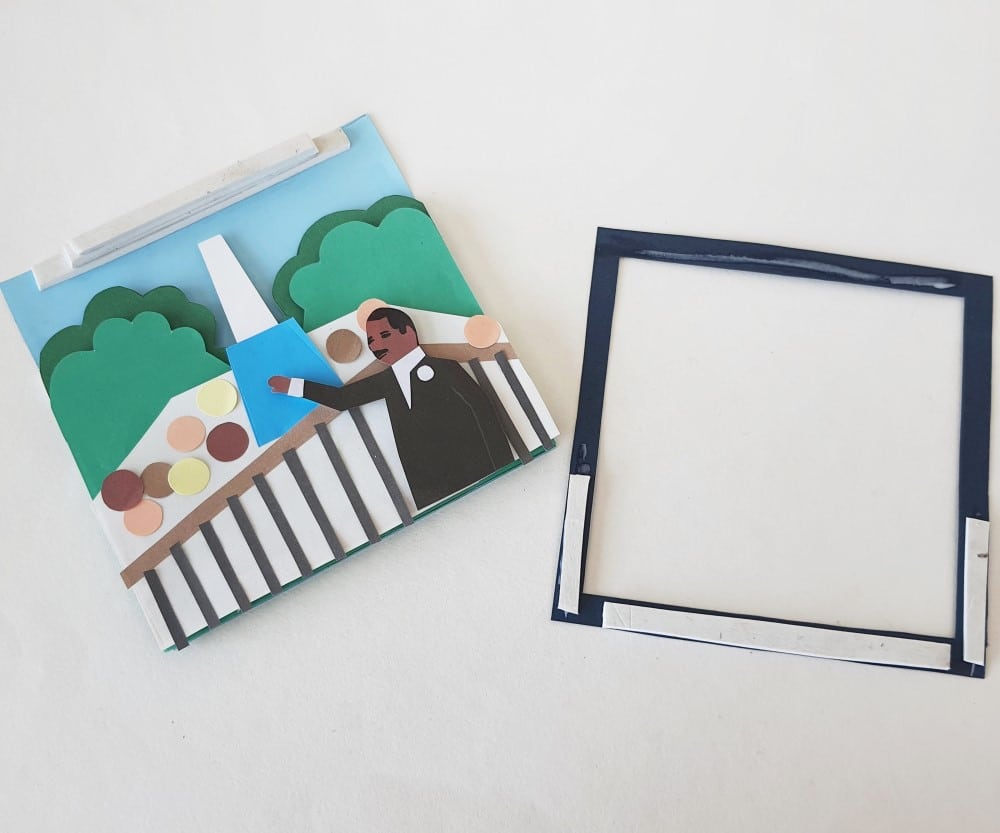
Step 20:
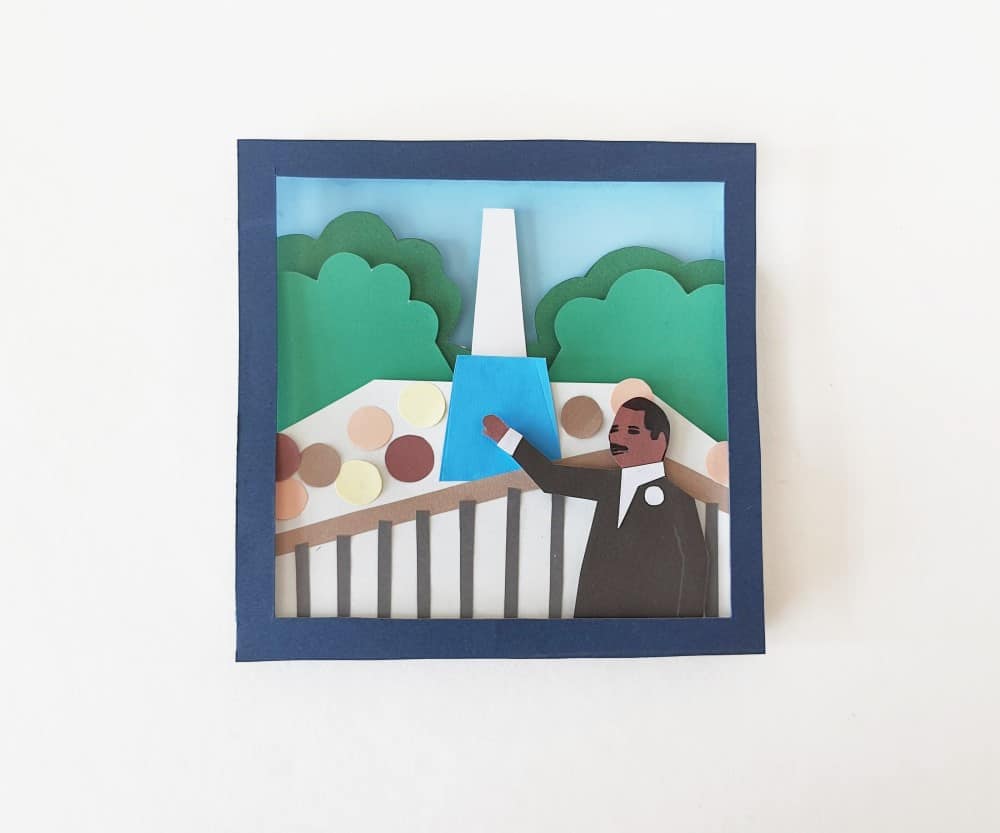
Attach the border to complete the 3D Dr. Martin Luther King craft.
Download the Dr. Martin Luther King Jr. Activities

Learn More about Dr. Martin Luther King Jr.
Dr. Martin Luther King Jr. Day is a day we honor the man and the legacy of Dr. King. He made it legal for each of us to expect — regardless of skin color, gender, ethnicity, or economic means — to be treated fairly, with dignity and respect. Consider doing Community Service in Honor of Dr. Martin Luther King Jr. Day. You can also read these 80+ Facts about Dr. Martin Luther King Jr.