Fun, Floral Rainbow Macrame Craft
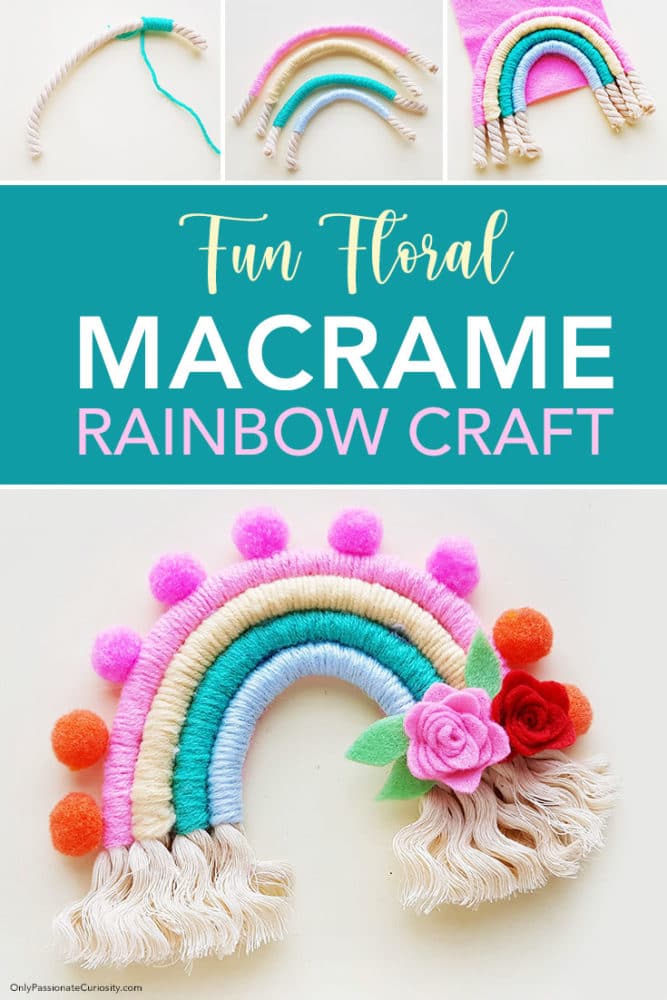
I’ve always loved the look of macramé. It’s got a rustic, intricate quality that is totally unique! While it’s never been out of style, macramé crafting seem trendier than ever right now. So why not make your own? It’s not as difficult as you might think, and can be a great craft to do with your kids, too! This macramé craft is perfect for spring, featuring a cheerful rainbow-and-flowers design. (And if you’re a dad, teen, or kid who is reading this—these also make Mother’s Day gifts!)

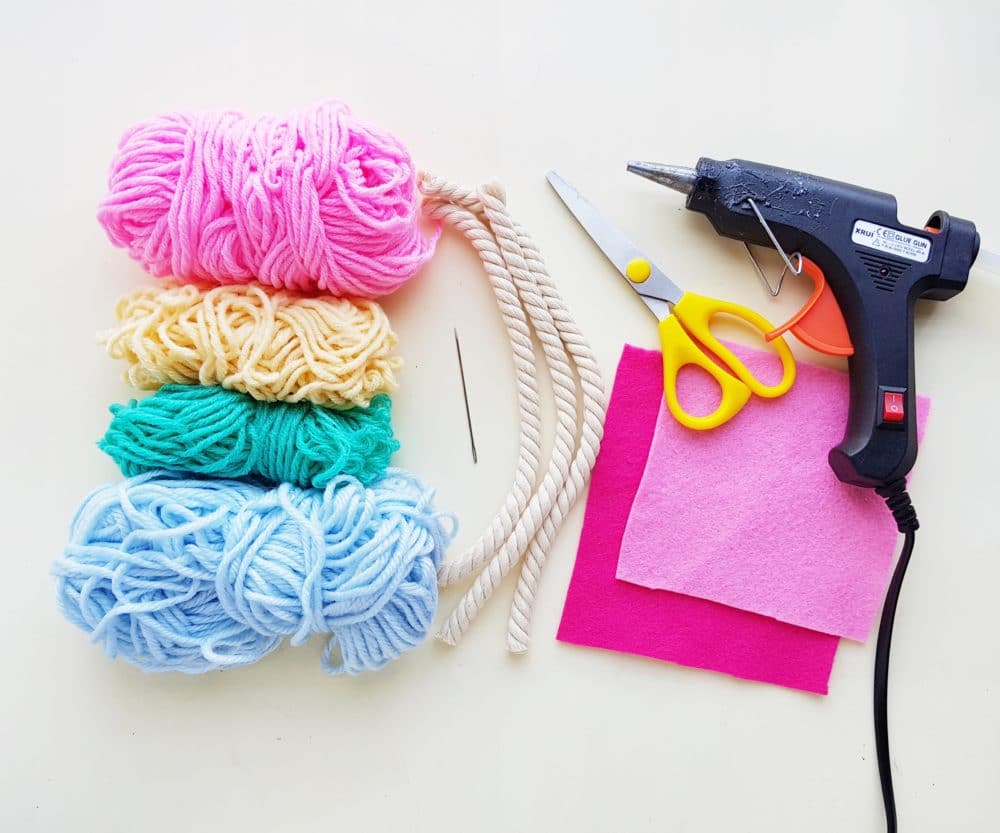
What You’ll Need:
1. Natural Twisted Rope
2. Colorful yarn
3. Tapestry needle
4. Felt
5. Hot glue gun
6. Scissors
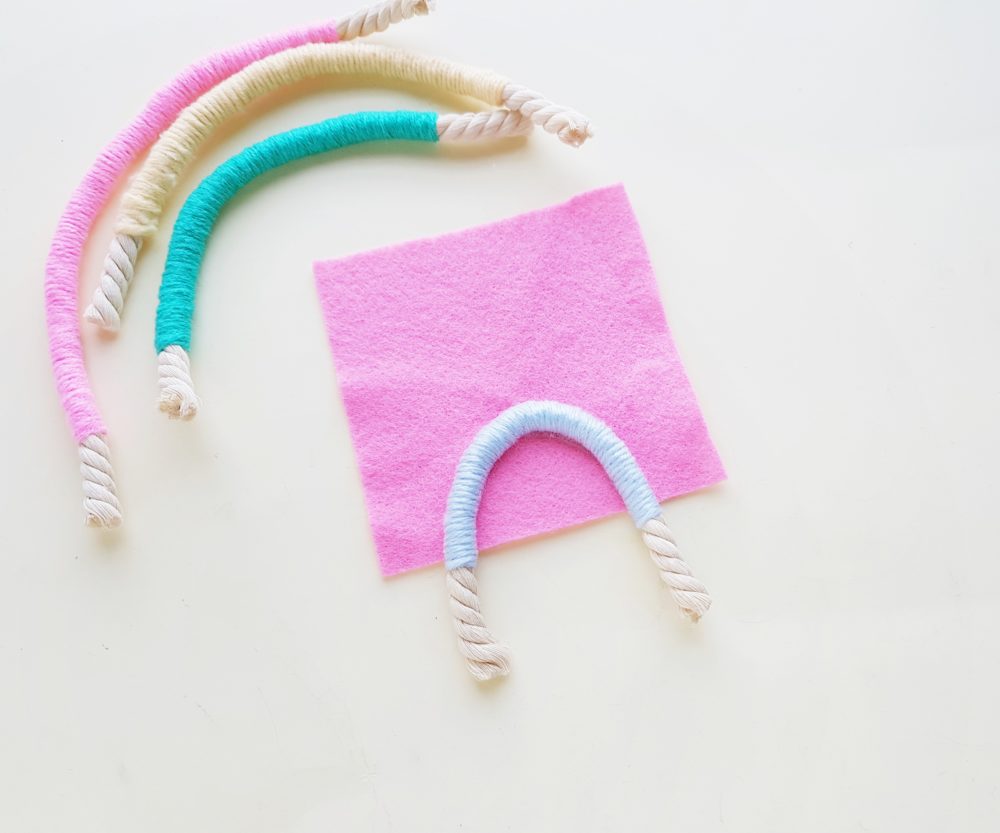
 To get started on your Macramé Rainbow Craft, you’ll determine how many layers you want for your macramé rainbow. We chose to do four. Cut the ropes accordingly. It can help to cut the largest rope first and arrange it into a arch shape, using that to measure each subsequent rope. Each will probably need to be just a little bit shorter than the last. When you’re done, place the rope cutouts on a flat surface forming a rainbow pattern. Cut both ends of each rope evenly.
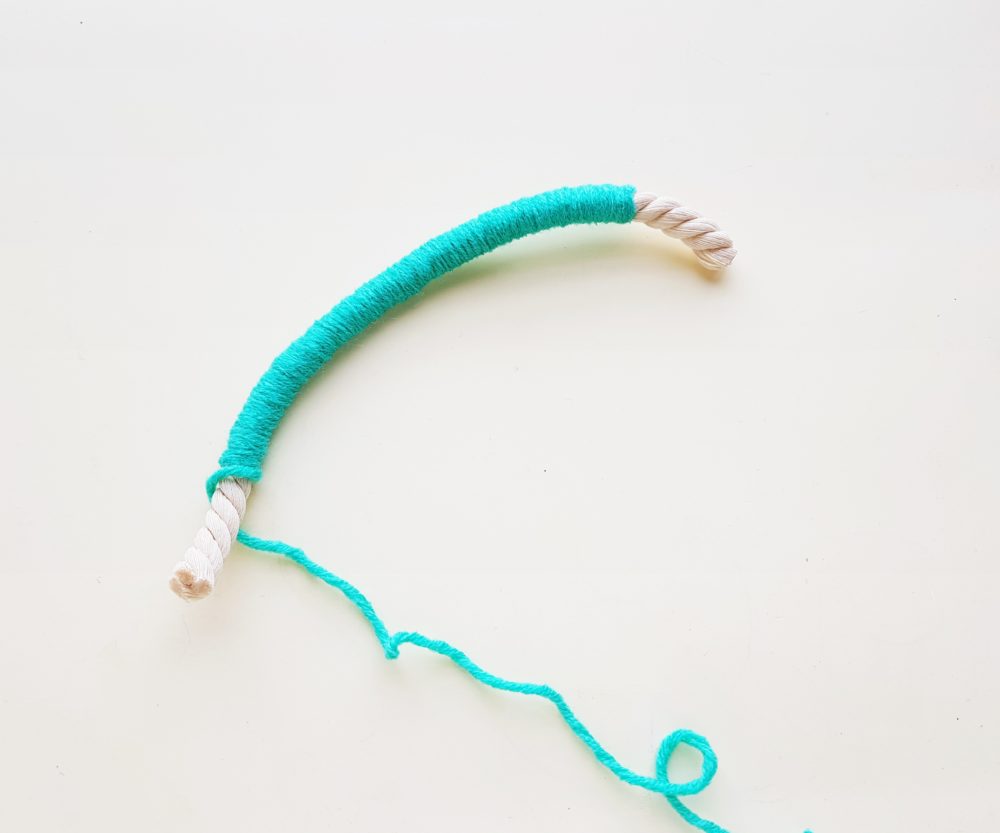
 Pull the the short, “tail” end of the of the yarn up against the rope and wrap the yarn around the rope, over and over. Make sure that the wrapping is nice, firm and even. Your wrapping should also go around, and conceal, the tail end of your yarn knot. (Check out the picture below to see what this looks like!)
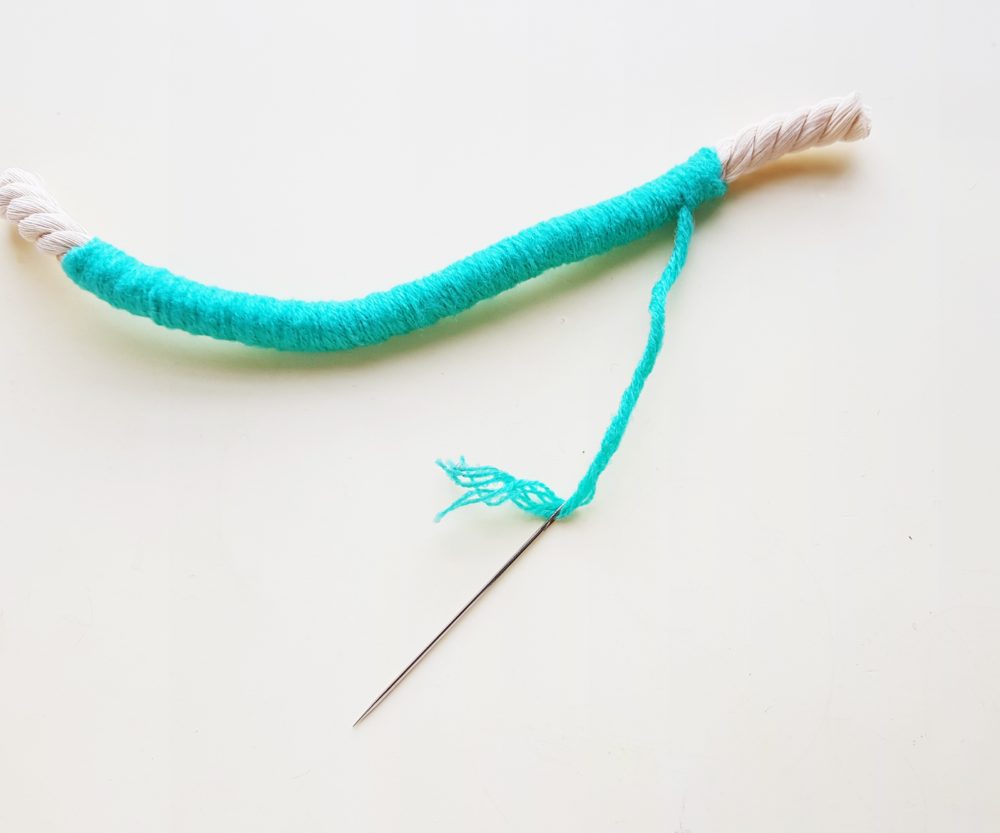
 When you’re all done wrapping, it’s time to grab the needle and thread. Keeping about 2-3 inches of slack, cut off the yarn you’ve been working with from the bundle. Then insert the end piece of the yarn through a tapestry needle (as shown below) and draw the needle through the wrapped yarn. Pull it out again and then cut off the remaining yarn. This will ensure that your yarn stays in place and has a nice, clean look!
 Now that you’ve done all of this once, repeat the same process for each piece of rope! Be sure to use nice, bright, contrasting colors for your rainbow! Also, don’t forget that you want to leave an inch on each side of each rope exposed. If you come from a large family and are making this rainbow macramé craft for Mother’s Day, you could even choose a color to represent each member of your family to make it extra special for mom.

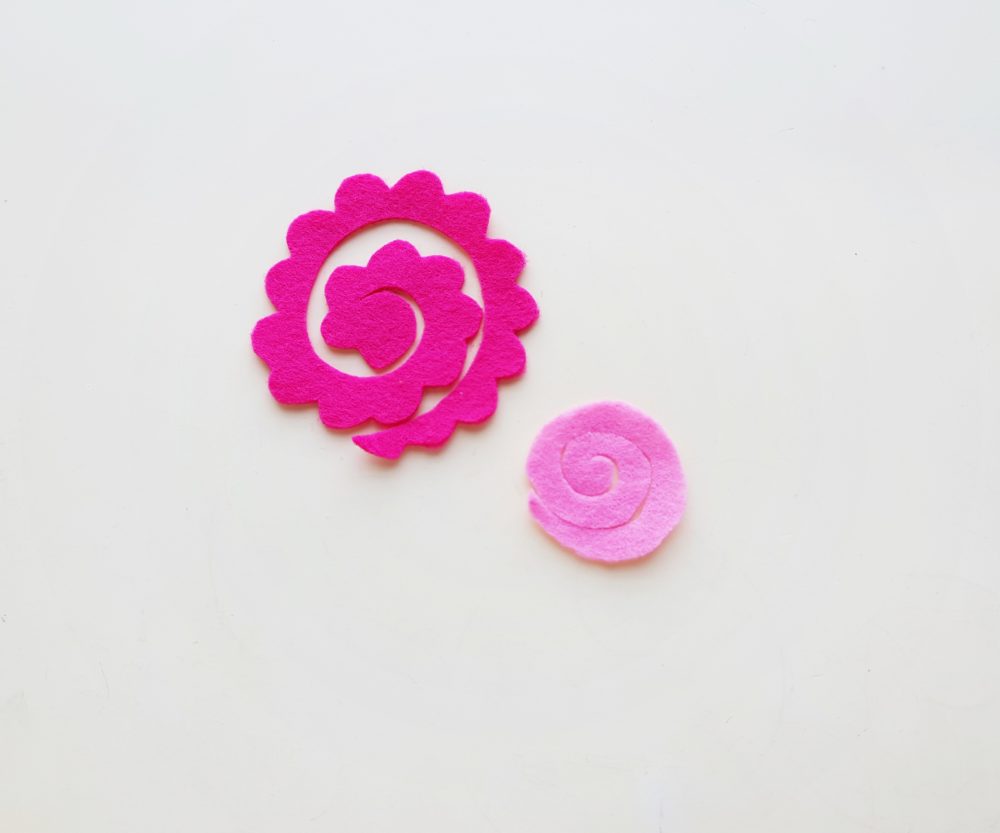
Now that your rope pieces are finished, it’s time to make some extra decorations for your rainbow that will give it a fun, fancy and personal touch. Felt is perfect for making unique, decorative items, and we’re using it in this craft to make some fun, felt florals! Felt flowers are so easy to make and they look beautiful when finished! All you have to do is simply cut out spiral patterns, such as the ones shown below. You can do some spirals with scalloped edges and some without.
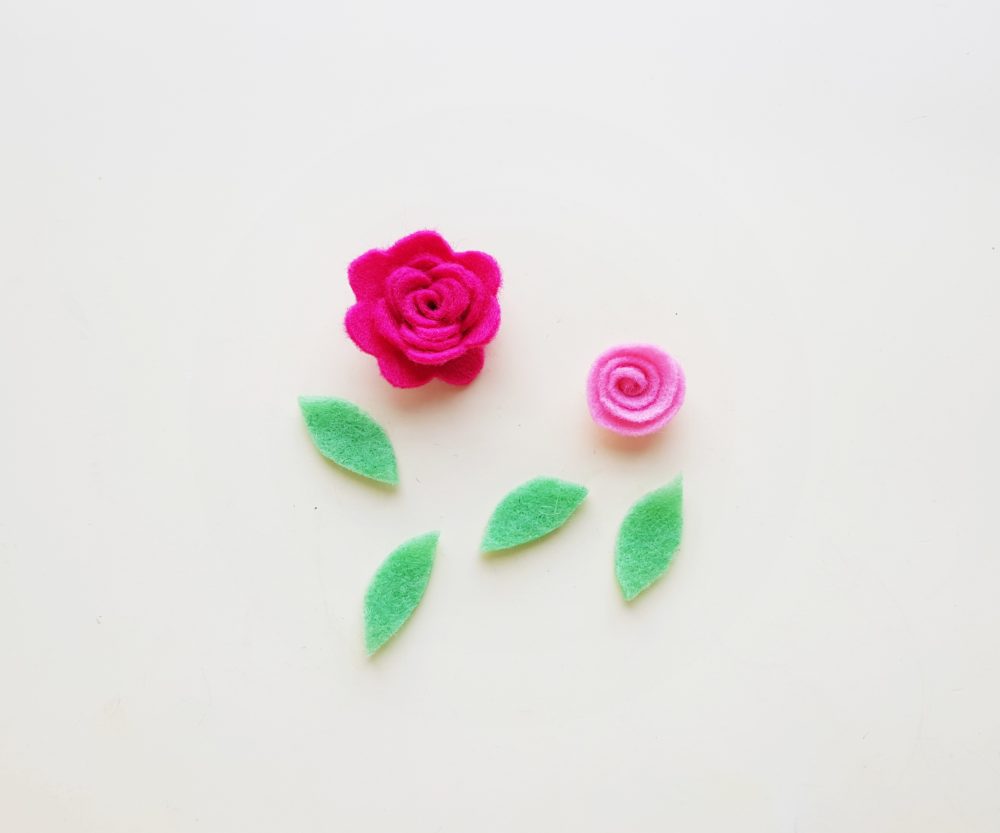
 Then all you have to do is roll them up, burrito-style, into beautiful little flowers. Apply some hot glue so that they stay that way. You may also want to cut out some little green leaves to go with your flowers.
 When you’re happy with your decorative items, you’ll get ready to put it all together. Take a piece of felt (enough to cover the rainbow pattern which will be created with the ropes). First take the shortest, yarn-wrapped rope and arrange it into an arched shape on top of the felt. Use hot glue to secure it to the felt.
 One by one, arrange and glue each piece of colorful rope onto the felt into a rainbow shape. Make sure to place each one snugly against the last.
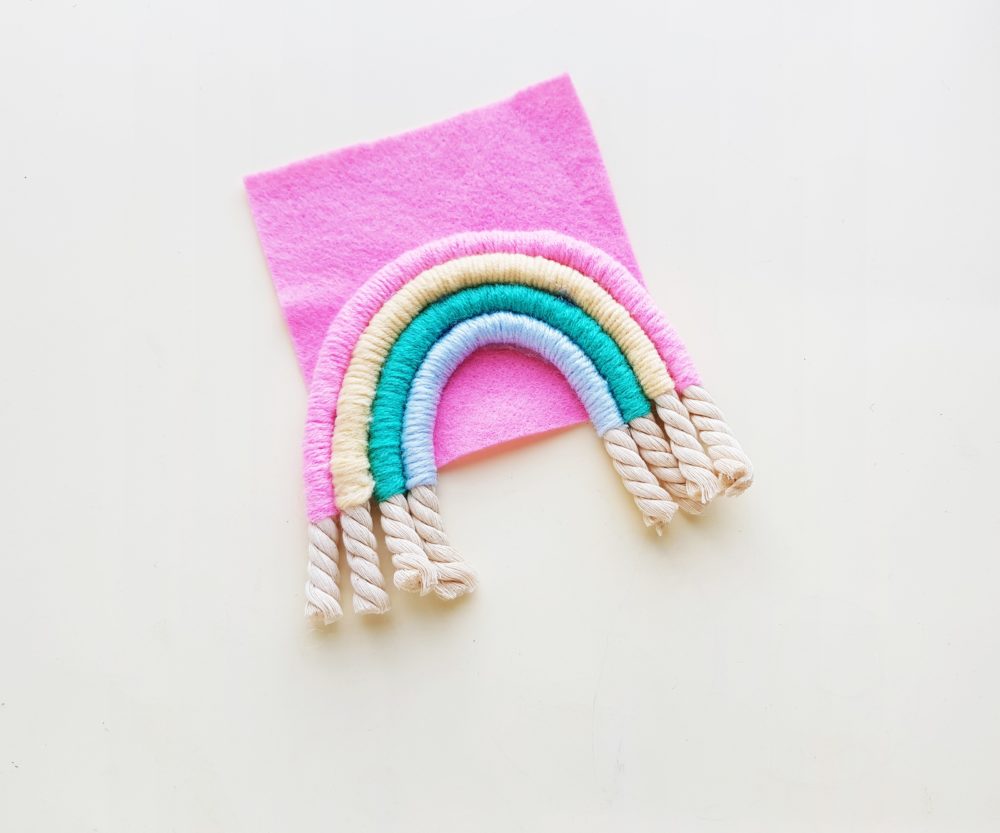 When your rainbow design is finished, and the glue has dried, cut it out. The felt should only be visible from the back.
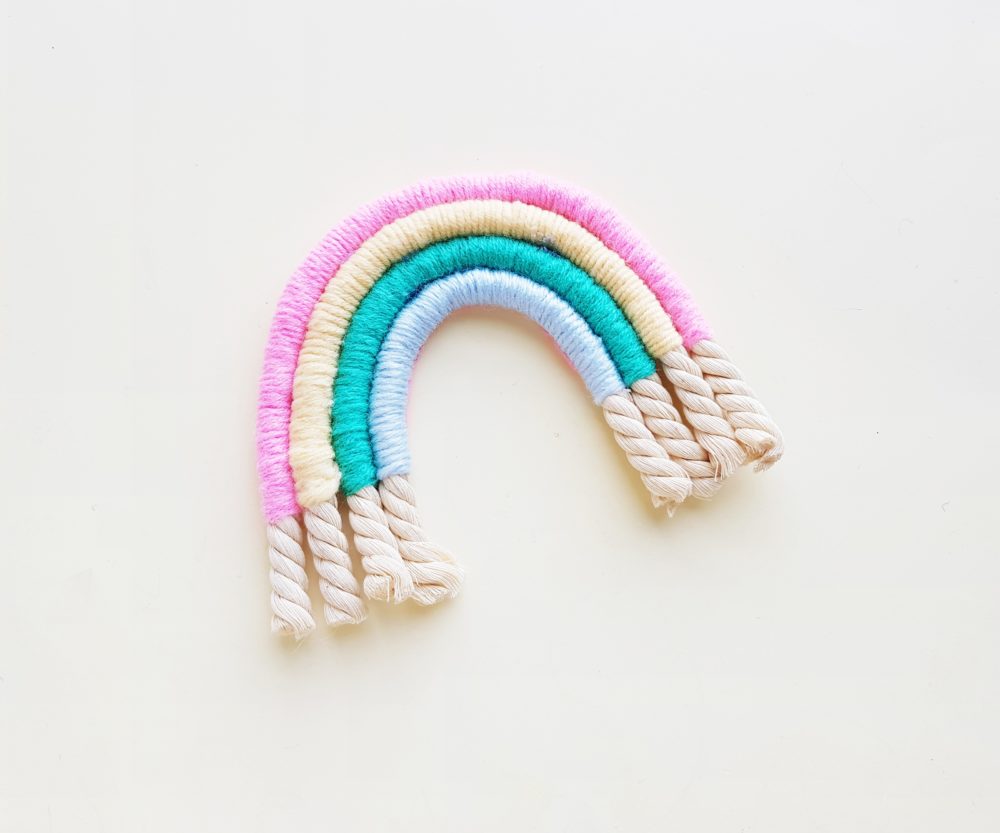 Now all that remains are the finishing touches! To give your craft that classic, macramé look, you’ll use sharp scissors to trim the felt along the open sides of the ropes, and then open/fray the twisted ends of the rope.
 While pom-poms are a personal choice, I think they also give this project a little something extra. If you like pom poms, too, attach them evenly along the top of your rainbow with a hot glue gun.
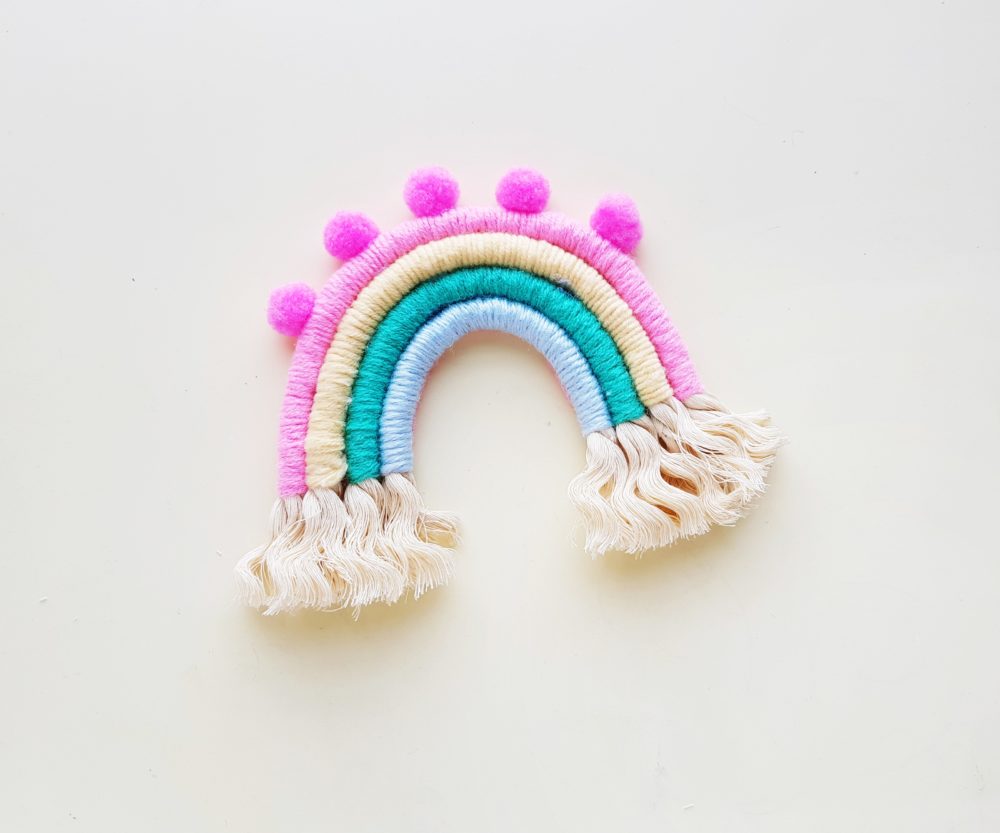 And lastly, glue on those adorable felt flowers you made!
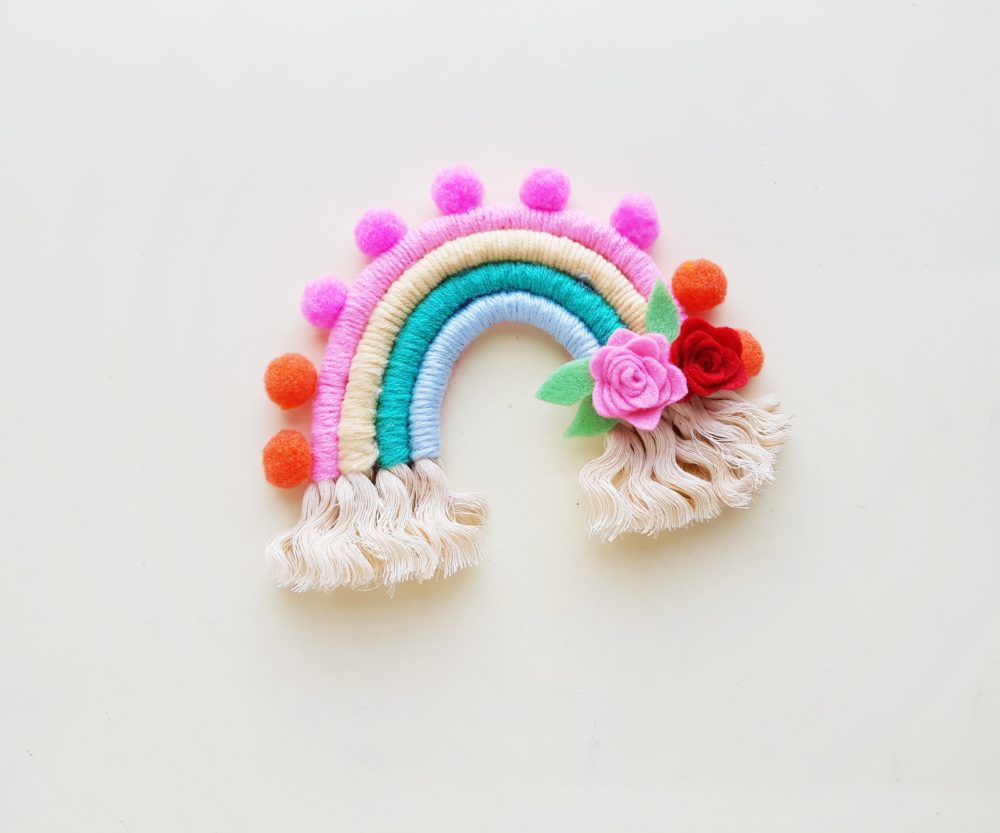
We hope this cheerful macramé craft brightens your day! If you are looking for a cool way to display this piece, you could attach some ribbon to it and use it as a wall-hanging, or glue on magnet strips and put it on the fridge. This fun, easy and happy-looking craft makes a perfect gift–for Mother’s Day or any special occasion!
Have you ever done any macramé art before? This easy craft is a great place to start. Let us know if you try it out at home!

Floral Rainbow Macramé Craft
Materials
- Natural Twisted Rope
- Colorful yarn
- Tapestry needle
- Felt in your choice of colors
- Hot glue gun
- Scissors
Instructions
- Determine the number of layers that you want for your macramé rainbow and cut ropes accordingly. Place the rope cutouts on a flat surface (forming a rainbow pattern) and cut their open ends evenly.
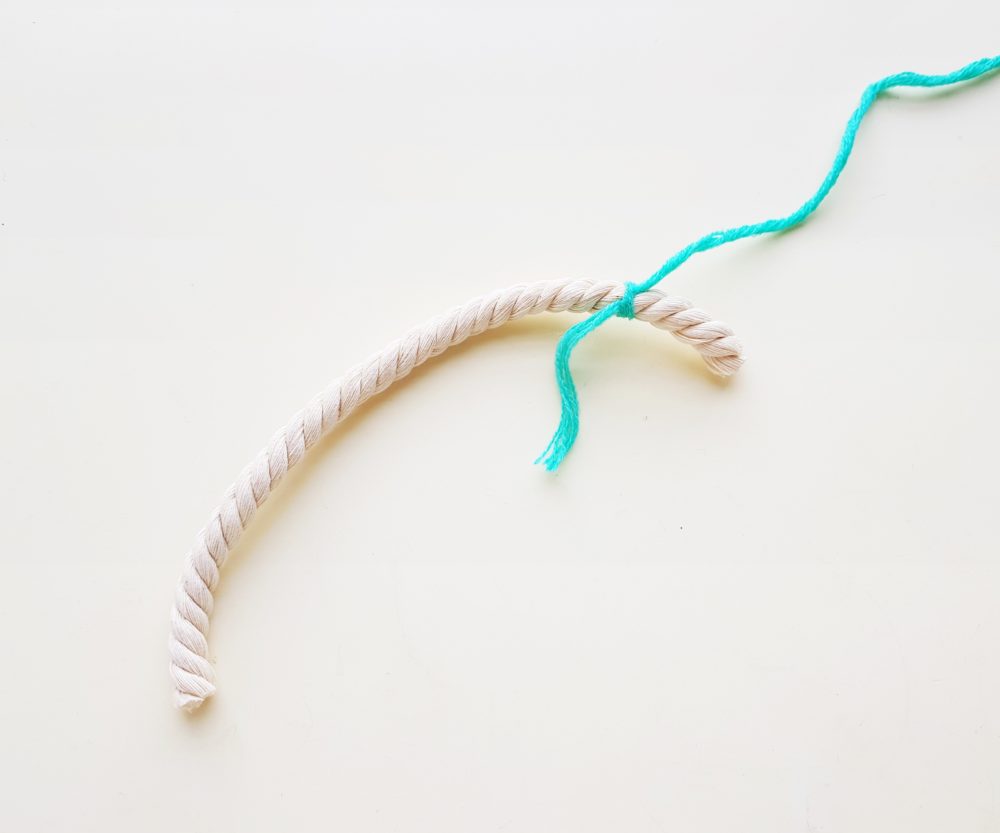
- Grab any one of the rope cutouts and a yarn (color of your choice). Leave an inch of the rope cutout from any one of its open ends and tie a knot with the yarn around the rope.
- Align the smaller end of the yarn with the rope towards the inner side and start to wrap the yarn around the rope, making sure that the wrapping is nice, firm and even. .
- Wrap the yarn all the way to the other side of the rope, but make sure to leave another inch on the open end of the rope.
- Keeping 2 or 3 inches of yarn on hand, cut off the rest of the yarn from the bundle. Insert a tapestry needle through the remaining yarn and draw the needle through the wrapped yarn (4 or 5 wraps will do) Pull it out again. Cut off the remaining yarn.
- Similarly, wrap the rest of the rope cutouts; making sure to leave an inch intact on the open ends of each piece of rope.
- Grab some colored felt fabric and trace spiral flower patterns on them. Cut out the traced patterns. If you need a template for a spiral flower pattern, there are several free patterns available online.
- Grab a spiral felt cutout and roll it from its outer end towards the center. Apply hot glue on the center and press the rolled part against it to secure the flower pattern. Cut out small leaf patterns from green colored felt fabrics.
- Take a piece of felt (enough to cover the rainbow pattern which will be created with the ropes). Use hot glue to attach the shortest yarn wrapped rope on the bottom side of the felt. Place the rope by forming a curve shape.
- One by one, glue the rest of the ropes into the same curved pattern.
- Use sharp scissors to trim the felt along the open sides of the ropes.
- Open the twisted ends of the ropes.
- To give the macramé rainbow an even cuter look, attach pompoms along the top side.
- Attach the felt flowers on either open sides of the macramé rainbow to complete the craft.